
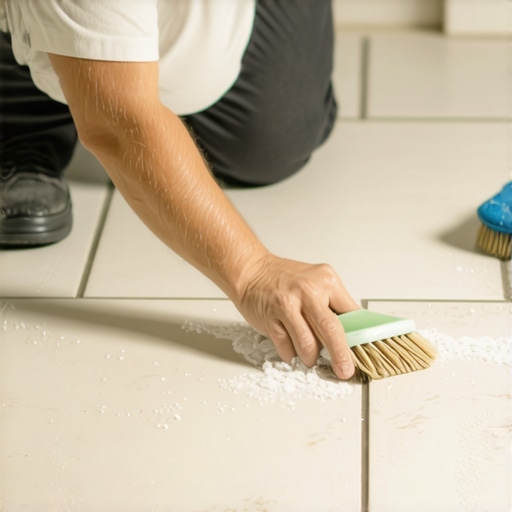
I remember the exact moment I realized that dried thinset in my tile spacers had transformed my DIY project into a frustrating nightmare. It was late in the evening, and I was eager to see my new floor gleam. But as I removed the spacers, I spotted crusty, hardened thinset cement—stuck stubbornly inside the spacers, making the whole job look amateurish. That lightbulb moment sparked my quest to find solutions that would save me hours of scrubbing and risk damaging my tiles.
Why Getting Thinset Out Fast Matters More Than You Think
When you’re installing tiles, the last thing you want is to spend extra time battling dried thinset. Not only does it ruin the sleek look, but it can also compromise the adhesion, leading to future cracks or tiles lifting. Plus, if you don’t clean the spacers promptly, the hardened material becomes almost impossible to remove without scratching your tiles or damaging the grout lines.
What’s more, professionals know that quick action can prevent long-term headaches. Dried thinset tends to set into the smallest crevices, and if left unchecked, it can cause uneven tile surfaces—something that’s annoying to fix later and can be costly. According to flooring specialists, removing residual thinset immediately after installation keeps your surface smooth and reduces the need for rework, saving both time and money.
But here’s the kicker: I made the mistake early on of trying to scrub it with just a cloth, which was a total waste of effort. That’s when I discovered that patience combined with the right tools makes all the difference. I’ll walk you through my proven methods to get dried thinset out of tile spacers quickly and effectively—so your project remains pristine.
Are you currently struggling with stubborn thinset residue and wondering if there’s an easier way? Stay tuned because I’m about to share some tips that will transform your tile work from sloppy to stunning in no time. And if you want to see how mastering floor leveling can create a flawless foundation for your tiles, check out this comprehensive guide on [precise floor leveling techniques](https://tiletrendshop.com/precise-floor-leveling-techniques-to-achieve-flawless-surfaces). Now, let’s dive into the solutions you’ve been waiting for.
Brace Yourself Before Scraping
Start by gathering your tools: a plastic putty knife, a stiff-bristled brush, a bucket of warm water, and a cleaning cloth. I remember when I tackled this for the first time; I was impatient and used a metal scraper, which scratched the tiles. Since then, I’ve learned that patience and proper tools are key—think of it like working with glass versus metal; gentler methods preserve your surface.
Soften the Thinset with Water and Heat
Apply warm water to the affected areas using a sponge or spray bottle, letting it sit for 10-15 minutes. For stubborn spots, use a hairdryer set to low heat to gently warm the thinset, making it more pliable. During my initial attempts, I rushed this step, causing more work later. Remember, like softening hardened glue, heat and moisture work together to loosen the bond without damage.
Careful Scraping and Brushing
Once the thinset appears more relaxed and slightly loosened, gently scrape it off with a plastic putty knife—avoid metal tools to prevent scratching. Follow up with a stiff-bristled brush dipped in warm water to scrub away residual bits. I once used a toothbrush for tight spots, which worked wonders and saved me from damaging the tile edges. Think of it like scrubbing a stubborn stain—you need the right brush and patience.
Use Vinegar or Commercial Thinset Remover
If some residue persists, apply a solution of equal parts white vinegar and water or a commercial tile cleaner designed for thinset. Let it sit for 5-10 minutes to dissolve the hardened material. During my experience, I found that natural solutions are safer for your tiles and grout, while commercial products might be more effective but require rinsing thoroughly. Always test in an inconspicuous area first.
Rinse and Final Clean
After removing all visible thinset, rinse the spacers with clean water to flush out any remaining particles. Wipe the area with a damp cloth to remove smudges or leftover debris. This step ensures no abrasive residues remain that could interfere with joint sealing or future tile adhesion. Proper cleanup at this stage keeps your surface pristine and ready for the next steps in your installation.
Prevent Future Build-up with Fast Action
The best way to avoid stubborn dried thinset is to clean spacers and tools immediately after tile placement. Keep a damp sponge nearby to wipe off excess thinset on spacers before it hardens, saving time and effort later. Think of it as painting; quick touch-ups prevent bigger messes down the line. For more detailed strategies, check out this guide on floor leveling.
While mastering the basics of floor leveling, tile, and hardwood installation is crucial, many professionals and DIY enthusiasts overlook the subtleties that determine lasting quality. Let’s dig deeper into common myths, advanced pitfalls, and overlooked nuances that can make or break your project.
Why Conventional Wisdom About Floor Leveling Can Mislead You
Often, we rely on simple tools like a straightedge or a laser level, assuming that a flat surface guarantees a perfect finish. However, expert installers know that the underlying subfloor’s composition, moisture content, and structural integrity are equally vital. For example, using a moisture meter is a game-changer—studies show that unmanaged moisture variances can cause tile cracking and hardwood warping, even if the surface appears level (source: Flooring Institute of America). Don’t fall into the trap of measuring only the top layer; always assess the entire subfloor structure to prevent future issues.
Hardwood Floors: More Than Just Acclimation
Many believe that leaving wood planks to acclimate for a few days suffices, but the truth involves understanding the species’ moisture buffer capacity and the environment’s humidity levels. For instance, engineered hardwood tends to react differently than solid wood, requiring tailored acclimation procedures to prevent buckling or gaps. A common myth is that high-humidity environments are always bad; in reality, controlled moisture content is key—fail to do so, and you’ll invite cupping or separation over time. This nuance underscores the importance of environmental control during installation, a topic covered extensively in expert hardwood floor refinishing tips.
Tile Installation: The Pitfalls of Grout and Subfloor Interactions
An advanced mistake many make is neglecting the compatibility of the substrate with the tile adhesive, which can lead to cracks and tiles lifting. Even seasoned installers sometimes overlook the importance of proper substrate preparation, such as ensuring the subfloor’s stiffness and moisture barrier are appropriate. Additionally, the choice of grout—sanded vs. unsanded—should be informed by joint width and environmental exposure, a detail that can significantly impact longevity. Misjudging these factors causes problems a few months down the line, prompting unnecessary repairs. For detailed strategies, see tile installation tips that save time and money.
Beware of Common Misconceptions That Lead to Failure
Despite extensive knowledge, some installers assume that higher-quality materials automatically translate to better results. While material quality is important, preparation, environmental considerations, and technique are usually the deciding factors. For example, skipping the curing time for self-leveling compounds or rushing to install flooring before the adhesive has fully set can cause serious issues. Also, the myth that all leveling compounds are universal leads people astray—selecting a formula incompatible with your subfloor’s moisture or material type results in cracks and uneven surfaces. Remember, mastering these nuances isn’t optional if you want durable results.
Finally, How Can You Safeguard Your Projects?
Admittedly, these hidden complexities can be daunting. The key is continuous learning and meticulous preparation. Paying attention to details like environmental conditions, substrate compatibility, and material-specific requirements often differentiates professional results from amateur attempts. For an in-depth approach, consult expert flooring installation tips to ensure you’re covering all bases. Have you ever fallen into this trap? Let me know in the comments.Maintaining your flooring, whether it’s hardwood, tile, or other materials, is essential to preserve its beauty and functionality over the years. Investing in the right tools and adopting a consistent maintenance routine can significantly extend the lifespan of your floors. A high-quality vacuum with a soft brush attachment is my first recommendation—it’s gentle on surfaces yet effective at removing debris that can cause scratches or grout wear. For hardwood floors, I swear by a microfiber mop paired with eco-friendly cleaning solutions; this combo prevents buildup and keeps the finish shining without water spots. When dealing with stubborn stains or grime, I use a steam cleaner designed specifically for hard surfaces, but I avoid excessive use to prevent moisture damage—especially in hardwood or engineered floors. Regularly inspecting your flooring for signs of wear allows you to address issues early, saving costly repairs later. For tile and grout, I apply a penetrating sealer annually; it repels dirt and moisture, making cleaning easier and preventing staining. In a future where smart home technology becomes more integrated, I predict that floor sensors capable of detecting moisture or structural shifts will become standard, alerting homeowners before small problems escalate.
How do I maintain my flooring for long-term results?
Adopting a proactive approach with proper tools is key. For instance, routinely using a specialized floor buffer can help keep hardwood surfaces smooth and buff out minor scratches, reducing the need for complete refinishing. Additionally, employing a moisture meter before installing or sealing a new floor helps ensure ideal conditions—this practice can prevent the moisture-related issues that compromise long-term durability. Don’t underestimate the importance of a well-maintained subfloor; a dusty or uneven base will undermine your top layers over time. One advanced tip is to explore sealing products like the [Teflon Ceramic Sealer](https://tiletrendshop.com/5-eco-friendly-flooring-options-that-actually-stand-up-to-heavy-foot-traffic), which creates an invisible barrier that protects against spills and stains. Regular reapplication, based on wear and exposure, keeps your floors looking their best. Remember, even the best flooring treatments need routine maintenance—think of it like a fitness regime for your home surfaces. To simplify this process, consider investing in a multifunctional floor cleaning kit that combines vacuuming, damp mopping, and polish application. This reduces clutter and streamlines your upkeep. Don’t wait until you’re faced with deep stains or scratches to act. Start today by testing your hardwood’s finish with a simple water droplet test—if the water beads up, your sealant is still effective. If not, it’s time for a refresh. Try this advanced maintenance tip: regularly apply a polish compatible with your flooring material to revive the surface’s luster and add a layer of defense against everyday wear. For more comprehensive strategies, see hardwood floor care secrets. Keeping your floors in top shape requires dedication, but with these tools and tips, you’ll ensure your investment pays off for decades to come.
What I Wish I Knew About Floor Your Dreams Before I Started
One of the most powerful lessons I learned was that even the smallest oversight—like ignoring subfloor moisture—can turn a beautiful installation into a nightmare. I once rushed to lay hardwood over a slightly damp slab, only to see cupping appear months later. That experience taught me to always thoroughly assess and prepare before laying down new floors.
Another insight was how crucial patience is during the curing stages of leveling compounds. Waiting the full recommended time, rather than rushing to finish, saves so much hassle in the long run and preserves the integrity of your work. It’s a reminder that good results demand respect for the process, not shortcuts.
I’ve also realized that using the right tools—whether it’s a moisture meter or a high-quality trowel—makes all the difference. Cutting corners with cheap tools often leads to uneven surfaces and frustrations. Embracing quality and precision early on is an investment in your home’s future sturdiness and beauty.
Tools and Resources That Transformed My Approach
- Precision Leveling Systems: Investing in a good laser level and a proper subfloor assessment kit helped me avoid uneven surfaces. I trust these tools because they combine accuracy with ease of use, preventing costly mistakes.
- Expert-Recommended Books: “The Ultimate Guide to Floor Leveling” by seasoned pros has invaluable tips I return to repeatedly. It breaks down complex steps into actionable insights, saving me from common pitfalls.
- Trusted Suppliers and Brands: Sourcing quality materials, like high-grade self-leveling compounds and environmentally friendly sealers, makes a noticeable difference. I prefer brands recommended by flooring specialists because they stand the test of time.
- Online Communities: Forums and tutorials have been gold mines for troubleshooting unexpected issues. Connecting with experienced DIYers and professionals keeps me updated on best practices and innovative solutions.
Take the Leap: Elevate Your Flooring Skills Today
Now, it’s your turn to turn your flooring project into a success story. Embrace the lessons, leverage the right tools, and never underestimate the impact of patience and preparation. Every step you take towards mastering your craft adds value and pride in your home. Remember, with dedication and a learning mindset, perfect floors are within your reach. Are you ready to start transforming your space with confidence? Share your questions or experiences below—I’d love to hear your journey or guide you further on this path to flawless flooring.