
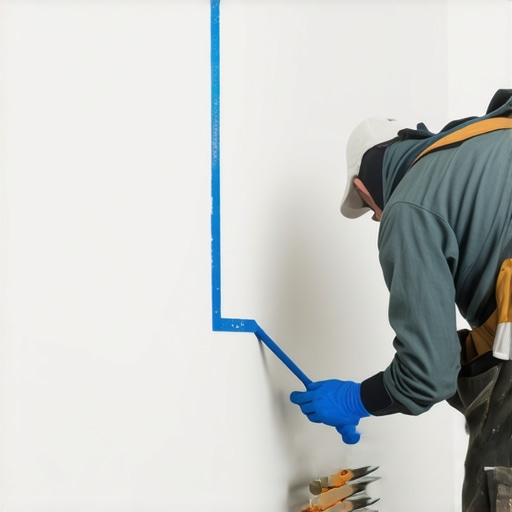
I remember the moment vividly. I had just finished installing new hardwood floors in my living room, and all I wanted was that perfect, clean line where the baseboard met the floor. Instead, I ended up with uneven, messy caulking that looked like a toddler had done it. Frustration set in, but then I discovered a simple painter’s tape trick that transformed my finishing game. It wasn’t just a small hack—it was a game-changer that saved me hours of sanding and re-caulking.
The Secret to Perfect Caulk Lines: Painter’s Tape Like a Pro
If you’ve ever struggled with getting that crisp, professional-looking caulk line, you’re not alone. Many DIYers and even seasoned pros face this challenge. The problem isn’t the caulk itself; it’s often about the application process and how we control the line. Before I found this hack, I’d try to freehand it, resulting in uneven edges, gaps, or excess caulk bleeding onto the baseboard or floor. My breakthrough came when I realized I needed a simple, clean way to guide the caulk and protect adjacent surfaces.
Every time I see a home improvement enthusiast express doubt about the effectiveness of basic tools, I think back to my early mistakes. I once thought that more caulk meant a better seal—that was a rookie error. Proper application, combined with tiny tricks like painter’s tape, made all the difference.
Is This Painter’s Tape Hack Really Worth the Hype?
Initially, I was skeptical. It seemed too simple. Would a strip of painter’s tape really make my caulking line look professional? The answer was a resounding yes. This method ensures a straight, crisp edge, minimizes cleanup, and saves so much time. It’s a technique I now recommend to friends and clients alike. Want to see how it works? Keep reading, and I’ll walk you through the steps to master this simple trick that can elevate your entire finishing process. Curious if you’ve faced this problem yourself? Trust me—it’s one of those small fixes that yields big results. For more advanced tips on floor finishing, check out this guide on floor leveling.
Prepare the Subfloor with Precision
Start by thoroughly cleaning the subfloor, removing any dust, debris, or loose materials; use a vacuum to ensure a dust-free surface, which is critical for proper adhesion of leveling compounds. Next, check for moisture issues using a moisture meter, especially in basement areas or near large windows, as excessive moisture can compromise the entire flooring install. Address any dampness or leaks before proceeding to avoid future problems. Once dry, inspect the surface for dips, humps, and uneven spots, visualizing it as a landscape that needs smoothing for a perfect foundation.
Identify and Mark Low Spots
Use a long straightedge or a 4-foot level to scan the entire floor, marking areas that are below the general surface level. Think of it as mapping the terrain in preparation for leveling; marking these spots helps prioritize the areas requiring additional attention. For larger dips, consider marking the deepest points to focus your efforts. Remember, addressing high spots first with grinding or grinding tools ensures a flat baseline, just like leveling a hiking trail before filling in the low valleys.
Mix and Apply Floor Leveler Correctly
Mix your self-leveling compound according to manufacturer instructions, paying close attention to the specified water-to-powder ratio, which influences the workability and curing of the mix. Use a drill with a paddle attachment to achieve a smooth, lump-free consistency—think of it as creating a perfect pancake batter. Pour the mixture into the lowest sections of the floor first rather than spreading it randomly; this ensures self-leveling properties work efficiently. When pouring, start at the highest point of the lowest dip, allowing the compound to flow naturally into the low spots. Use a trowel or smoothing tool to help guide the compound into tricky corners, but avoid overworking it to prevent introducing air bubbles or causing the compound to set unevenly.
Spread and Level with Trowels and Smoothing Tools
As the compound flows into low areas, guide it with a long trowel or squeegee, working from the center outward to fill all dips uniformly. Visualize this process as smoothing out wrinkles on a bed sheet—smooth and continuous motions help achieve an even surface. For larger or more complex floors, a leveling pin or laser level can serve as an aid, ensuring the compound is perfectly flat. Remember, patience is key; allow the compound to self-level for a few minutes before final smoothing to prevent trap air and ensure an even surface.
Shim and Support Large Floor Irregularities
For significant humps or uneven areas that cannot be corrected with leveling compounds alone, use shims or wedges beneath the subfloor before applying leveling products. This method is like building a foundation for a bookshelf—correct support prevents future sagging or uneven wear. Secure the shims firmly to prevent shifting during the curing process. Once the surface is flat and level, you can proceed confidently, knowing your underlying structure is stable, which makes the subsequent installation of hardwood or tile much smoother and more durable. If you’re unsure about the extent of leveling needed, consult expert tips at this comprehensive guide for ideal results.Many homeowners and even professional contractors often buy into myths about floor leveling and installation that can lead to costly mistakes. For example, one widespread misconception is that using too much leveling compound guarantees a perfectly flat surface, but in reality, excess product can cause cracks and warping over time, especially if the right type of primer isn’t used beforehand. To ensure long-lasting results, proper surface preparation is essential; this includes thorough cleaning and moisture testing, which many overlook.
Another trap is believing that hardwood floors are simply a matter of laying boards evenly. In fact, advanced skills like acclimating wood to the environment and understanding species-specific behavior—such as how bamboo reacts in humid basements—are critical. Installing too quickly without accounting for these nuances increases the risk of gaps, buckling, or even cupping. For detailed tips on avoiding these pitfalls, check out expert hardwood refinishing strategies.
When it comes to tile installation, a common mistake is neglecting proper substrate evaluation, which can lead to cracking or uneven grout lines. For instance, if you ignore slab moisture levels, tiles may not adhere properly, resulting in delamination. A critical but often missed nuance is understanding the difference between Portland-based and gypsum-based levelers, as each reacts differently under various conditions—see this comprehensive guide.
Beyond the basics, advanced practitioners are aware that the mechanical properties of materials matter immensely. Using a spike roller to remove trapped air in leveling compounds can make or break a smooth finish, yet many skip this step, leading to weak spots. Have you ever fallen into this trap? Let me know in the comments!
Lastly, a crucial but overlooked nuance involves temperature and humidity during installation. Installing hardwood floors at the wrong humidity level can cause wood to expand or contract, creating gaps or buckles down the line. Ensuring proper environmental controls and understanding acclimation rules—like the recommended 72 hours in the installation space—are essential. For more on this, explore this guide on choosing the right hardwood.
Being aware of these advanced details and avoiding common traps can elevate your flooring projects from amateur to professional quality. What pitfalls have you encountered? Share your experiences below and keep striving for flawless results!
Investing in the Right Tools for Durable Results
Maintaining quality flooring installations isn’t just about initial craftsmanship; it hinges on using specialized tools designed for longevity and precision. I rely heavily on a high-grade laser level for ensuring consistent flatness over large surfaces, especially when working with hardwood or tile. Unlike traditional bubble levels, laser levels project continuous horizontal and vertical lines, making it easier to spot dips or high spots that could compromise your final look.
Another favorite is a quality pry bar, which I use to carefully remove and adjust flooring planks or tiles without damaging neighboring pieces. For smoothing, I prefer a notched trowel with a specific notch size tailored to the tile or adhesive type—this precise selection prevents lippage or uneven bonding.
Power tools like a variable-speed drill with a paddle mixer attachment are essential for mixing leveling compounds and adhesives thoroughly, ensuring a consistent application without lumps or air pockets. Investing in a spike roller is worth it; it helps to eliminate trapped air bubbles in leveling compounds, a step critical for long-term adhesion and flatness, as explained in this comprehensive guide.
Why Regular Maintenance Extends Your Floors’ Life
Consistent upkeep involves more than just occasional cleaning. Using specialized cleaning tools like microfiber mops prevents scratches, especially on delicate hardwood finishes. Additionally, periodically inspecting expansion gaps and reapplying sealers or protective coats maintains the integrity of your flooring and prevents moisture ingress that can lead to warping or buckling.
In my experience, addressing minor issues promptly—such as small cracks or gaps—preserves the overall durability of the surface. Applying the appropriate sealant at the right intervals is part of this maintenance routine. Regularly checking for signs of wear in high-traffic areas confirms you’re proactive about extending your floors’ lifespan.
Future Trends: Automation and Smart Maintenance
Looking ahead, I predict that advancements in sensor technologies and automation will revolutionize flooring maintenance. Imagine smart sensors embedded within the subfloor to monitor moisture, structural integrity, or temperature fluctuations—alerting homeowners before problems escalate. Integration with smartphone apps could guide routine maintenance tasks, making DIY upkeep even more accessible. Preparing now by adopting reliable tools and establishing a consistent care routine ensures your flooring benefits from these future innovations.
How do I keep my flooring installation functioning perfectly over time?
Adopting meticulous maintenance routines, such as annual inspections and timely repairs, is vital. Use quality tools like laser levels and spike rollers to guarantee your setup stays flat and well-adhered. But more than tools, understanding how environmental factors—like humidity and temperature—affect your flooring will save you from costly repairs down the line. For in-depth strategies, explore this resource on hardwood floor care. Don’t forget—regular cleaning with appropriate equipment and prompt attention to minor issues can exponentially extend your floors’ lifespan. I encourage you to try incorporating a spike roller into your next leveling project; it’s a small investment that yields big results in the durability and appearance of your floor.
What I Wish I Knew Before Starting My Floor Journey
- One of the hardest lessons I learned was the importance of patience and thorough surface preparation. Rushing the leveling process or skipping moisture tests can lead to costly mistakes down the line.
- Embracing the right tools transformed my work. Investing in a laser level and spike roller wasn’t just helpful—they were game-changers for precision and longevity.
- I underestimated environmental factors like humidity, which caused my hardwood to gap and warp over time. Now, I always monitor these conditions to ensure stable results.
- Learning from expert advice and proven techniques saved me countless hours of rework. It’s worth seeking out trusted resources to guide your installation from start to finish.
Tools and Knowledge That Elevate Your Flooring Projects
- Precision Laser Levels: Ensure consistent flatness across large surfaces—I’ve found this tool invaluable for professional-looking results. See this guide on choosing the right hardwood floors for more insights.
- Spike Rollers and Fine Trowels: These help eliminate trapped air and achieve smooth, durable finishes. Proper application techniques make all the difference, as discussed here.
- Moisture Meters: Critical for pre-installation checks, preventing warping and buckling—something I now never skip.
- Reliable Resources: Following expert advice from this comprehensive flooring installation tips has saved me from common pitfalls and improved my skills significantly.
Your Next Step in Creating Perfect Floors
Embarking on a flooring project is a journey filled with learning and growth. By applying these lessons and utilizing trusted tools and resources, you’re setting yourself up for success. Remember, patience and precision are your best allies. Don’t hesitate to ask questions or seek guidance—every expert was once a beginner. Now’s the time to take that first step toward stunning, durable floors. What aspect of floor leveling or installation are you most excited to master? Let me know below!