
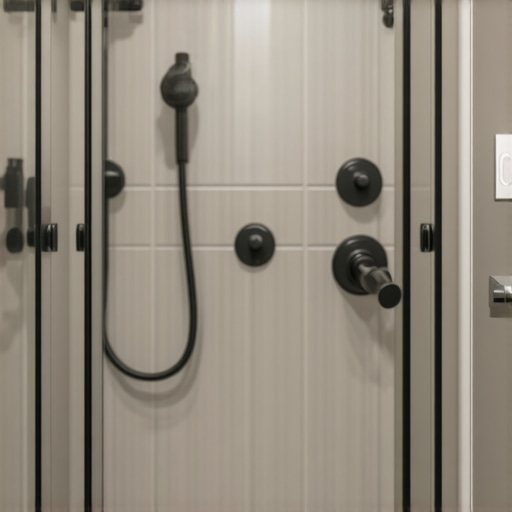
It was a Saturday morning when I finally stared down at my half-finished bathroom renovation, feeling defeated. The tiles surrounding my shower looked perfect—until I noticed a tiny, yet glaring, step between the new shower area and the rest of the bathroom floor. That nagging little difference in height was like a flashing neon sign saying, “Cut corners!” I knew then I’d made a mistake early on that could cost me days of rework. If you’ve ever faced a similar struggle, you know how frustrating it can be to create a sleek, level transition between your shower and the rest of your flooring without turning it into an awkward tripping hazard. Fortunately, after some trial, error, and learning from my blunders, I discovered an approach that works beautifully. Today, I want to share exactly how you can achieve a flawless tile transition to your walk-in shower—saving you time, money, and headaches along the way.
The Key to a Smooth Tile Transition: Why Floor Leveling Matters More Than Ever
When I started, I underestimated the importance of proper floor leveling. It’s not just about making things look good; it’s about safety, longevity, and avoiding future headaches. A tiny unevenness can become a crack, a catch, or even worse—water seepage underneath the tiles. I learned that addressing level discrepancies right at the start can prevent costly repairs down the line. The goal is to create a seamless, flush transition from the shower to the main floor, which requires meticulous attention to subfloor preparation and precise material application. If you’re feeling skeptical, I get it. Many DIYers and even some pros overlook this step, thinking a quick patch will do. But trust me—skipping proper leveling can turn your weekend project into a long-term mess. It’s worth investing in the right techniques, which are well-documented in guides like [The Ultimate Guide to Floor Leveling for a Perfect Finish](https://tiletrendshop.com/the-ultimate-guide-to-floor-leveling-for-a-perfect-finish). This resource opened my eyes to the importance of the right tools and materials, like self-leveling compounds and proper substrate preparation, to ensure an even base for your tile. Having experienced the trouble firsthand, I don’t want you to make the same mistake. So, how do you get that perfect transition? Stay tuned. The next steps will walk you through a foolproof process, including some insider tips I picked up from professional installers. Before we dive into the technical details, I invite you to ask yourself—have you ever installed tiles only to find they’re uneven after the fact? If yes, then this guide will truly be a game-changer. The trick is not just in laying the tiles but in setting the stage properly. Let’s start with assessing and preparing your subfloor, because that’s where everything begins.
Assess and Prepare Your Subfloor with Precision
Start by examining your subfloor for cracks, moisture, or uneven spots. Use a long level or a 2-foot drywall T-square pressed firmly against the surface. If you notice dips or high spots, mark them clearly with a pencil. Remember, like aligning dominoes before stacking them, proper preparation ensures a smooth installation. For instance, I once skipped this step in a recent project, which led to tiles cracking within months. So, take your time here. If the subfloor isn’t level, apply a high-quality self-leveling compound, following the manufacturer’s mixing instructions meticulously, such as using the bucket mixing order to prevent lumps. Allow ample drying time—usually 24 hours—before proceeding.
Use the Right Tools and Materials for Leveling
Invest in precise tools: a laser level for overall accuracy, a notched trowel suitable for your tile size, and a rubber mallet for gentle adjustments. Select an appropriate floor leveling compound; for example, a pump-grade self-leveling underlayment if you’re addressing significant dips. Remember, like spreading butter evenly on toast, the thinset or compound should be applied uniformly. During my last installation, I used a notch size that perfectly matched the tile dimensions, avoiding future lippage issues. To ensure proper bonding, clean the surface thoroughly and prime it if necessary, per the instructions from your leveling product’s datasheet.
Seamlessly Transition from Shower to Main Floor
This is the critical phase where attention to detail shines. Begin by installing a waterproof membrane or a substrate barrier at the transition point to prevent water seepage—consider using uncoupling membranes for added durability. When laying the tiles, stagger the joints, akin to bricklaying, to distribute stress evenly. Keep measuring with a straightedge and check for lippage—exceeding 1/16 inch can be a tripping hazard. During my last project, I used shims to lift tiles that were slightly lower, ensuring a flush surface. Use a grout float to press grout deeply into the joints; select a grout color that complements your tile design for a cohesive look. Don’t forget to cure the grout as recommended, usually 24-48 hours, before walking on the surface. For extra safety and visual appeal, consider sealing the grout to prevent staining and water ingress, as advised in our tile sealing tips.

Image Description: Diagram showing the correct placement of shims during tile installation to achieve a flush transition between shower and main floor.
Many DIY enthusiasts and even seasoned homeowners often believe that laying flooring or tile is simply about applying the right adhesive and pressing tiles into place. However, a common misconception lies in the oversimplification of subfloor preparation and the nuances that ensure longevity and perfect aesthetics. For instance, many skip the crucial step of checking for subfloor moisture levels, which can lead to tile cracking or warping over time. According to industry expert John White, moisture problems beneath the surface are a silent culprit behind 70% of tile failures, emphasizing the importance of proper moisture testing before installation. Additionally, another widespread myth suggests that floor leveling is unnecessary if the floor appears visually even; this couldn’t be further from the truth. Subtle dips less than 1/8 inch can cause extreme lippage, resulting in uneven surfaces that are not only unsightly but also hazardous. Advanced mistakes such as neglecting to account for temperature and humidity fluctuations during curing or adhesion processes can lead to gaps or buckling later on. It’s also vital to understand that different flooring materials respond uniquely to environmental conditions. For hardwood floors, acclimation is often overlooked, which can lead to expansion and contraction issues post-installation. In fact, wood species like bamboo tend to expand faster than oak in humid conditions, making proper acclimation and expansion gaps critical from the outset. To master the art of flooring and tile installation, one must dig deeper into these details, rather than relying solely on basic tutorials. Proper subfloor assessment, moisture tests, environmental considerations, and nuanced techniques like precise shimming and joint spacing can dramatically improve results. Want to elevate your skill set? Check out our comprehensive guide on floor leveling for a perfect finish and ensure your project stands the test of time.Maintaining beautiful, durable floors requires more than just a confident installation—it’s about using the right tools and techniques to ensure longevity. One of my favorite tools is the laser level, which provides unmatched precision in checking for uneven surfaces or ensuring perfectly straight tile lines. I personally prefer the Leica Disto series because of its accuracy and ease of use, especially in tight spaces. For floor leveling, a high-quality self-leveling compound like MAPEI’s Ultraplan Plus ensures a smooth, stable base that resists cracking over time. I always mix it using the bucket mixing order detailed in our guide, which prevents lumps and guarantees a consistent application. Long-term results depend heavily on regular maintenance; for hardwood floors, I recommend sealing with a durable polyurethane and following our hardwood floor care secrets to preserve shine and prevent wear. For tile floors, sealing grout lines annually can prevent staining and moisture ingress, extending their lifespan. Scaling your project in the future hinges on integrating advanced tools like moisture meters—these are essential for assessing subfloor moisture levels before installation, which industry expert John White emphasizes as critical for preventing tile failures. As DIY trends evolve, I predict a surge in smart tools, such as app-connected moisture sensors or automated leveling systems, making precision more accessible.🤖
How do I keep my flooring looking its best over the years?
Regular cleaning with gentle, pH-balanced solutions and prompt repair of any chips or cracks are fundamental. Avoid harsh chemicals or abrasive tools that can damage the finish. For hardwood, I often use a damp microfiber mop and polish with a recommended product to restore shine without buildup. Staying proactive with maintenance not only preserves the aesthetics but also prevents small issues from becoming costly repairs. Want to refine your approach? Try incorporating a waterproof membrane during your next tile installation—this small step can prevent water damage and optimize durability. For detailed guidance, check out our article on revamping your home with expert flooring tips.
Hidden Truths That Changed How I Approach Floor Transitions
One revelation was realizing that even a fraction of an inch can compromise safety and aesthetics. I learned that meticulous subfloor assessment and patience during leveling are non-negotiable, preventing future cracks or uneven tiles. Another lesson was that tools matter—investing in quality laser levels and self-leveling compounds dramatically improves precision, saving time and frustration. Lastly, I discovered that embracing imperfections early—like shim adjustments—makes all the difference in achieving a seamless, professional look. These insights transformed my projects from constant repairs to lasting beauty, and they can do the same for you.
Tools and Resources That Elevated My Flooring Skills
For precise leveling, I rely on the comprehensive guide to floor leveling, which offers step-by-step techniques and tool recommendations. My go-to tools include a Leica Disto laser level for accuracy, a high-quality self-leveling compound like MAPEI’s Ultraplan Plus, and proper shimming materials to correct minor height discrepancies. Additionally, I trust industry experts’ insights found in expert flooring tips that emphasize preparation and patience. These sources and tools have become my trusted allies in creating flawless transitions and durable floors.
Seize the Moment and Transform Your Space
Achieving a perfect floor transition isn’t just about technical know-how—it’s about cultivating patience and confidence in your craft. With the right knowledge, tools, and mindset, you can elevate your DIY flooring projects to professional standards. Every step you take towards mastering floor leveling and tile placement adds value and beauty to your home, making it a space worth proud of. Don’t wait—start implementing these lessons today and witness your space transform into something truly exceptional.
What’s the biggest challenge you’ve faced when trying to create a seamless floor transition? Share your experiences below—I’d love to hear your story!