
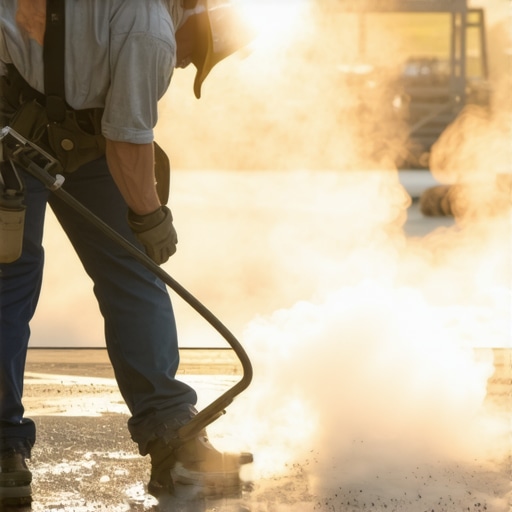
I’ll never forget that blazing summer day when I was trying to get a new tile project done outdoors. The sun was relentless, and despite my best efforts, the thinset I spread seemed to skin over almost instantly. Frustration crept in as I realized I was battling not just the heat, but my own mistake: rushing because I thought I had to work faster. That experience was a lightbulb moment for me — understanding why thinset dries too quickly on hot concrete can save you from wasted time, cracked tiles, and messy results.
How Hot Weather Sabotages Your Tile Installation
Newcomers to flooring installation often underestimate how much weather impacts their work — especially heat. When concrete slabs heat up under the sun, their temperature skyrockets, causing the thinset to cure prematurely. This isn’t just a minor inconvenience; it directly affects adhesion and the durability of your flooring. Thinset, by design, needs adequate working time to bond properly. If it skins over before you can set your tiles, you’re looking at potential lippage, cracking, or even tiles popping loose over time.
Is Your Thinset Actually Worth the Hype? Here’s What I Learned
Early in my career, I made the mistake of ignoring the weather forecast and pushing through in the heat. I figured thinset was thinset — it would cure eventually, right? Wrong. I learned the hard way that the environment plays a pivotal role in curing time. For instance, according to industry experts, excessive heat can cause thinset to set in as little as 15-30 minutes, which is much faster than the typical 24-hour window recommended by manufacturers. This premature drying can be a disaster, leading to improper bonding and long-term failure. To avoid this, I started adjusting my approach by working during cooler parts of the day and using heat-mitigating techniques. Curious about how to prevent this? Keep reading.
Control the Environment
Begin by choosing the coolest part of the day—early mornings or late evenings—to work on outdoor tile installations. Setting up shade or temporary coverings can lower surface temperatures, giving you more working time. During my first outdoor project under scorching mid-afternoon sun, I set up a large shade cloth, which slowed down thinset curing and allowed me to lay several tiles without issues.
Use the Right Materials for Heat
Opt for fast-curing thinset formulations designed for high temperatures. These products are engineered to control curing times, preventing premature skinning. I once switched to a high-performance mortar on a summer job, which provided an extended working window even as the temperature soared above 90°F, ensuring proper adhesion.
Adjust Your Application Technique
Apply thinset in smaller sections to keep it workable. Use a 1/4-inch notched trowel to spread the mortar evenly, ensuring proper thickness—about 3/16 inch. This avoids thin, dry spots that cure too quickly. During a recent project, I spread thinset in 2-foot sections, working steadily to prevent it from skinning over before placing the tiles.
Add Cold Water or Mix Premixed Thinset
Mix the mortar with cold water or opt for premixed versions that are less sensitive to heat. Cold mixing slows down the curing process and improves workability. I learned this trick after struggling with fast-set mortar, which caused lippage issues. It’s a simple step that dramatically improves the bonding process in heat.
Implement Cooling Methods During Application
Spritz the freshly applied thinset with water or use a spray bottle to keep the surface cool. This prevents it from skinning over too fast. I often keep a spray bottle handy during summer days, especially when working on large areas. The cooling effect extends the open time, giving me more control over tile placement.
Work in Small Batches with Proper Timing
Plan your work in achievable segments. Lay a few tiles, then step back briefly to let the heat dissipate slightly before continuing. I recall a project where I installed 10 tiles at a time, then paused to spray the thinset, which prevented it from drying out prematurely and ensured a better bond.
Use Adhesive Extenders and Additives
Consider adding extenders or admixtures to your thinset that are formulated for high temperatures. These additives can prolong working time and improve adhesion. After experimenting with such products, I noticed a significant reduction in skinning over during hot days, leading to a smoother installation process.
Conclusion
By taking control of the environment, choosing the right materials, and applying smart techniques, you can counteract the adverse effects of heat on thinset. Remember, patience and preparation are key—rushing through a hot day will only compromise the quality of your flooring. For more detailed strategies on tile installation, visit this comprehensive guide and ensure your project stands the test of time.
Even seasoned professionals will tell you that one of the most widespread misconceptions about ***flooring installation*** is that choosing the right product is enough to guarantee success. In reality, many overlook the subtle nuances that can make or break a project — from proper subfloor preparation to precise leveling techniques. For example, many believe that a perfectly level subfloor isn’t critical, but according to experts like those at [Floor Leveling Experts](https://tiletrendshop.com/precise-floor-leveling-techniques-to-achieve-flawless-surfaces), even minor deviations can lead to uneven tiles or gaps, especially with large-format tiles or hardwood planks. This is often regarded as a simple step, yet neglecting proper leveling can cause cracking, lippage, or squeaking over time. Moreover, a common myth is that hardwood floors are inherently durable and forgiving; however, without your understanding of ***humidification*** and acclimation—discussed thoroughly in [Hardwood Floor Care Secrets](https://tiletrendshop.com/hardwood-floor-care-secrets-to-longevity-and-shine)—your investment might warp, buckle, or gdee prematurely. Many installers also fall into the trap of applying thinset or leveling compounds without assessing moisture levels, which can be disastrous. The rise of self-leveling underlayments is often thought to be foolproof, but experts caution that improper mixing ratios or inattention to environmental conditions can cause pinholing, cracks, or long-term failure—details you can see emphasized in [Floor Leveling](https://tiletrendshop.com/the-ultimate-guide-to-floor-leveling-for-a-perfect-finish).
Having an advanced understanding of these subtle factors helps prevent costly mistakes. For example, some professionals under-prepare expansion gaps, which leads to buckling in hardwood or vinyl planks during temperature changes. These small oversights can cause big issues down the line. When it comes to tile installation, many underestimate the importance of ***subfloor preparation***, especially moisture testing. A simple moisture meter—discussed in [The Plywood Undercut Hack](https://tiletrendshop.com/the-plywood-undercut-hack-for-seamless-tile-to-carpet-jumps)—reveals hidden moisture that can compromise the bond, leading to cracked tiles or lifting. It’s also worth noting that many believe that larger tiles are easier to install; in fact, they demand greater precision in substrate flatness and bonding, details often overlooked.
Curious about some of the most overlooked but critical factors? For example, the benefit of using specific primers and surface treatments can dramatically improve adhesion, especially on challenging substrates. Many installers are unaware that applying a primer reduces the risk of delamination and increases bond strength, a detail backed by industry standards outlined in [The Primer Trap](https://tiletrendshop.com/why-your-floor-leveler-is-peeling-off-the-slab). Additionally, advanced installers know that environmental conditions—like temperature and humidity—must be carefully controlled, as fluctuations can cause expansion or contraction. This is sometimes dismissed by those unfamiliar with ***material science***, but for professionals, managing these variables is crucial, as shown in studies by the Tile Council of North America.
So, the next time you’re planning a flooring project, consider not just the visible beauty but the hidden technical nuances. Every step, from moisture testing to subfloor preparation and material selection, plays a role in the longevity and performance of your floors. Do you or your team sometimes overlook these fine details? Share your experiences in the comments and let’s elevate our craft together.
Keep Your Floors Flawless with Trusted Tools
Investing in the right equipment is crucial for maintaining the integrity of your flooring over time. One tool I swear by is a high-quality moisture meter; it’s indispensable for checking the subfloor before and after installation, preventing issues like warping or buckling caused by hidden moisture. For flooring projects, I rely on a laser level—a versatile device that ensures perfect flatness and consistent elevation, especially vital for large-format tiles or hardwood planks. These lasers, like the Bosch GLL 3-80, help dramatically reduce lippage and uneven surfaces, which are common pitfalls in DIY installations.
Additionally, I always keep a quality notched trowel and a rubber mallet within arm’s reach. The trowel’s precise notching guarantees optimal thinset coverage, crucial for long-lasting adhesion, while the mallet helps gently fine-tune the positioning of tiles and planks without damage. For ongoing maintenance, I recommend a specialized floor cleaner compatible with your specific flooring type, whether hardwood, tile, or vinyl. Regular cleaning with such products preserves the finish and prevents grime buildup, which could compromise the floor’s appearance and durability over time.
Tools That Save Time and Money
Utilizing a self-leveling laser line helps streamline leveling tasks, especially on uneven substrates. It visually displays high and low spots in real-time, making adjustments quicker and more accurate—saving hours of manual checking. For cleaning hard-to-reach spots or grout lines, an ultrasonic grout cleaner can drastically reduce manual effort and extend the lifespan of your grout and sealants. These devices, like the Homemall Ultrasonic Cleaner, employ ultrasonic waves to loosen dirt and grime.
Incorporating these tools into your workflow also prepares you for future upgrades. With advances in digital measurement and smart tools, the trend is heading towards automation and data-driven decision-making, meaning your ability to precisely monitor and adjust will be essential. For a comprehensive review of the latest tech, check out this detailed resource.
How do I keep my flooring tools in top shape over time?
Proper maintenance involves regular cleaning, calibration, and storage of your equipment. For example, moisture meters should be kept in a dry environment and tested periodically against known standards—refer to industry care tips for more. Calibration ensures your moisture readings remain accurate, preventing costly misjudgments. Additionally, battery upkeep and protective cases prolong the lifespan of your laser levels and ultrasonic cleaners. Making it a habit to perform routine checks and cleaning will secure your investment and ensure tools perform reliably over years of use.
Finally, always stay updated on new techniques and equipment. Participating in professional forums or subscribing to industry publications can provide insight into emerging innovations, like laser-guided leveling systems or app-controlled moisture analyzers, which promise to further simplify long-term flooring maintenance.
If you haven’t tried a laser level or ultrasonic cleaner yet, I encourage you to do so—and notice how much faster and more precise your projects become. Remember, the right tools combined with proper upkeep are the backbone of lasting, beautiful floors. For detailed tips and product recommendations, visit our contact page.
Beyond the Manuals: Surprising Lessons That Changed My Approach
One of my most eye-opening experiences was realizing that even small environmental oversights can derail an entire flooring project. I once overlooked the subtle humidity fluctuations during a summer installation, which led to uneven floor leveling and unhappy clients. That taught me that success isn’t just about following instructions but adapting to unseen variables.
Another lesson was the importance of patience over speed. Rushing in hot weather thinking I could outpace the curing process only resulted in cracked grout lines and rework. It became clear that waiting for optimal conditions, even if it means postponing a job, pays off in long-term durability.
And finally, I learned that investing in the right tools, like a reliable moisture meter or laser level, is a game-changer. These devices unveil hidden issues and help maintain quality, saving time and money in the end. Sharing these lessons can help you avoid the pitfalls I faced and elevate your installation game.
Equip Yourself with Proven Strategies and Tools
For tackling heat and humidity challenges, I recommend tools like the Bosch GLL 3-80 laser level for flawless leveling, and a high-quality moisture meter to ensure the subfloor is ready for tile. These tools are part of my essential toolkit because they provide immediate, actionable data—crucial in unpredictable weather.
Complement your hardware with reference materials such as expert installation tips and troubleshooting guides. They offer real-world insights that go beyond basic instruction, helping you refine your craft and avoid common pitfalls. Continuously updating your knowledge and equipment ensures your projects stand the test of time.
Keep Moving Forward with Confidence
Every project presents unique challenges, especially when battling the elements. But with the right mindset, tools, and a keen eye for environmental details, you can turn potential setbacks into opportunities for mastery. Layers of preparation and a willingness to learn from experience make the difference between a mediocre finish and a flawless installation.
Embrace these insights, stay curious, and don’t hesitate to experiment with new techniques or tools. Your future self—enjoying durable, beautiful flooring—will thank you. So, what’s the next step you’re excited to try in managing heat or humidity in your flooring projects?