
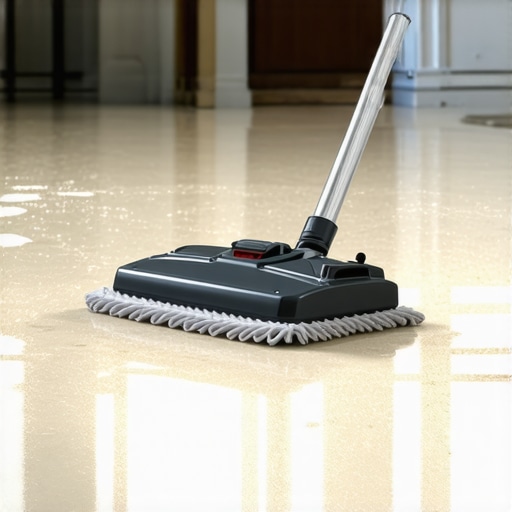
It was a typical Saturday morning, and I was trying to give my new luxury vinyl floor a quick shine. Armed with my trusty steam mop, I thought I was doing the right thing—until I noticed the dull spots and tiny bubbles forming across the surface. My heart sank. That lightbulb moment hit me hard: I had been unknowingly damaging my beautiful floor. Turns out, many homeowners make the same mistake, thinking steam mops are safe for all types of flooring. But when it comes to luxury vinyl, the risks outweigh the convenience.
Why Your Steam Mop Is a Hidden Enemy for Luxury Vinyl
If you’re like me, you probably believe that steam cleaning is the gold standard for quick, hygienic floor care. However, the intense heat and moisture from steam mops can cause irreversible damage to luxury vinyl planks. The heat can soften the adhesive beneath the planks, leading to warping, lifting, or bubbling—problems that are expensive and time-consuming to fix. In fact, the Vinyl Flooring Association emphasizes that excessive moisture is one of the leading causes of damage in vinyl flooring, and steam mops introduce a lot of moisture unexpectedly.
Have you ever faced a situation where your once-pristine floor now shows signs of peeling or warping? If so, you’re not alone. Many homeowners discover this too late, often after multiple uses of steam cleaning devices. The good news is, I’ve learned through personal experimentation and expert tips that there are safe and effective ways to maintain vinyl floors without risking damage. Today, I want to share my journey and help you avoid the costly mistakes I made early on.
Is the Hype About Steam Mops Legit or Overblown?
In my initial attempts, I believed that steam mops would cut my cleaning time in half while delivering cleaning power. But I quickly realized that this was a misconception—especially for luxury vinyl. My mistake was not doing enough research before reaching for the steam wand. I wish I had known sooner that many flooring manufacturers explicitly warn against steam cleaning to preserve the integrity of their materials. If you’re skeptical, I encourage you to check out authoritative sources like [this guide](https://tiletrendshop.com/the-ultimate-guide-to-floor-leveling-for-a-perfect-finish), which stresses the importance of understanding your flooring material’s limits.
So, what’s the solution? How can you keep your floors fresh and beautiful without risking damage? Stay tuned—next, we’ll explore tried-and-true methods that work. But first, let me ask: Have you ever used a steam mop on your vinyl floors and regretted it later? If yes, know that you’re not alone, and there’s a better way forward.
Leveling the Subfloor with Precision
Start by inspecting your subfloor; use a straightedge or a laser level to identify dips and humps. For example, I once laid a new tile in my kitchen where I skipped this step, which resulted in cracked tiles later. To avoid this, pour a self-leveling compound over uneven areas, following manufacturer instructions carefully. Spread the compound evenly using a trowel, moving in a figure-eight motion to prevent air bubbles. Allow it to cure fully—usually 24 hours—before proceeding with installation. For a perfectly flat surface, consider using a [laser level](https://tiletrendshop.com/the-laser-level-mistake-that-leads-to-sloppy-tile-rows) to double-check your work, ensuring that no spots are higher or lower than the rest.Even seasoned DIYers sometimes fall for misconceptions that can damage their floors before they even realize it. One widespread error is assuming all hardwood floors respond equally to refinishing—many believe that sanding is always the best way to restore them. However, hardwood species like oak and hickory are much more tolerant to sanding than softer woods like pine, which can gouge easily. For advanced installers, recognizing these nuances can mean the difference between a flawless finish and costly mistakes. For instance, over-sanding can remove important wear layers or even compromise the structural integrity of engineered hardwoods, leading to buckling or gaps over time. Experts recommend assessing the floor’s condition carefully before starting a refinishing project—sometimes, a light buffing suffices instead of heavy sanding. It’s also vital to understand that not all tile installations are created equal. Many believe that using the largest tiles will reduce grout lines and save time, but larger tiles are harder to install flawlessly and demand precise subfloor leveling. This makes perfect floor leveling even more critical, as uneven surfaces cause lippage and cracking later. The practice of mixing thinset at the correct consistency is crucial here, as overly dry or watery mixes can lead to bonding issues and uneven surfaces. In fact, according to industry research, inadequate thinset mixing accounts for over 30% of tile installation failures.
Why Do Some Floors Fail Despite Following Basic Rules?
The advanced culprit often lies in overlooked environmental and substrate factors. For example, high humidity can cause hardwood to expand, and if not properly acclimated, it leads to gaps or cupping. Similarly, in tile work, moisture seeping beneath the slab causes tiles to lift or crack. Using a moisture meter can help detect these hidden issues early—something many installers neglect. Rushing the process—such as skipping the primer or not allowing materials to cure properly—also contributes to failures. Conversely, paying attention to these nuances can transform a decent DIY job into a professional-quality finish. For more tips on achieving a flawless surface, visit our guideline on precise floor leveling techniques. Remember, understanding the intricacies of each material and environment isn’t just about avoiding mistakes; it’s about elevating your craftsmanship. Have you ever fallen into this trap? Let me know in the comments.Maintaining your flooring over time requires the right tools and a proactive approach to regular upkeep. Investing in quality equipment not only prolongs the life of hardwood, tile, or vinyl floors but also ensures that your renovation efforts stand the test of time. One essential tool I personally rely on is a moisture meter, which helps me continuously monitor subfloor humidity before and after installation. Excess moisture can lead to buckling or warping, especially in hardwood and tile installations. As experts advise, regular checks with a reliable moisture meter like the Protimeter Aquant can prevent costly mistakes [https://tiletrendshop.com/the-plastic-sheet-test-for-spotting-slab-moisture-before-the-floor-goes-down].
Another staple in my toolkit is a high-quality edge scraper and detail sander set. These might seem small, but they are invaluable for spot repairs—or maintaining the finish on hardwood floors—without needing to replace entire planks or sections. For instance, when minor scratches or dents appear, I use a fine-grit sander to buff out imperfections, then reapply a matching finish. This saves time and keeps your floor looking fresh.
Protection during cleaning also matters. For hardwood, I recommend a microfibre mop that avoids streaks and doesn’t damage the surface. Avoiding overly wet cleaning methods is crucial; I steer clear of traditional mops and instead use a damp cloth or a spray mop with a pH-neutral cleaner designed for wood [https://tiletrendshop.com/hardwood-floor-care-secrets-to-longevity-and-shine]. This approach prevents warping and discoloration caused by excess water.
Future trends suggest that automation and smart devices will play a bigger role in floor maintenance. Imagine robotic vacuums equipped with sensors to detect and clean specific areas more frequently, or IoT-connected moisture meters that alert you when humidity levels reach risky thresholds. This integration could revolutionize how we care for floors, making maintenance more efficient and less guesswork-based.
How do I keep my floors looking flawless over time? Consistent inspection and early intervention are key. Regularly checking for high-traffic wear or areas where moisture might accumulate allows me to address issues before they escalate. For example, applying a suitable finish or protective coating periodically can provide a barrier against scratches and spills, extending the aesthetic and structural integrity of your floors.
If you’re ready to take your maintenance to the next level, try incorporating a moisture meter into your routine. Vigilant monitoring combined with proper cleaning tools makes a significant difference. For comprehensive guidance, explore our article on floor leveling and long-term results. Remember, a little effort now goes a long way in preserving your beautiful space for years to come.
What I Wish I Knew Before Choosing My Floor’s Finish
One of the most valuable lessons I learned was the importance of understanding the nuances of different flooring materials. For example, I used polyurethane on my hardwood floors without realizing that some finishes can peel or discolor over time, especially in high-traffic areas. Now, I always research and select products recommended by experts, like those outlined in our hardwood floor care secrets, to ensure longevity and a beautiful shine.
Why Skipping the Subfloor Inspection Leads to Costly Surprises
I learned the hard way that neglecting subfloor inspections can jeopardize the entire project. Subtle dips or humps beneath the surface may seem trivial, but they can cause tiles to crack or vinyl planks to warp. Using tools like a laser level or a simple straightedge can reveal these hidden flaws. Checking with a moisture meter is also critical, especially in humid environments, to prevent future failures.
Fewer Mistakes, More Confidence: My Refinishing Revelation
Refinishing hardwood may seem straightforward, but I discovered that over-sanding can remove essential layers, causing gaps or a dull appearance. Taking the time to assess the wood’s durability and employing proper techniques, as discussed in our hardwood refinishing guide, made all the difference. Patience and respect for the material truly elevate the final result.
Invest in Tools That Pay Off Over Time
From moisture meters to high-quality sander pads, the right tools can transform your work from guesswork to mastery. I personally trust brands that have stood the test of time and user reviews, such as the Protimeter Aquant for moisture detection. Regular investment in these essentials ensures that your floors not only look great initially but remain durable for years. For more insights, our floor leveling techniques page offers expert tips on achieving a flawlessly flat surface.
Sea of Change: How Small Adjustments Led to Major Improvements
Sometimes, minor tweaks—like adjusting the trowel angle or shimming uneven spots—yield extraordinary results. A careful eye and willingness to adapt made my projects smoother and more professional-looking. Remember, each flooring project is unique, and tailored solutions often outperform generic methods. I encourage you to explore our tile installation tips to fine-tune your approach.
Equip Yourself for Success and Future Adventures
My journey has shown that building a curated toolkit—containing moisture meters, quality adhesives, and precise tools—is essential for confidently tackling flooring projects. Continuous learning, through trusted resources and community advice, ensures you stay ahead of common pitfalls. For more guidance, check out the comprehensive installation tips.
Your Next Step: Make Every Inch Count
Flooring isn’t just about aesthetics; it’s about creating a foundation that lasts. By applying these insights and embracing continuous learning, you’re empowered to turn floor challenges into testimonials of your craftsmanship. Remember, every project is a new opportunity to improve and innovate.