
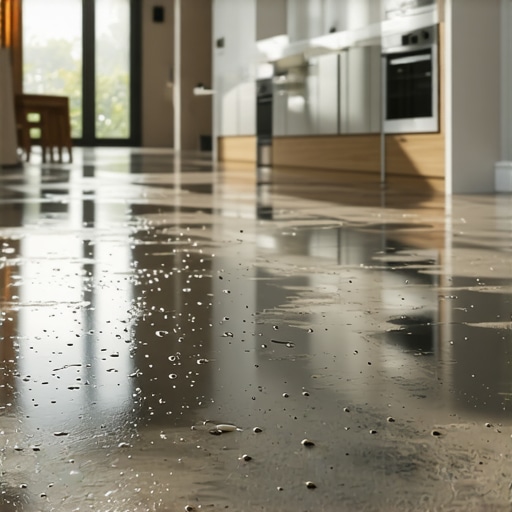
I’ll never forget the moment I stepped into my kitchen after a heavy rainstorm, only to find my floating hardwood floor warped and creaking louder than ever. The feeling of frustration was immediate—I had followed all the installation guides, yet the humidity had done what I thought was impossible: wrecked my beautiful new floor. Sound familiar? If you’re reading this, chances are you’ve faced a similar nightmare where your flooring buckled or warped unexpectedly, especially in a humid kitchen environment.
The Hidden Waterfall: Why Humidity Turns Floors into a Disaster Zone
High humidity levels can be a silent killer for floating floors. Unlike gluedown or nailed-down options, floating floors rely on a precise balance of moisture content and stable subfloors. When the air is saturated, moisture seeping into the materials causes expansion, leading to cupping, warping, and, ultimately, failure. What I learned early on is that the very properties making floating floors attractive—easy installation and versatility—also make them vulnerable to moisture fluctuations. A key mistake I made initially was ignoring the local climate and humidity levels during installation. To truly protect your investment, it’s vital to understand the environmental factors that influence your flooring and how to manage them effectively.
Should You Reconsider Floating Floors in Humid Areas?
This is probably the first question on your mind. Many think that floating floors are a quick fix or a budget-friendly option, but in high-humidity kitchens, they can be a ticking time bomb if not installed with extra precautions. I’ve seen firsthand how neglecting proper acclimation and subfloor preparation—like skipping the [proper leveling techniques](https://tiletrendshop.com/precise-floor-leveling-techniques-to-achieve-flawless-surfaces)—can spell disaster. Trust me, proactively addressing humidity and environment-specific challenges is the secret to ensuring your floors stay beautiful for years to come. Want to dive deeper into securing your floors against moisture and humidity? I highly recommend reading about [flooring installation mistakes to avoid for lasting results](https://tiletrendshop.com/flooring-installation-mistakes-to-avoid-for-lasting-results). Ready to learn the practical steps to protect your floors? Let’s get started.
Prepping Your Space Before Installing
Begin by measuring your room’s humidity levels using a reliable hygrometer—aim for below 60% relative humidity. If levels are higher, consider installing a dehumidifier or improving ventilation to lower moisture. Next, evaluate your subfloor for flatness; uneven surfaces can cause future warping. Use a straightedge to identify dips and humps—any deviation over 1/8 inch needs correction. For leveling, apply a self-leveling compound, following the instructions meticulously to achieve a smooth surface. Remember, a flat subfloor is the foundation for a durable float that resists warping.
Acclimating the Flooring Materials
Once on-site, store your hardwood or laminate planks in the room where they’ll be installed at least 48 hours prior. Keep the boxes unopened and maintain room temperature around 65-75°F with controlled humidity. This allows the materials to adjust and helps prevent expansion or contraction post-installation. During this time, avoid direct sunlight or placing the boxes near heaters—think of it as training your flooring to ‘fit in’ with your environment. I experienced a minor mishap when I forgot this step, and my floors warped within weeks, emphasizing its importance.
Proper Installation Techniques to Minimize Moisture Risk
When laying your floor, leave expansion gaps of about ¼ inch around the perimeter—think of it as giving your floor room to breathe. Use spacers to maintain consistent gaps. For floating floors, click-lock systems are popular, but ensure the planks are fully engaged—listen for a solid click. During installation, avoid forcing gaps or using excessive adhesive, which can trap moisture. I once used too much glue, and it seeped into seams, complicating future refinishings. Regularly check alignment with a chalk line and a level—this keeps your rows straight and prevents unevenness that could trap moisture.
Controlling Indoor Humidity Post-Installation
After installing, keep humidity levels stable with a dedicated dehumidifier, especially in kitchens where moisture from cooking and cleaning is common. Use exhaust fans during cooking and baths, and run them for at least 30 minutes afterward. Maintaining consistent temperature and humidity prevents the floor from expanding or contracting dramatically—like a tightrope walk, small changes can cause big issues over time. I found that investing in a quality humidifier made a noticeable difference in the longevity of my hardwoods, keeping them looking pristine despite the humid environment.
Routine Maintenance for Long-Lasting Floors
Implement a regular cleaning schedule using moisture-free methods—damp mop and avoid excessive water. Use protective pads on furniture to prevent scratching, which creates entry points for moisture. For added protection, apply a floor finish or sealant recommended for your specific material—this acts as a moisture barrier. Keep an eye out for any signs of shifting, such as gaps or buckling, and address issues promptly. Adoption of these practices turned my warping nightmare into a distant memory, proving that proactive care is key to durability.
When it comes to flooring, many enthusiasts focus on the visible aspects like color, style, and surface finish, but there’s a deeper layer of understanding that often gets overlooked—particularly regarding installation nuances and common myths. Let’s dig deeper into the subtle pitfalls that even seasoned DIYers and pros can fall for, and why awareness of these details can be a game-changer for your project’s longevity and aesthetic.
One widespread misconception is that flooring installation is purely about laying planks or tiles into place. In reality, mastering the nuances of **floor leveling** is crucial. Many assume that a slightly uneven subfloor isn’t a big deal, but even minor dips or humps can cause long-term problems like cracking, squeaking, or uneven wear. For example, improperly prepared subfloors often lead to tile cracking—especially with expansive large-format tiles. To avoid this, I recommend thoroughly inspecting and precisely leveling the surface using techniques detailed in [the ultimate guide to floor leveling](https://tiletrendshop.com/the-ultimate-guide-to-floor-leveling-for-a-perfect-finish). This extra step might seem tedious but is essential for a flawless, durable finish.
Another common myth is that materials alone determine the success of a flooring project. While quality is vital, many overlook the importance of **environmental conditions during installation**. For instance, installing hardwood or tile during fluctuating humidity can cause unpredictable expansion or contraction, undermining the entire effort. This is particularly critical in kitchens, bathrooms, or basements where moisture levels can spike unpredictably. Investing in moisture control devices, like vapor barriers or dehumidifiers, can save you from costly repairs down the line.
Let’s ask an advanced question—
How does understanding substrate movement impact long-term flooring stability?
Grasping how subfloor dynamics influence your chosen flooring type can differentiate a professional result from a DIY mishap. According to flooring experts, such as those referenced in [flooring installation mistakes to avoid](https://tiletrendshop.com/flooring-installation-mistakes-to-avoid-for-lasting-results), comprehending and accommodating substrate movement—like joist flex or moisture swelling—can prevent issues like buckling or delamination. For example, installing engineered hardwood over a subfloor prone to seasonal expansion without proper acclimation or decoupling layers can result in a warped surface within months.
Moreover, many underestimate the importance of **precision in layout**. Misaligned tiles or uneven plank spacing may seem minor initially, but over time, they can magnify into cracks or gaps. Utilizing tools such as laser levels and straightedges with care—topics I cover extensively in [mastering hardwood refinishing tips](https://tiletrendshop.com/mastering-hardwood-floor-refinishing-expert-tips-for-2025)—ensures consistent, professional results.
Finally, beware of the trap that materials are fully compatible when, in fact, subtle differences can cause failure. For example, not all adhesives or sealants are suitable for every substrate or climate condition. Always consult manufacturer specifications and perform adhesion tests, which are often overlooked but can prevent disasters. For additional insights, see [adherence tests for hardwood installations](https://tiletrendshop.com/3-adhesion-tests-for-installing-2026-hardwood-over-old-vinyl).
Making sure you understand these hidden nuances isn’t just about avoiding mistakes, but about elevating your flooring game—achieving results that last decades rather than years. Have you ever fallen into this trap? Let me know in the comments.
Keeping your flooring in top condition requires not only the right installation but also the proper tools and routine maintenance. Personally, I rely on a combination of high-quality equipment and smart methods to ensure my floors stay pristine and functional over the years.
Essential Equipment for Floor Care and Maintenance
One of my go-to tools is a microfiber dust mop, which effectively captures dust and debris without scratching delicate surfaces. I prefer the Swiffer WetJet for light cleaning because it combines ease with control, preventing excess water—which can warp hardwoods. For deeper cleaning, I use a **steam cleaner** with adjustable settings, such as the Bissell Steam Mop**—but only on sealed surfaces to avoid moisture seepage that can cause damage. Regularly inspecting your floors with a quality flashlight helps identify less obvious issues like microcracks or early warping—reviewing how to spot unevenness can be game-changing.
Monitoring Environmental Conditions Effectively
Maintaining ideal humidity—around 45-55%—is essential. I recommend investing in a reliable hygrometer; I use the ThermoPro TP50 because of its accuracy. An automatic dehumidifier such as the Frigidaire FFAD1533W1 keeps moisture levels consistent, especially in kitchens and basements. Controlling temperature and humidity is critical; even fluctuations can cause flooring to expand or contract, leading to cracks or warping. Monitoring these factors long-term can prevent costly repairs, aligning with insights from hardwood care experts.
Adopting Advanced Maintenance Methods
Incorporate routine preventive measures like applying protective pads on furniture legs—mine are the Sure-Grit Felt Pads—to avoid scratches that trap moisture. Additionally, periodically refinishing the surface with a suitable sealant extends the life of hardwood floors; I use a water-based polyurethane that resists scratching and maintains a clear finish over time. For tile, resealing grout lines every few years keeps water infiltration at bay. A game-changing tip I adopted was to use a small, handheld orbital sander to refresh worn areas—this minimizes the need for full refinishing yet restores the aesthetic. Keep in mind, long-term results depend heavily on consistent care, such as regular cleaning, humidity control, and timely repairs. As technologies evolve, so do our options; I predict that integrated environmental sensors connected to smart home systems will dominate future flooring maintenance—making proactive care more accessible than ever.
How do I keep my floors working long-term?
Consistency is key: stick to a routine cleaning schedule, monitor environmental conditions diligently, and use the right tools for repairs. Remember, proactively addressing small issues prevents major damage later. If you’re serious about extending your floors’ lifespan, try implementing a moisture barrier beneath new installations and consider upgrading older floors with fresh sealants, following expert advice like these renovation tips. Prioritize long-term oversight by setting up a schedule—maybe quarterly—to inspect and maintain your floors using these recommended tools and methods. Doing so guarantees your investment will continue to pay off, providing both beauty and durability in your home environment.
After experiencing my own flooring nightmare, I realized that the most valuable lessons come from firsthand encounters with common pitfalls. One pivotal insight was that environmental awareness isn’t just about measuring humidity—it’s about integrating moisture control into every stage of your flooring project. By investing in reliable tools like hygrometers and dehumidifiers, I learned that proactive measures can prevent disaster before it starts. Also, understanding the subtle dance between subfloor movement and material flexibilities transformed my approach from reactive to preventive, saving me time, money, and headaches in the long run. Lastly, I discovered that the true secret lies in appreciating not just the craftsmanship of installation but also the environment in which that craftsmanship takes place—it’s the invisible partner that either supports or sabotages your flooring’s lifespan.