
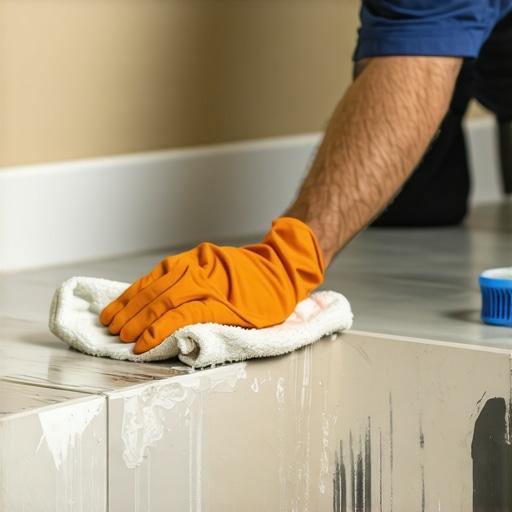
Have you ever scrubbed and scrubbed, only to find stubborn, damp grout smudges lingering on your baseboards after tiling? I still remember the frustrating moment when I realized the wet grout had left an unsightly stain, and no amount of cleaner seemed to do the trick. That’s when I had my lightbulb moment: what if I used a damp rag in a strategic way to tackle those messes efficiently?
Why Wet Grout on Baseboards Can Be Such a Headache
Getting grout right is already a delicate process—mistakes can lead to uneven joints or staining. But the real trouble begins after the grouting process, especially if you’re in a hurry or if the grout doesn’t dry as quickly as you’d like. Wet grout tends to smear onto nearby surfaces, particularly baseboards, which are often overlooked during cleanup. This can result in discolored streaks that are stubborn and difficult to remove later.
Transform Your Cleanup Routine with a Damp Rag Hack
In my experience, the key to keeping baseboards spotless after grouting is to act swiftly and with a simple tool—a damp rag. Instead of reaching for harsh chemicals or abrasive scrubbers, I found that lightly dampening a soft cloth and gently wiping the grout before it dries can eliminate most smudges completely. The trick is to keep the rag just moist—not soaked—and to wipe along the grout lines and baseboards before the grout sets.
This method is surprisingly effective because it prevents the grout from bonding onto the surface, making cleanup quick and fuss-free. Over time, I tweaked my technique by using a spray bottle filled with clean water to mist the area, ensuring the rag stays consistently damp. A few wipes later, the smears disappeared, and I avoided hours of tedious scrubbing.
Now, I know you might be skeptical—”Does this really work? Is it worth the extra step?”—and I get it. I was once in your shoes, worrying about whether my efforts would pay off. The good news is, **yes, it actually works**. However, early in my DIY journey, I made the mistake of waiting until the grout dried completely—thinking I could clean it better once hardened. That was a mistake because dried grout sets into surfaces, making stains much harder to remove. For dependable results, act quickly. You can read more about common flooring installation mistakes and how to avoid them [here](https://tiletrendshop.com/flooring-installation-mistakes-to-avoid-for-lasting-results).
In the next section, we’ll explore the step-by-step process to implement this hack effectively, even if you’re short on time or dealing with stubborn stains. Ready to keep your baseboards looking pristine after your next tiling project? Let’s dive into the practical steps that turn this simple trick into your new cleaning ritual.
Before you begin, clear the area around your baseboards and gather your supplies: a spray bottle filled with clean water, a soft microfiber cloth, and optionally, a towel for drips. This setup ensures quick access and minimizes disturbance once you start cleaning.
Start by lightly misting the grout lines and adjacent baseboards using the spray bottle. Hold the bottle about 6 inches away and spray a gentle, even mist—think of it as giving your workspace a light dew. Avoid saturating the area to prevent excess water from seeping into the floor joints or baseboards. Immediately, use the damp microfiber cloth to gently wipe along the grout lines and baseboards. Picture yourself as a painter delicately touching up dry paint—not scrubbing, but softly gliding to lift the smears. This action prevents the grout from bonding, stopping smudges before they set.
Timing is critical. Act within 10-15 minutes of applying the grout. When I tackled my bathroom project, I misted and wiped in small sections—about a 3×3-foot area—to stay efficient. I learned that if I waited too long, the grout would start to dry, making removal harder. During one mishap, I delayed wiping for 30 minutes, and the dried grout left stubborn stains on my baseboards, requiring harsher cleaning later. Incorporate a habit: mist, wipe, then move to the next section. This keeps the grout moist and manageable.
Don’t be tempted to squeeze out the cloth too much; keep it damp, not dripping. After each wipe, rinse or switch to a clean section of your cloth to avoid redistributing grime. When I first did this, I noticed that a damp, not soaked cloth ensured gentle removal without spreading stains. Also, keep a towel nearby to quickly blot any excess water, especially if you see pooling. This quick management prevents water damage or lingering dampness, which could affect your floor’s finish.
If small stains persist, lightly dampen a soft-bristled brush or a toothbrush and gently scrub the area. I found that a gentle brushing motion was perfect for stubborn grout smears, especially in tight corners. Think of it as a delicate massage for your grout lines, loosening dried or cured grout remnants without harming the surface underneath. Be cautious—exert minimal pressure to avoid scratching or dislodging tiles.
One mistake is waiting until the grout dries completely before cleaning. Dry grout is much more difficult to remove and may require harsh chemicals or abrasive scrubbing, risking damage to your baseboards or tiles. Always work swiftly—act within the window of grout’s tacky phase for best results. Also, avoid over-saturating the area, which can lead to seepage and potential warping of baseboards or damage to the subfloor.
During my last backsplash project, I applied this method on a tight schedule. As I tiled, I periodically misted and wiped the grout lines and baseboards, which kept the smears minimal. Later, a quick wipe with a damp cloth restored a crisp, clean look—even on the more textured grout joints. The result was a professional-looking finish, achieved without heavy scrubbing or chemical cleaners, saving me time and effort.
For more detailed insights into flooring techniques, check out this comprehensive guide to floor leveling [here](https://tiletrendshop.com/the-ultimate-guide-to-floor-leveling-for-a-perfect-finish). Implementing this damp rag method will not only streamline your cleanup but also preserve the beauty of your new grout lines, ensuring a lasting, pristine finish in your home.
Many homeowners believe that choosing high-end materials or following standard installation procedures guarantees a flawless floor. However, even seasoned professionals can fall prey to misconceptions that compromise the longevity and appearance of your flooring. Let’s investigate some of the most overlooked nuances that can cause costly mistakes and how to avoid them.
Why Thinking All Subfloors Are Equal Could Sabotage Your Project
One of the biggest myths is that every subfloor surface is suitable for any type of flooring. In reality, different subfloor materials—like concrete, plywood, or existing vinyl—have distinct moisture levels, flatness, and adhesion properties. Failing to assess and prepare the substrate meticulously often leads to issues like tile lippage, hardwood buckling, or vinyl warping. For example, not addressing moisture content with a proper vapor barrier can cause hardwood floors to cup or delaminate over time. This nuance emphasizes the importance of comprehensive subfloor evaluation, which experts recommend checking with tools like a moisture meter before any installation. You can learn more about perfecting floor leveling techniques [here](https://tiletrendshop.com/the-ultimate-guide-to-floor-leveling-for-a-perfect-finish).
Assuming Thinset Is One-Size-Fits-All
A common mistake among DIYers and even some pros is using a generic thinset mortar without considering the specific tile type or the environment. For instance, porcelain tiles require a different bonding approach than natural stone, and indoor installations demand a different mix than outdoor projects exposed to freeze-thaw cycles. The wrong thinset can lead to cracking, hollow sounds, or tiles popping loose. It’s crucial to select a thinset with the right flex, adhesion, and moisture resistance, tailored to the project. Not doing so can mean repeating costly work or facing premature tile failure. For detailed advice, consult comprehensive installation pointers [here](https://tiletrendshop.com/tile-installation-pointers-that-save-time-and-money).
Why Overlooking Climate’s Role Undermines Your Flooring
Many people underestimate the impact of seasonal and humidity fluctuations on their floors. Engineered hardwood, for example, is often praised for stability, but in high-humidity areas, it can still experience buckling or gapping if not properly acclimated. Conversely, solid wood tends to react more dramatically to moisture changes. Ignoring humidity levels during installation or neglecting to use appropriate underlayment can result in dimensional instability over time. A smart move is to monitor environmental conditions and let the flooring acclimate for the recommended period—usually several days—before installation. This step is vital for lasting beauty and structural integrity; learn more with expert tips on hardwood care [here](https://tiletrendshop.com/hardwood-floor-care-secrets-to-longevity-and-shine).
What’s the Real Cost of Skimping on Preparation
Cutting corners during prep work is the sneakiest way to doom your flooring project. Skipping proper sanding of uneven subfloors, neglecting moisture barriers, or ignoring the necessity of expansion gaps might save time initially but will lead to stubborn issues later. These problems often manifest as cracked tiles, gaps in hardwoods, or squeaky floors that persist despite repairs. Ensuring meticulous surface preparation and following best practices, such as using a leveling compound or installing a slip sheet, can dramatically extend your flooring’s lifespan. For detailed guidelines about avoiding common pitfalls, check out this resource on installation mistakes [here](https://tiletrendshop.com/flooring-installation-mistakes-to-avoid-for-lasting-results).
Make no mistake—understanding these nuanced aspects of flooring installation can save you money, prevent frustration, and result in a durable, stunning finish. Think beyond the basics and arm yourself with expert knowledge to make informed decisions every step of the way. Have you ever fallen into this trap? Let me know in the comments.
Gear Up with Precision Tools for Lasting Results
When it comes to flooring installation and maintenance, having the right equipment can make the difference between a durable, flawless floor and ongoing headaches. I personally rely on a high-quality laser level, like the Bosch GLL3-330CG, because its three-plane leveling ensures absolute accuracy across large surfaces—crucial when aligning tiles or hardwood planks. Unlike traditional bubble levels, laser levels provide consistent, hands-free reference points, saving time and reducing errors. I also recommend investing in a reputable moisture meter, such as the Tramex CME5, to monitor subfloor and material moisture levels. This prevents common issues like buckling or warping caused by neglected moisture control, especially when working with engineered hardwood or tile adhesives. As trends move toward smart, integrated tools, expect more devices to connect via Bluetooth, offering real-time data and calibration alerts—making your troubleshooting more precise and efficient.
Methodical Cleaning with Advanced Techniques
Beyond tools, the maintenance routines you adopt can extend the lifespan of your flooring. I find that using a spray bottle to mist cleaning solutions like a mixture of water and a few drops of gentle pH-neutral cleaner helps prevent grout smudges and dirt buildup. This aligns with expert advice found in Revamp Your Home With Expert Flooring Installation Tips, emphasizing that controlled moisture is vital for preserving tile and hardwood finishes. Additionally, a microfiber mop offers gentler handling, reducing micro-scratches and keeping surface gloss intact. As tools like robotic vacuums become smarter, I foresee a future where integrated cleaning systems continuously monitor and maintain floor health, alerting you to issues before they escalate.
How do I maintain my flooring over time?
Consistent inspection and preventive care are key. Regularly check for high traffic wear, especially in entryways, and consider applying protective coatings periodically. Invest in quality floor refinishing products, like those recommended in Mastering Hardwood Floor Refinishing, which can restore luster and seal the surface against moisture and scratches. Implementing a routine of gentle cleaning, prompt repair of minor damages, and careful furniture placement can dramatically extend your floor’s aesthetic and structural integrity. Remember, small maintenance steps now can prevent costly repairs later, ensuring your investment pays dividends in beauty and durability. For expert advice on avoiding common mistakes that compromise flooring longevity, check this guide here.
Choosing the Right Maintenance Tools for Long-Term Success
My go-to tools also include a handheld orbital sander with fine-grit pads for minor touch-ups on hardwood floors, and a quality floor buffer for polishing. These tools allow me to handle wear and tear efficiently, restoring surfaces to their original shine without the expense of full refinishing. As technology advances, expect smart dust mops equipped with sensors to identify dirt buildup and prompt cleaning, further simplifying long-term upkeep. The key is to select equipment calibrated for your specific flooring type—natural wood, engineered, tile, or vinyl. Proper maintenance not only improves appearance but also prevents issues like gaps, warping, or staining, especially in environments with fluctuating humidity or temperature fluctuations. Make a habit of scheduled inspections and care routines, and your floors will reward you with years of beauty. You might want to try out a professional-grade floor stripping kit to rejuvenate tired finishes. That method, combined with regular cleaning, keeps your space inviting and resilient.
What I Wish I Discovered Sooner About a Perfect Floor Finish
One of the most valuable lessons I learned was that preparation is everything. Skipping the thorough assessment of your subfloor or underestimating the importance of proper moisture control can lead to cracks, uneven surfaces, or even costly replacements down the line. The moment I started prioritizing detailed inspections and using the right tools, my projects became more predictable and professional-looking. Trust me, investing that initial time and effort saves you endless headaches later.
My Go-To Resources for Flooring Success
Having the right tools and references transforms a daunting project into an achievable one. I rely heavily on the comprehensive guides from Revamp Your Home With Expert Flooring Installation Tips for detailed techniques, especially for tricky tasks like leveling and grout finishing. For measurement precision, I swear by the laser levels from that brand. Additionally, avoiding common mistakes guide has saved me from many rookie errors, making my work more durable and aesthetically pleasing.
Let Your Flooring Dreams Drive Action
Every successful flooring project begins with confidence and a willingness to learn and adapt. Whether you’re leveling a subfloor or installing hardwood, remember that patience and attention to detail will reward you with stunning results. Don’t shy away from experimenting with new techniques or seeking advice—your home will thank you for it. Take that first step today and transform your space into the masterpiece you’ve envisioned. You’re capable of creating truly seamless floors that last for years to come.
What’s the biggest challenge you’ve faced when leveling or installing floors? Share your experience below—I’d love to hear your story and offer tips to help you succeed!