
Ever found yourself stepping over a transition strip and hearing that dreaded click or pop, only to see it bounce right back out of place? I know that frustration all too well. The first time it happened to me, I was convinced I’d done something wrong during installation—until I realized it’s a surprisingly common issue many homeowners face. That lightbulb moment made me dive deep into the causes and solutions, saving me from constantly fussing over my floors and reinvesting in the elegance I had envisioned.
Don’t Let Transition Strips Ruin Your Flooring Look
Transition strips are essential for creating a seamless flow between different flooring types or hiding unsightly gaps. But when they keep popping out, it not only disrupts your aesthetic but also raises concerns about the stability and durability of your flooring setup. If you’ve been pulling at your strip only to have it stubbornly come loose again, you’re not alone. This persistent problem often stems from simple installation mistakes or overlooked flooring conditions, but the good news is—I’ve discovered some effective fixes that can make your transition strips stay put for good.
Is Your DIY Approach Dooming Your Strips to Failure?
Early on, I made the mistake of assuming that a quick misaligned nail or a shallow adhesive application would do the trick. Instead, I ended up with strips that loosened after a few days, especially in high-traffic areas. It wasn’t until I learned about proper subfloor preparation and the importance of appropriate adhesive techniques that I finally saw lasting results. Don’t make the same mistake—check out this guide to learn more about preparing your subfloor correctly.
What Causes Transition Strips to Pop Out?
Start with a Solid Foundation
Before installing or reattaching transition strips, ensure your subfloor is perfectly level. An uneven surface is like trying to glue two mismatched puzzle pieces—inevitably leading to pops and loosening. Use a high-quality floor leveler, following this comprehensive leveling guide to smooth out bumps and dips. Applying the leveler with a margin trowel allows for precise spreading, ensuring a flat surface that will keep your strips secure over time.
Prepare the Surface Thoroughly
Clean the area meticulously. Remove all dust, debris, and grease that could compromise adhesion. Think of it as preparing a canvas before painting—free of obstacles. Vacuum thoroughly, then wipe with a damp cloth. For stubborn residues, a mixture of rubbing alcohol can help create a pristine surface. Proper preparation is crucial for the adhesive to bond strongly, preventing future popping or curling.
Choose the Right Adhesive and Fasteners
Picking the appropriate adhesive depends on your floor type. For hardwood and laminate, a strong construction adhesive like polyurethane works well; for tile transitions, builders’ adhesive with high grip is ideal. Use a caulking gun to apply a uniform bead along the entire length of the strip’s groove. For added durability, consider screws or nails—drill pilot holes first to avoid splitting the material. When screwing into the subfloor, ensure the fasteners are spaced evenly to distribute stress across the strip evenly.
Apply and Clamp for a Tight Bond
Press the transition strip firmly into place, ensuring it seats fully into the adhesive and rests flush with adjacent flooring. Using clamps or heavy weights can help maintain pressure while the adhesive cures—think of it as giving the strip a firm hug. For longer strips, work in sections to prevent shifting or air pockets. Allow adequate drying time, typically 24 hours, before subjecting the strip to foot traffic or stress.
Secure with Mechanical Fasteners
If your floor and strip material permit, add mechanical fasteners for extra hold. Drill small pilot holes at regular intervals—every 12 to 16 inches—through the strip into the subfloor or beneath layer. Insert nails or screws, then countersink and fill with matching putty to make them invisible. This technique is particularly effective in high-traffic areas, providing insurance against stubborn pops or lifts.
Tackle Common Challenges
In areas with expansive hardwood, leaving an expansion gap is vital. This space accommodates natural wood movement, preventing buckling or lifting of the transition strips. Use spacers during installation to maintain consistent gaps. For uneven edges or existing pops, carefully remove the strip, re-level the subfloor if necessary, then repeat the adhesion and fastening process.
Verify and Finish the Installation
Once installed, walk along the strip to test stability. Gently lift and reseat any sections that feel loose, adding more adhesive or fasteners as needed. Seal the edges with matching caulk or sealant to prevent dirt accumulation and moisture seepage. Regular inspections and maintenance will extend the life of your transition strips, keeping your flooring seamless and beautiful.
Many homeowners and even seasoned installers forget that the devil is in the details when it comes to flooring. For example, a common myth is that applying a thicker layer of adhesive ensures better bonding. In reality, using excessive adhesive can lead to uneven surfaces and future adhesion problems. The key is mastering proper application techniques, such as precise bead size and placement, which significantly impact the longevity of your flooring. Professionals often emphasize that instead of rushing, taking the time to prepare surfaces meticulously—like ensuring the subfloor is thoroughly cleaned and properly leveled—is what separates a good installation from a great one.
Why Does Floor Leveling Sometimes Fail Despite Following the Manuals?
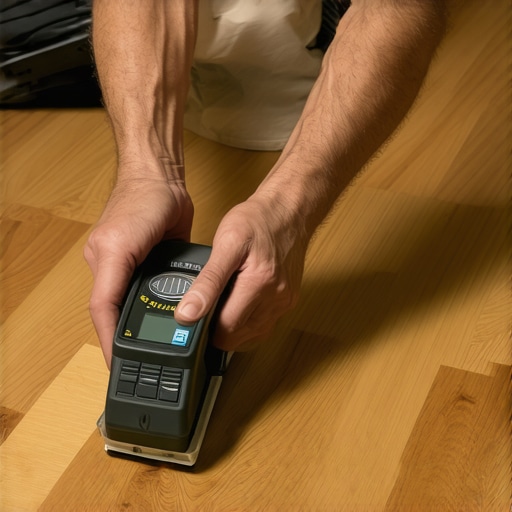
In my experience, one overlooked aspect is substrate compatibility. Using the wrong type of leveling compound on a damp or incompatible surface can cause failure, like peeling or cracking over time. Experts recommend testing your substrate with a moisture meter before applying any leveling product, as moisture can be a hidden culprit behind uneven floors or future issues. According to industry research, incorrect substrate preparation accounts for nearly 35% of flooring failures, highlighting the importance of expert-level surface assessment before installation. Remember, a flawless floor begins not just with great materials but with understanding their interaction with your specific environment. If you’d like to master these advanced techniques, start by reviewing this guide on floor leveling mastery. And as always, don’t forget that attention to detail—like choosing the right primer or ensuring the proper drying time—is what elevates your results from average to professional-grade. Are you aware of the nuances that can make or break your flooring project? Share your experiences below!
Keep Your Floors in Prime Condition with the Right Tools
Maintaining your flooring’s beauty and functionality over time hinges on using the proper equipment and adopting precise techniques. I personally rely on a high-quality moisture meter like the Tramex CME4 before any refinishing or installation project. This tool helps me detect hidden moisture issues in subfloors, which, if overlooked, can lead to future buckling or staining, especially in areas prone to humidity fluctuations. Incorporating such assessments early ensures your floors remain stable and durable for years.
For leveling, I prefer a professional-grade self-leveling compound like those from this trusted resource. Using the right mixing paddle and applying it with a vibratory screed guarantees a flat, reliable surface — essential for both tile and hardwood installations. My method involves pouring the mixture in sections, then spreading with a carbon-tipped trowel, which smooths out the compound faster and reduces air pockets.
In terms of tools for long-term care, I swear by microfiber pads and a damp mop infused with a gentle pH-balanced cleaner—this combination prevents wax buildup and keeps finishes shining without stripping protective coatings. Regularly inspecting seams, edges, and high-traffic zones allows me to catch issues early before they escalate. Maintaining floors is less about big fixes and more about consistent, attentive care.
Where to Invest for Future Improvements
Opting for versatile, durable tools can save substantial time and money in the long run. For example, upgrading to a heavy-duty orbital sander makes refinishing hardwoods more efficient and less labor-intensive, preserving the wood’s integrity during smoothing phases. Advanced moisture barrier products—like vapor emission inhibitors—are also something I recommend embracing for basements or slab installations; they significantly reduce the risk of moisture-related problems down the line. As technology advances, expect smart sensors that monitor humidity and temperature, alerting you to potential issues before damage occurs.
How do I maintain flooring installation and leveling over time?
Ensuring longevity starts with meticulous initial work—thorough surface prep and precise leveling techniques are non-negotiable. Once installed, regular cleaning with non-abrasive tools and timely touch-ups of gaps or scratches keep your floors looking pristine and functional. When considering scaling up your project, such as expanding hardwood or adding new tile sections, always invest in professional consultation or detailed guides like this comprehensive resource. It will help you avoid common pitfalls and uphold a seamless aesthetic as your space evolves.
Remember, mastering the right tools and adhering to proven methods will pay dividends by extending the life of your floors. Don’t hesitate to leverage expert techniques—try implementing a moisture barrier or precise leveling for your next project and experience the difference firsthand.
Lessons from My Flooring Journey That No One Tells You
- One of the toughest lessons I learned was the significance of substrate integrity. Even the most perfect adhesive or fastener won’t hold if your subfloor isn’t properly prepared, which is something professionals emphasize but DIYers often overlook. A quick moisture test can reveal surprises like hidden dampness that undermine your entire project.
- Another insight is about patience—allowing ample drying time isn’t just a recommendation; it’s a game-changer. Rushing adhesives or leveling compounds often leads to pops, and addressing them later costs more effort and expense.
- I also discovered that using the right tools makes a world of difference. Investing in a quality leveler or moisture meter has saved me countless rework hours. They are the secret weapons behind a flawless flooring result.
- Lastly, understanding the natural movement of wood through expansion gaps is vital. Ignoring this causes your beautiful hardwood to buckle over time, turning a simple installation into an ongoing headache. Learning these nuances has transformed my approach from amateur to confident professional.
My Go-To Resources That Elevate My Flooring Skills
- This guide on floor leveling has been instrumental in helping me master subfloor prep. It breaks down complex techniques into simple steps, which is invaluable for DIY enthusiasts aiming for professional results.
- The precise leveler application methods from industry leaders have taught me how to achieve a super flat surface, critical for both tile and hardwood installations.
- For routine maintenance, I rely on this hardwood care guide to keep floors looking new and prevent small issues from escalating.
- Finally, I always check moisture levels with a trusted moisture meter before starting any project—early detection can save costly repairs later.
Take Action and Transform Your Floors Today
Remember, the secret to stunning flooring transitions lies in attention to detail. Every step—be it proper surface prep, choosing the right adhesive, or understanding wood movement—builds toward a seamless, durable finish that elevates your entire space. Don’t wait for problems to surface; equip yourself with the right knowledge and tools now, and enjoy the satisfaction of a job well done. Your floors will thank you for it! What’s the biggest flooring challenge you’ve faced so far? Share your story below and let’s learn together!