
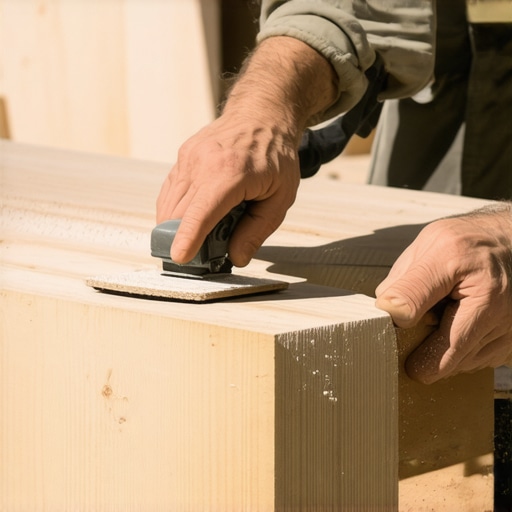
Have you ever gone to sand a stair tread, only to discover that your efforts left unsightly scuff marks on the delicate face of the riser? I’ve been there—thinking I had a straightforward job, only to realize I’d turned a simple project into an unintended nightmare. That lightbulb moment when I saw the scratches I couldn’t undo made me realize just how tricky it is to finesse stair sanding without damaging neighboring surfaces.
Fortunately, over years of working on renovation projects, I’ve uncovered some effective techniques to keep that riser face pristine while giving the tread the smooth finish it deserves. Today, I promise to share real-world tips and tricks to help you sand your staircase like a pro, avoiding those pesky scuffs that can ruin your entire look.
Why It’s Harder Than It Looks to Sand a Stair Tread Without Scuffing the Risers
Sandpaper can be a double-edged sword. It’s an essential tool for smoothing out rough patches, but it’s also the culprit behind unwanted scratches when mishandled. The biggest challenge? Managing your grit and grip so that only the tread gets the attention—without inadvertently smashing into the riser face.
One mistake I made early on was using a bulky sanding block that simply couldn’t reach the tight corners and edges. That resulted in accidental scuffing, and some of my best work was marred by simple oversight. It’s a common rookie slip that even seasoned DIYers can fall into, especially when rushing through projects.
Research supports this—poor sanding techniques can compromise your finish and even weaken the wood over time. The key is patience, precise control, and the right tools, which I’ll dive into next. If you’ve faced the frustration of trying to make a staircase look perfect only to see minor scratches, you’re not alone. And better yet, I’ll show you how to avoid these pitfalls altogether.
For more tips on maintaining hardwood floors and flawless finishes, check out this comprehensive guide on hardwood floor care here. Now, let’s move from the why to the how—getting those treads smooth without sacrificing the riser’s face.
Secure Your Work Area and Prepare Tools
Start by protecting nearby surfaces with painter’s tape on the riser edges. Gather a fine-grit sandpaper (120-220 grit) and attach it to a sanding block or use hand-held sanding sponges for better control. Always wear dust masks and safety glasses to keep your workspace safe.
Use Precision and Control During Sanding
When sanding the tread, apply gentle, even pressure—think of guiding a brush across canvas, not scraping a wall. I recall the time I started with a heavy hand, causing gouges; switching to light strokes with a T-handle sanding block transformed my results and minimized risks. Maintain a consistent angle and avoid pressing down hard, letting the abrasive do the work.
Follow a Systematic Sanding Pattern
Begin at one edge of the tread and work across in parallel strokes, overlapping slightly to ensure even coverage. For the corners and hard-to-reach spots, use a flexible sanding sponge or a small detail hand pad. This approach avoids uneven surfaces that can become trip hazards or look unprofessional.
Control Grit Progression and Keep the Surface Clean
Start with a coarser grit (around 120) to smooth out rough patches, then move progressively to finer grits (220 or higher) for a polished finish. Regularly sweep or vacuum the sanding debris to prevent particle buildup that can cause scratches. Remember, patience here pays off—rushing can lead to unevenness and accidental damage to the riser face.
Protect Adjacent Surfaces During Finishing
For delicate areas like the riser face, hold a piece of painter’s tape or a cardboard shield close to the surface to catch stray particles. During my last project, I held a stiff piece of cardboard against the riser while sanding the tread, which prevented scratches and saved hours of touch-up work. After sanding, remove the tape gently to avoid peeling any finish or paint.
Final Inspection and Spot Touch-Ups
Once you’ve finished, examine the surface with raking light—hold a flashlight at a low angle across the treads. Look for any scratches or uneven spots. Use fine grit sandpaper to buff out minor imperfections—think of it as polishing a gemstone. This meticulous step ensures your staircase looks flawlessly finished and professional.
Applying these disciplined sanding techniques eliminated my past issues with scuffed risers and uneven steps. For detailed guidance on ensuring your entire flooring installation turns out just right, explore the comprehensive installation mistakes to avoid. Mastering control, patience, and precision are the keys to achieving a smooth, durable finish that stands the test of time.
When it comes to flooring installation, many DIY enthusiasts and even some professionals fall prey to misconceptions that can compromise the lasting beauty and durability of their floors. One widespread myth is that leveling subfloors is always necessary before installing hardwood or tile. In reality, minor irregularities often can be mitigated with proper techniques like feathering the edges or using flexible mortar beds, avoiding unnecessary and costly prep work. Overlooking foundational issues, however, can lead to uneven surfaces and cracked tiles over time, which is why mastering precise floor leveling techniques is crucial for enduring results.
What advanced strategies ensure flawless leveling in challenging subfloor conditions?”
Another common error revolves around misconceptions about hardwood flooring acclimatization. Many assume that exposing hardwood planks to the environment for a few hours suffices, but experts emphasize a more nuanced approach. Proper acclimatization depends on your climate, moisture levels, and the specific wood species, often requiring days of controlled environment conditioning to prevent cupping or bowing later. This depth of knowledge is backed by research from industry leaders like the hardwood flooring associations. Failing to heed these nuances can result in costly repairs, so understanding the subtle factors that influence hardwood performance is essential.
How do climate control and wood type influence acclimatization periods for hardwoods?”Similarly, the common misconception with tile installation hinges on the choice of adhesive. Many believe that standard thinset mortar is universally suitable, but the reality is more complex. For large format tiles or uneven surfaces, a flexible, high-performance adhesive ensures better adhesion and crack prevention. Moreover, selecting the right grout width and type contributes significantly to the aesthetic and longevity of your tile work. Going beyond the basics, professional tips recommend considering expert approaches to grout selection and application. Recognizing these subtle distinctions can mean the difference between a flawless finish and recurring issues. Don’t overlook the importance of tailored materials and techniques for the best long-term results. If you’re eager to elevate your expertise even further, exploring innovative tile design ideas can inspire your next project. Have you ever fallen into this trap? Let me know in the comments.Maintaining Your Flooring for the Long Haul
Investing in quality tools is the first step towards ensuring your flooring remains pristine over time. Personally, I recommend a high-grade belt sander with variable speed control. It offers refined adjustments that help prevent gouges or uneven surfaces when refacing hardwood, especially in tight spots or detailed moldings. Pair it with a dust extraction vacuum like the Festool CLEANTEC, which captures fine particles and minimizes cleanup, preserving your work environment safety and cleanliness.
Alongside power tools, having precise hand tools like a rubber grout float ensures meticulous application and touch-ups, reducing the chance of blemishes or uneven grout lines in tile installations. My go-to is the QEP 4-inch Elite Grout Float because its soft grip and sturdy foam pad give me control and comfort during extended use.
Adapting to Future Trends in Flooring Care
The trend is shifting towards smarter maintenance with app-connected tools and eco-friendly materials. For example, automated floor sensors that detect moisture levels can alert you before water damage occurs, especially critical for hardwood and tile areas prone to humidity fluctuations. Additionally, advances in biodegradable sealants extend the lifespan of surfaces without harming the environment, aligning with consumer awareness of sustainable living.
How do I keep my floors looking their best over time?
One effective technique I’ve adopted is regular deep cleaning using steam cleaners designed for hardwood and tile. The hardwood floor care secrets detail how low-moisture steam cleaning can remove ingrained dirt without stripping finishes, thereby prolonging their original luster. Remember, a consistent cleaning schedule combined with strategic sealing helps prevent dirt buildup and moisture penetration, both enemies of long-term flooring health.
Don’t Overlook Maintenance for Floors with Multiple Materials
Mixing hardwood and tile in open-concept interiors requires tailored approaches. Use different cleaning tools for each surface—soft microfiber mops for hardwood, and stiff-bristled brushes for grout lines—so you don’t damage delicate finishes or dislodge grout. Periodically inspect seals and caulking around transitions, resealing as necessary to prevent moisture ingress. This proactive care is critical to keep the joint areas from deteriorating prematurely.
In the future, innovations like nanotechnology-based sealers are emerging, offering super-durable protection that can withstand decades of wear. Experimenting with these new materials can be a game-changer for those looking to extend their floors’ life.
_Try applying a high-quality, eco-friendly sealer to your hardwood or tile areas this month. The benefits are noticeable: improved resistance to stains, scratches, and moisture. For a comprehensive guide on surface sealants, visit flooring fundamentals. Regular maintenance, combined with the right tools and techniques, ensures your investment lasts well beyond initial installation, saving you time and money in the long run.
What I Wish I Knew Before My First Floor Makeover
One of the biggest lessons I learned was the importance of patience and taking the time to understand the specific materials and techniques involved in flooring and tile work. Rushing often leads to mistakes like uneven surfaces or damaging delicate finishes. Embracing a meticulous mindset, especially during leveling and sanding, can save countless hours of troubleshooting later.
Another insight was realizing that not all tools are created equal. Investing in high-quality, tailored equipment—like a variable-speed belt sander or a flexible grout float—makes a significant difference in achieving professional results. Cutting corners with cheaper tools often results in more work fixing avoidable errors.
Lastly, I discovered that the smallest details, such as properly protecting adjacent surfaces during sanding and applying the right sealants, define the lasting beauty of a project. Overlooking these nuances can compromise even the best craftsmanship, so attention to detail is non-negotiable.
My Go-To Resources for Flooring and Tile Success
For comprehensive guidance, I rely heavily on trusted sources like this detailed guide on installation mistakes. It covers common pitfalls and offers practical solutions that save time and money. Additionally, the hardwood floor care secrets resource provides expert tips on maintaining finishes and preventing issues like cupping or scratching. When selecting tools, I opt for brands recommended by industry pros, such as Festool for dust extraction and high-quality hand tools designed specifically for precise sanding and finishing.
Furthermore, staying updated with the latest innovative materials—like nanotech sealers or eco-friendly adhesives—keeps my projects ahead of trends and ensures durability. Exploring these resources and tools continuously elevates my craft and results in floors that truly stand the test of time.
Keep the Momentum Going: Your Next Floor Could Be a Masterpiece
Don’t let hesitation hold you back from creating the floor of your dreams. Every project is an opportunity to learn and refine your skills, transforming your living space into something remarkably personal and beautiful. Remember, the key lies in patience, attention to detail, and the willingness to invest in quality tools and resources. With consistent effort and a curious mindset, you’ll master the art of flooring and tile installation, ensuring stunning results that last for years to come.
What has been your biggest challenge when trying to achieve a flawless floor finish? Share your experiences below—I’d love to hear your story and help you troubleshoot!