
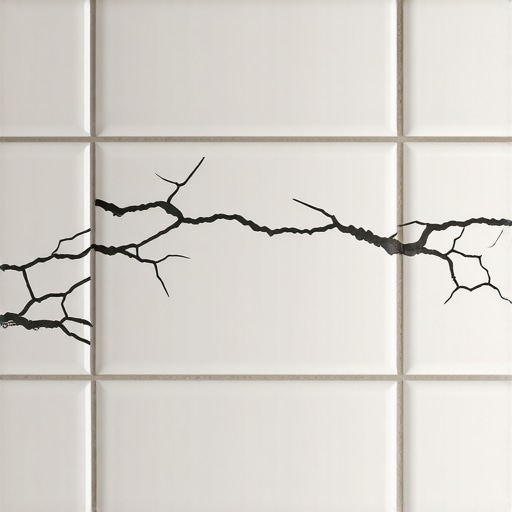
It was a chilly morning when I stepped into my bathroom and noticed a tiny crack snaking across my pristine porcelain tile. At first, I thought it was just a hairline, but as days went by, more cracks appeared, especially around the grout lines near the radiant heat panels. That was my lightbulb moment—realizing that my beautiful, warm floor was secretly working against me.
Dealing with Cracks in Porcelain Grout Caused by Radiant Heat
The truth is, radiant floor heating systems are fantastic for cozy mornings and chilly evenings, but if not installed or maintained properly, they can lead to unexpected problems like cracking grout. I’ve been there—struggling to figure out why my flawless tiling was developing these unsightly lines. Turns out, the culprit was uneven thermal expansion that put stress on the grout joints, causing them to crack over time.
If you’re experiencing something similar, don’t worry. Today, we’ll unravel the mystery behind these cracks and explore practical solutions to keep your floor both warm and intact. I’ll share what I learned from my mistakes and guide you through the steps to prevent or fix grout cracks caused by radiant heat.
Is Radiant Heating Really to Blame—or Just Bad Installation?
One of the first mistakes I made early on was assuming that radiant heating was just a miracle of modern comfort, without considering the underlying installation quality. Proper floor leveling plays a crucial role here. If your subfloor isn’t perfectly even, the heat can unevenly expand the tiles and grout, leading to cracks. It’s a common mistake I see homeowners make—think that just laying down tiles is enough.
According to experts, precise floor leveling and correct installation techniques minimize these issues significantly. For example, using self-leveling compounds correctly can be the difference between a durable surface and one that crumbles under heat stress. To avoid these pitfalls, I recommend reviewing the fundamentals of flooring installation and understanding how to achieve a perfectly flat surface before laying your tiles. You can find a detailed step-by-step guide on [flooring installation fundamentals](https://tiletrendshop.com/flooring-installation-fundamentals-leveling-for-a-seamless-look).
If this resonates with your experience, you’re not alone. Many homeowners overlook the importance of proper preparation, assuming that heating systems are foolproof. But as I learned the hard way, cutting corners can lead to costly repairs and frustration.
Next, let’s dive into practical strategies that I wish I knew from the start—techniques and tips to protect your grout from cracking when using radiant heat. Spoiler: It starts with setting the right expectations and following proven installation protocols.
Ensure Proper Subfloor Preparation Before Tile Installation
The first and most critical step is verifying your subfloor’s condition. A bumpy or uneven surface acts like a jarring road unevenly absorbing the thermal stresses from radiant heat, leading to grout cracks. I once tried installing tiles over a subfloor that hadn’t been sufficiently leveled, which resulted in visible cracks within months. To prevent this, use a laser level or a straightedge to identify high and low spots. If gaps exceed 1/8 inch, fill them with a high-quality self-leveling compound; I recommend reviewing the ultimate guide to floor leveling for detailed techniques. This ensures a flat, uniform surface resilient to heat expansion stresses.
Choose the Right Tiles and Expandability Features
Select tiles with properties suited for radiant heat, such as porcelain with low thermal expansion rates. Additionally, opting for tiles that are slightly larger allows for movement without cracking. When I upgraded my kitchen, I chose 12×24 porcelain tiles that are specifically rated for floor heating systems. Pairing these with a flexible thinset mortar, like one formulated for radiant heat, can absorb thermal shifts better—see professional installation strategies. This combination minimizes stress points, maintaining grout integrity over time.
Use Proper Adhesives and Grout Techniques
Applying the correct adhesive is vital. A high-quality, flexible thinset accommodates expansion without transferring stress to grout lines. I found that mixing my thinset to a consistent, peanut butter-like texture, checked via the trowel side test, resulted in fewer cracks. For grout, use a flexible, epoxy-based formulation or a polymer-modified grout designed for heated floors, which maintains elasticity when subjected to temperature changes. Apply grout in small sections, pressing it firmly into joints with a rubber float, then clean excess grout before it hardens. This meticulous process prevents gaps and cracks—see installation mistakes to avoid.
Control Temperature Gradually During System Activation
Rapid heating causes sudden expansion, which can crack grout. To prevent this, gradually increase your radiant system’s temperature over several days. I started by heating the system to 68°F for a few hours, then raised it by 5°F daily until reaching the desired setting. This slow ramp-up allows tiles and grout to adjust naturally. Never turn on your heating system at full blast immediately after installation, as this stress overload is a common cause of cracking. Consistent, slow temperature changes are your best defense—learn more about this approach in the expansion and contraction principles.
Implement Movement Joints and Expansion Gaps
Including movement joints in your tile layout provides designated zones for expansion, reducing stress on grout lines. When I installed tiles in a large open space, I incorporated silicone-filled joints along the perimeter and between large sections. These joints act as controlled escape points for thermal expansion. Additionally, leaving proper gaps around the room’s perimeter—about 1/4 inch—is essential, allowing the tile to expand without pushing against fixed boundaries. Cover these gaps with baseboards or transitional moldings to achieve a clean look, following advice from professional flooring guides. Proper planning of movement joints is a game-changer in maintaining grout durability under radiant heat.
Regular Maintenance and Inspection
Periodic checks ensure that thermal expansion isn’t causing damage unnoticed. If you notice hairline cracks developing over time, address them immediately with flexible grout sealers and repair kits to prevent worsening. I make a habit of inspecting my floors every six months, especially after seasonal temperature changes, to catch early signs of stress. This proactive approach extends the lifespan of your tiled surface and keeps your grout looking pristine for years—more maintenance tips can be found at hardwood and tile maintenance secrets.
Many homeowners believe that flooring installation is a straightforward process, but in reality, there’s a lot of nuance that can make or break your project. A frequent misconception is that using the thickest mortar or the most expensive tiles guarantees a perfect finish. However, **without proper floor leveling and understanding of material properties**, these superficial choices often lead to cracks, uneven surfaces, or premature wear. For example, installing large-format tiles on an uneven subfloor is a recipe for lippage and grout cracking, regardless of tile quality. To avoid these pitfalls, meticulous preparation is essential—start by verifying your subfloor with tools like laser levels, and consider professional-grade leveling compounds for a seamless surface. You can find detailed guidance on floor leveling techniques to ensure your foundation is truly flat before tile installation. Furthermore, many think that all grout is created equal; in fact, flexible, polymer-modified grout provides better adhesion and elasticity, especially in areas with radiant heating, preventing cracks over time. Choosing the right materials, combined with proper installation practices, can save you thousands in repairs. A common trap is rushing the process—applying grout immediately after setting tiles without waiting for the adhesive to cure can cause shifting and cracks. Always follow manufacturer guidelines for drying times and temperature conditions. Remember, a flawless floor isn’t just about aesthetics; it’s about understanding and executing these intricate steps correctly. With the right knowledge and approach, you can transform your space into a durable, elegant haven. Want more tips on perfecting your flooring projects? Dive into our comprehensive guides or reach out for expert advice. Have you ever fallen into this trap? Let me know in the comments.Maintaining your flooring’s integrity over the years requires more than just routine cleaning; it involves selecting the right tools and adopting proven techniques. When I started refinishing my hardwood floors, I realized that investing in quality equipment drastically reduced my long-term costs and improved results. For instance, a high-quality belt sander with variable speed control allowed me to strip finishes smoothly without damaging the wood, making the process faster and more controlled. Additionally, a dust extraction system connected to the sander kept my workspace clean, preventing dust from settling into tiny crevices, which could compromise the finish’s adhesion. When it came to leveling uneven subfloors, I relied on a laser level and a long straightedge—these tools provided precise measurements, ensuring the surface was truly flat before laying new tiles or refinishing hardwoods. These tools don’t just improve accuracy; they save time and frustration during installation and maintenance phases.
Unveiling Hidden Lessons: What I Rarely Share About Flooring Mishaps
One of the most enlightening moments in my flooring journey was realizing that even meticulous planning can fall prey to subtle mistakes. I learned that rushing through subfloor preparation often leads to cracks that seem minor but become major headaches later, emphasizing the importance of patience and precision. Additionally, I discovered that not all tiles or grout are created equal; choosing materials rated for radiant heat can save you from quick failures. The biggest revelation was understanding that gradual temperature adjustments are crucial—applying systematic heat builds resilience in your installation, preventing stress fractures. Lastly, consistent inspection isn’t just maintenance—it’s a proactive shield against unseen damage that can extend the longevity of your beautiful floors.