
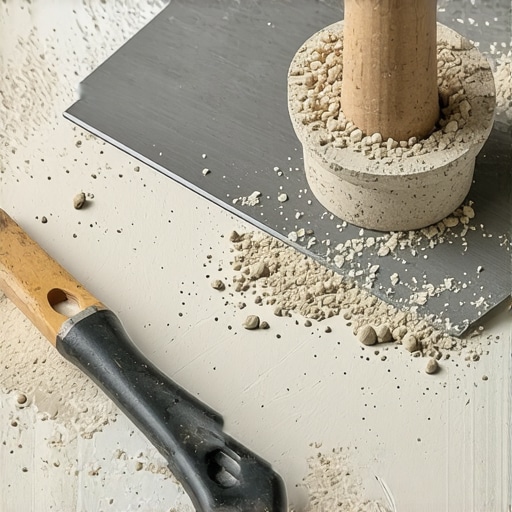
There was a moment during my first tile installation when I realized my thinset was too runny. I had just finished laying a row of tiles, only to watch them slip and slide before my eyes, jeopardizing hours of work and my confidence. That lightbulb moment made me realize how crucial the consistency of thinset really is, especially when it comes to the integrity of your flooring.
Why Getting Thinset Mixture Right Could Save Your Floor
If you’ve ever started a tiling project only to face uneven surfaces, cracked tiles, or lippage, chances are your mix was off. Trust me, I learned this the hard way — rushing through mixing thinset can lead to disastrous results. Today, I want to share with you a simple yet effective test I rely on every time to ensure my thinset is just right. This isn’t just about following rules; it’s about safeguarding your hard work and saving money in the long run. According to a study published by the Tile Council of North America, proper thinset adhesion is directly linked to correct mix consistency, which ultimately determines how well tiles will stay put over time.
Is the Trowel-Side Test Really Worth the Hype?
Early in my DIY days, I thought I could judge thinset by feel alone. Spoiler alert: I was wrong. I made the mistake of skipping precise tests, resulting in tiles that popped up after a few months. That’s when I discovered the value of the trowel-side test — a simple, no-fuss method to verify the mixture’s ideal state. If you’re wondering whether this quick check can truly make a difference, I promise, it does. Not only does it save you time and frustration, but it also helps you achieve professional-looking results that last. So, if you’ve faced issues with uneven tiles or cracking, keep reading; I’ll guide you through a straightforward process to master this essential skill.
Achieve the Ideal Thinset Consistency with Precise Mixing
Start by measuring your dry ingredients accurately; a digital scale ensures consistency. Mix the cement and water gradually, maintaining a thick, peanut butter-like texture—this prevents runny mixtures that cause slipping. Use a paddle mixer on a drill for uniform blending, avoiding lumps. I recall a time I used a hand trowel, which led to uneven consistency; switching to a paddle mixer drastically improved my results and saved me hours of rework.
Perform the Trowel End Tip Test
Once mixed, scoop a small amount onto your trowel, then flip it over. The thinset should stick without sliding off or dripping excessively. When I first tried this, I was surprised how a slight tilt revealed my mixture was too watery, causing tiles to shift during setting. Adjust water content or remix until the thinset clings well, ensuring stability during installation.
Test the Set Before Committing
Apply a small amount of thinset onto a scrap tile and press it against a piece of drywall or a test subfloor. Wait 10-15 minutes; if it doesn’t slump or sag, you’re on the right track. During my early projects, I skipped this step and faced tiles lipping within days. Testing allows you to catch and correct issues immediately, saving time and material in the long run.
Note on Working Time
Remember, fresh thinset remains workable for about 30-45 minutes, depending on temperature. Keep a watchful eye, especially during hot days, to avoid a mixture that sets too quickly, which impairs adhesion. I once rushed to install tiles on a hot afternoon, and the thinset dried before I could properly embed the tiles, leading to cracked grout and uneven surfaces. Proper timing ensures optimal bonding and a long-lasting finish.
Maintain Consistency Throughout the Project
Mix only as much thinset as you can use within its workable period. For large jobs, split your mix into smaller batches to prevent inconsistency. Use a clean, dedicated mixing bucket and paddle to avoid contamination. I learned this when mixing multiple batches in one container, which led to visible color differences and uneven setting times. Consistency makes the entire installation look professional and durable.
Adjusting the Mixture on the Fly
If you notice your thinset becoming too thick during application, add small amounts of water—never more than 5%—and remix thoroughly. Conversely, if it’s too runny, sprinkle in dry mortar mix and blend. This real-time adjustment keeps your mixture at optimal consistency, especially when working in variable conditions like changing humidity or temperature, which can affect drying times and adhesion quality.
Mastering these concrete steps turns a seemingly simple task into a reliable skill. Each adjustment and test ensures your tiles will stay put, straight, and last for years, ultimately saving you money and frustration. For more advanced techniques on surface preparation and installation, visit this guide on perfect floor leveling, which complements your thinset mixing skills.
Even seasoned professionals sometimes fall prey to misconceptions about flooring installation. One widespread myth is that leveling compounds alone can fix uneven subfloors, but in reality, understanding the root cause of unevenness is key to a durable finish. Many assume that simply screwing down loose subfloor panels is sufficient, yet neglecting proper assessment of underlying issues like moisture intrusion or structural shifts often leads to future buckling or cracks. As highlighted in expert studies on flooring longevity, addressing the underlying causes—not just surface symptoms—ensures a lasting, professional result. A frequently overlooked nuance is the importance of acclimating materials properly; rushing this step can result in gapping or warping later on, especially with solid hardwoods. What most people get wrong about tile and hardwood flooring is underestimating the complexity involved in creating a perfectly flat and stable surface. For example, many don’t realize that subfloor prep must include moisture testing and leveling with self-levelers that are correctly applied—including priming and meticulous spreading—to prevent issues like tile lippage or adhesive failure. Advanced installers also pay attention to expansion gaps and choose the right underlayment to accommodate room humidity variations, which is often skipped in DIY approaches. Have you ever fallen into this trap? Let me know in the comments. Making assumptions about the simplicity of flooring installation can cost both time and money. A mistake I see frequently is using the wrong trowel notch size, leading to inadequate thinset coverage, which compromises tile adhesion over time. For high-end floors, every detail matters—from surface flatness to proper sealing—so don’t overlook these critical steps. For in-depth guidance on achieving perfect flatness, I recommend consulting resources like this comprehensive floor leveling guide. Remember, mastering these advanced nuances transforms flooring from a novice attempt to a professional installation—saving you years of repair costs and frustration.
Keeping It Working: Essential Tools and Maintenance Strategies
Achieving a flawless flooring installation is only half the battle; maintaining it over the years ensures your investment continues to pay off. Personally, I rely on specialized tools that streamline maintenance tasks and prevent issues before they become costly repairs. For hardwood floors, a high-quality microfiber mop paired with a pH-neutral cleaner like these recommended products keeps the finish looking vibrant without damaging the wood. I also swear by a handheld dehumidifier in areas prone to moisture build-up, which helps prevent buckling or warping—common problems that emerge when humidity isn’t controlled.
For tile, a grout cleaning brush with stiff bristles allows for easy removal of grime buildup, extending the life of grout lines and preventing stains. I often incorporate a small steam cleaner for deep cleaning, but caution is advised to avoid excessive moisture, especially with older or porous tiles. A professional-grade self-leveling compound, stored properly in a sealed container, is invaluable for fixing uneven patches that develop over time, preventing trip hazards and cosmetic flaws.
How do I maintain my flooring efficiently over time?
Regular inspections are key. Schedule a quarterly check for loose tiles or creaky hardwoods—catching issues early saves big bucks. Employing preventive methods like felt pads on furniture prevents scratches on hardwood, while sealing porous tiles helps resist staining and moisture penetration. I also recommend refreshing expansion gaps periodically—dust and debris can accumulate, leading to uneven movement or buckling; vacuuming these gaps keeps the flooring stable. To stay ahead, consult updated guides such as this resource on proper leveling.
Looking toward the future, innovations like IoT-connected sensors might monitor environmental conditions automatically, alerting homeowners to humidity or temperature shifts that could harm the floor. Already, some advanced dehumidifiers with smart controls are marketing this feature—it’s a promising trend for proactive maintenance.
Don’t wait until small problems become major repairs. Implement a maintenance routine using these proven tools and methods, and you’ll extend the life of your floors significantly. For example, try using a microfiber mop combined with an appropriate cleaner this weekend to see immediate results. Keep your floors looking stunning and durable for years to come!
How I Learned the Hard Way About Surface Preparation
One of my most valuable lessons was realizing that rushing through subfloor assessment often leads to long-term problems like cracks or uneven tiles. The moment I took the time to identify moisture issues and address them properly, everything fell into place. Patience in this initial stage saved me from costly repairs later on, reinforcing that thorough surface prep truly means trouble avoided.
Tools and Resources That Elevated My Flooring Game
Investing in quality tools like a reliable moisture meter and a self-leveling primer changed how I approached installation. Additionally, I found that referencing comprehensive guides—such as this detailed floor leveling guide—offered insights far beyond basic tutorials. These resources became my secret weapons for achieving professional results without the need for expensive contractors.
Keep Pushing Your Flooring Skills Forward
The journey from DIY novice to confident installer is ongoing. Every project teaches me new nuances—like perfecting thinset consistency or mastering expansion gap maintenance—that make a real difference. Embrace the learning curve, and don’t hesitate to experiment with advanced techniques and tools. Your floors—and your pride—will thank you for it. Ready to elevate your flooring skills? Share your experiences or questions below so we can grow together!