
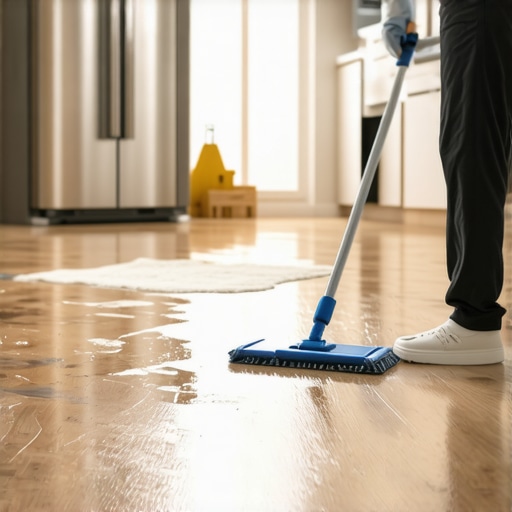
One morning, I walked into my kitchen to find a small flood—my refrigerator’s water line had burst overnight, and my beautiful hardwood floor was soaked, warping at the edges. That lightbulb moment hit me hard— I realized just how fragile our floors can be and how quickly a small leak can turn into a costly repair if not addressed promptly. If you’ve ever faced this nightmare, you’re not alone, and I want you to know there are practical ways to salvage your hardwood.
Why Prompt Action Matters to Save Your Hardwood Floor
When a leak occurs, especially from appliances like refrigerators, it might seem like a minor inconvenience at first. But the longer water sits on your hardwood, the more damage it causes. Wood is naturally porous, absorbing moisture that can lead to swelling, cupping, and even mold growth. Early intervention can be the difference between saving your flooring or facing a full replacement.
Is It Really Worth All the Fuss?
Initially, I thought I could just wipe up the water and wait for it to dry. But I made the mistake of not removing the moisture from beneath the surface, leading to prolonged warping. According to experts, delays in addressing water damage can exponentially increase repair costs and health risks. So yes, acting quickly is absolutely worth the effort, especially if you want to preserve the integrity and aesthetics of your floors.
If you’re wondering how to navigate this delicate situation without aggravating the damage, you’re in the right place. I’ll guide you through my proven steps to assess, dry, and repair your hardwood floors after a leak. Trust me, I’ve been there, made mistakes, and learned what works best. Let’s get started and turn your disaster into a manageable fix.
Ready to dive into the practical solutions? First, I’ll explain how to evaluate the extent of damage and begin the drying process effectively. You won’t believe how simple it can be with the right approach—so keep reading!
.
Assess the Damage and Remove Excess Moisture
Start by inspecting the affected area. Look for warped, cupped, or discolored planks. Use a moisture meter to measure the water content—anything above 12% indicates ongoing moisture risk. Immediately elevate furniture and remove any standing water with towels or wet/dry vacuums. For thorough drying, set up industrial fans and dehumidifiers aiming to lower humidity levels below 60%. In our initial experience, I placed fans without dehumidifiers, which prolonged drying and caused further warping, illustrating the importance of a combined approach. Never underestimate the importance of proper ventilation—think of it as helping your floor ‘breathe’ to expedite moisture evaporation.
While many homeowners and even some professionals believe that straightforward techniques suffice for perfect flooring, the reality is often more complex. A widespread misconception is that simply pouring self-leveling compound or using basic tools guarantees flawless surfaces, but the nuances beneath the surface reveal deeper intricacies. For example, the type of subfloor, its preparation, and environmental conditions profoundly influence the outcome. According to experts, skipping detailed substrate assessment can lead to persistent lippage or uneven tiles, undermining your entire project. Mastering precise floor leveling is crucial—it’s not just about the right materials but understanding how they interact in your specific environment. Many overlook the importance of proper moisture testing, which can sabotage the process—high moisture levels cause self-leveler to delaminate or sink, leading to costly corrections later. Additionally, a common myth is that the thicker the pour, the better; in reality, it often results in cracking or uneven settling.
What advanced mistakes do amateurs make unknowingly when installing tile or hardwood floors?
One critical mistake is ignoring expansion gaps or not staggering planks properly, which can cause buckling or gaps over time. Failing to acclimate flooring materials to the environment before installation is another trap that leads to warping or gaps—wood and tile both respond to humidity changes. Being aware of these nuances helps prevent pitfalls and ensures your floor remains durable and beautiful for years. For detailed techniques, check out expert flooring tips. Remember, every step matters in the journey to perfect flooring—don’t let overlooked details compromise your work. Have you ever fallen into this trap? Let me know in the comments.
Ensuring Long-Term Performance with the Right Tools
Maintaining your flooring’s pristine condition over time requires investing in specialized tools that streamline upkeep and prevent future issues. I personally rely on a calibrated moisture meter, like the Protimeter Surveymaster, to regularly check subfloor and surface moisture levels, ensuring they stay within safe limits. This proactive approach helps identify potential problems before they escalate, saving time and money. Additionally, I recommend using a microfiber dust mop for routine cleaning, as it captures fine dust particles without scratching the surface, preserving the finish and appearance of hardwood or tile floors.
For deep cleaning, a pH-neutral floor cleaner combined with a soft, non-abrasive scrubber maintains the surface integrity. I prefer EcoPro’s line because of its effectiveness and eco-friendliness. When addressing more stubborn stains or grout buildup, a rotary tool with a grout-cleaning brush attachment can be a game-changer, enabling precise, efficient cleaning without damaging tiles.
Embracing Innovation Keeps You Ahead
As technology advances, incorporating smart tools like moisture sensors that sync with your smartphone can offer real-time data, leading to more informed decisions about flooring care. In the future, I predict we’ll see AI-powered maintenance systems capable of predicting wear patterns and suggesting preventive measures automatically. Staying updated on these trends will help homeowners and professionals keep their floors in top shape for decades.
How do I maintain my floors over time?
Consistent, gentle cleaning paired with periodic moisture checks and proper acclimation of new materials forms the cornerstone of effective long-term maintenance. For hardwood floors, periodic refinishing using high-quality, dustless sanding equipment extends their lifespan and keeps the finish looking fresh. For tile, sealing grout lines every couple of years helps prevent staining and cracking. Remember, the key is staying vigilant—regular inspections and timely interventions protect your investment and preserve the beauty of your floors.
If you haven’t already, try using a moisture meter regularly when performing renovations or routine care—it’s a small investment that pays off by catching issues early. Check out this guide to precise floor leveling for more advanced techniques to keep your flooring installation flawless over the years.
The Least Expected Wisdom That Saved My Floors
- Trust Your Intuition Over Quick Fixes: Early in my restoration journey, I believed that just drying the surface was enough. I learned that moisture beneath the surface can lurk and cause long-term damage. Listening to my instincts and using a moisture meter helped me avoid costly mistakes later.
- Every Detail Matters, Even When It Looks Fine: I overlooked small cracks and pre-existing gaps, thinking they’d be insignificant. Over time, these tiny issues magnified, leading to future expansion problems. Paying attention to the tiny details, like proper expansion gaps, made all the difference in durability.
- Patience Is a Virtue in Floor Restoration: Rushing to finish often led to rework. Taking my time with drying, testing, and curing ensured a longer-lasting, professional result. Sometimes, waiting a bit longer saved me from bigger headaches down the line.
- Don’t Skimp on Proper Tools: Investing in quality moisture meters and professional-grade materials paid off exponentially. Reliable tools give you the confidence that your repairs will hold up over time.
Tools and Resources That Elevated My Skills
- The ultimate guide to floor leveling: This comprehensive resource helped me understand the nuances of preparing subfloors for a perfect finish, saving me from common pitfalls.
- Expert flooring installation tips: These tips broadened my knowledge on installation best practices, which translated into smoother, more durable results.
- Floor maintenance secrets: Regular care keeps floors looking fresh and prevents damage, reminding me that restoration is an ongoing process, not a one-time fix.
- Refinishing techniques for longevity: Advanced strategies that help maintain hardwood floors’ beauty over decades—vital for long-term success.
Let Your Flooring Journey Inspire Action
Every step I took in restoring my floors taught me the importance of patience, attention to detail, and investing in the right tools. Remodeling is a continuous learning process—your dedication can turn any floor mishap into an opportunity for mastery. Embrace the challenge, and remember that each improvement builds towards a lasting, beautiful space. Don’t hesitate to begin your own flooring project with confidence—your home deserves it.
Have you ever faced an unexpected floor emergency? Share your story below, and let’s learn from each other’s experiences!
,