
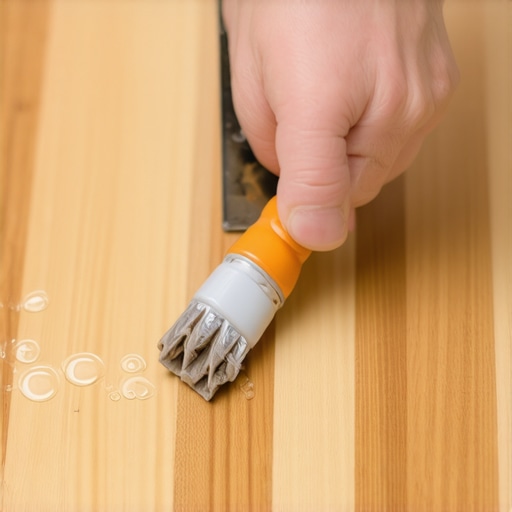
It was a quiet Saturday afternoon when I first noticed it—tiny bubbles forming across the surface of my newly refinished hardwood floor. At first, I thought it was just a minor imperfection, but as I inspected further, I realized that these bubbling spots were growing and threatening to ruin the entire finish. That moment felt like a punch in the gut, especially after investing so much time and effort into my home renovation.
Have you ever experienced a similar frustration, where your beautiful hardwood floors start to bubble, peel, or lift just months after a fresh finish? It’s both baffling and disheartening. The good news is, understanding the root causes of this problem can help you prevent or fix it without the need to pay for costly professional repairs.
Today, I’m going to walk you through why this bubbling happens—so you’re not left scratching your head—and share practical tips on how to fix it. With a bit of knowledge and some hands-on steps, you’ll be able to restore your floors’ beauty and durability.
Why Your Hardwood Finish Is Bubbling — The Hidden Culprits
Bubbling in a hardwood finish is commonly caused by moisture getting trapped under the surface, or improper application techniques. But the specifics can be quite sneaky. For instance, installing your hardwood over a damp subfloor or applying a finish in high humidity conditions can lead to these issues. During my own project, I initially overlooked the importance of checking subfloor dryness, which was a rookie mistake that contributed to the bubbling. Early in my research, I discovered that moisture-related problems are a leading cause—so much so that the National Wood Flooring Association emphasizes testing moisture levels before application.
Another frequent culprit is applying too much finish or using a product that isn’t suitable for your type of wood or environment. In my case, I used a quick-drying polyurethane that cured too rapidly in a poorly ventilated space. As the finish set unevenly, bubbles formed. This is why choosing the right product and reading the manufacturer’s instructions carefully is essential.
If left unaddressed, bubbles can lead to peeling, cracking, and even more extensive damage requiring complete refinishing. But fret not—there are effective ways to tackle this problem, which I will detail shortly.
Is Fixing Bubbling Hardwood Finish Actually Worth the Hype?
Many people wonder if the effort to repair bubbling hardwood is justified or if they should just replace the entire floor. Honestly, I was hesitant at first, fearing the worst. However, I learned that many bubbling issues can be fixed with proper sanding, cleaning, and recoating—sometimes even without removing the entire finish. Avoiding common installation mistakes, like improper surface prep or ignoring moisture, can save a lot of hassle in the long run. If you’re curious about the best techniques, I recommend checking out [precise floor leveling techniques](https://tiletrendshop.com/precise-floor-leveling-techniques-to-achieve-flawless-surfaces) to get your floors back in shape.
Have you faced bubbly finish problems before? Knowing the causes is half the battle, and in the following sections, I’ll guide you through the practical steps to restore your hardwood floors and prevent future issues.When bubbles start forming in your hardwood finish, they often signal underlying issues that need immediate attention. Here’s how to approach fixing them with precision and confidence.
Assess and Prepare the Surface
Begin by thoroughly inspecting the affected area. Use a utility knife to gently cut around the bubble’s perimeter, releasing pressure and preventing further lifting. Remove the bubbled finish carefully with a scraper, ensuring you don’t damage the wood beneath. Clean the exposed surface using a mild solvent like mineral spirits to eliminate any residual finish. Proper surface prep is crucial; a dirty or uneven base will undermine the adhesion of your new finish. Think of it like prepping a canvas before painting—every detail counts.
Sand and Level the Damaged Area
Next, sand the exposed wood with fine-grit sandpaper to create a smooth, even surface. Be cautious to feather the edges to blend seamlessly with the surrounding finish. If the damaged spot is uneven or sunk below the original level, apply a thin layer of floor leveling compound. Follow the instructions closely, mixing it in small batches to prevent bubbles from forming during curing. Use a trowel to spread the compound, working quickly before it starts to set. This step is akin to smoothing out wrinkles before applying a fresh coat—it ensures a flawless finish later.
Tip for Better Results
I once repaired a bubble on my living room floor and found that taping a piece of plastic over the leveling compound helped prevent dust from settling in while it cured. This simple trick ensured a perfectly smooth surface, making the final finish look like it was applied professionally.
Apply a Fresh Finish
Select a high-quality polyurethane or finish suitable for hardwood floors. Stir the product gently to avoid introducing air bubbles. Using a clean brush or foam applicator, apply thin, even coats following the wood grain’s direction. Allow each coat to dry completely—usually 4-6 hours—before lightly sanding with a very fine grit. This sanding eliminates any tiny imperfections and promotes adhesion of subsequent coats. Think of it as layering a cake—you want each layer to be smooth before adding the next.
Pro Tip
If you notice air bubbles forming during application, gently pass a heat gun or a small torch over the surface at a distance. The heat releases trapped air, resulting in a smoother finish. Just be cautious not to scorch the finish or the wood.
Prevent Future Bubbling
To keep your floors bubble-free, monitor moisture levels meticulously before starting any refinishing project. Use a moisture meter to ensure the subfloor is dry—ideally below 12%. Also, work in a controlled environment with proper ventilation and humidity levels between 40-50%. Applying finish in ideal conditions significantly reduces the risk of moisture trapped beneath, which is a leading cause of bubbling. For more tips on avoiding common flooring pitfalls, visit [flooring installation mistakes to avoid for lasting results](https://tiletrendshop.com/flooring-installation-mistakes-to-avoid-for-lasting-results).
Final Check
Once your finish has cured, inspect the repaired area. Lightly buff with a soft cloth to enhance shine. If any imperfections remain, repeat the process of light sanding and reapplying finish. Maintaining proper humidity and moisture levels will help your hardwood floors stay pristine for years to come.
Many homeowners believe that achieving a perfectly level floor or flawless tile installation is simply about following basic steps, but in practice, there’s a lot more beneath the surface. One prevalent misconception is that moisture barriers alone guarantee a flat, stable subfloor. While essential, relying solely on these barriers ignores the importance of assessing the actual moisture content of your subfloor—something experts emphasize as critical to preventing future issues. Skipping moisture testing can lead to hidden problems, such as uneven settling or tile cracking, even years down the line. For a comprehensive approach, read more about floor leveling techniques that take moisture into account.
Another trap many fall into involves underestimating the significance of the subfloor’s structural integrity. It’s a common mistake to assume that a smooth surface is sufficient, but in reality, minor imperfections or weak points can cause major headaches later. Reinforcing subfloor support or using independent floor joist check-ups are often overlooked but vital steps. When I first started, I underestimated this and ended up with tile cracks just a few months after installation. Learning to evaluate and improve subfloor stability can save you money and frustration.
### Why Some Floor Leveling Techniques Fall Short
Many DIY enthusiasts rely on quick-setting leveling compounds, thinking they can fix uneven floors in one go. However, these compounds often fail to adhere properly if the underlying issues aren’t addressed. Moreover, applying too much at once can trap air bubbles, leading to future cracks or uneven surfaces. Advanced pros know that proper surface preparation—like thorough cleaning and priming—can prevent these pitfalls. For detailed strategies, check out how to properly level subfloors before tile installation.
### Mistakes That Could Cost You Big
One of the worst mistakes is thinking that all flooring materials respond similarly to leveling techniques. Hardwood, tile, vinyl—they all have unique requirements. For example, some vinyl planks can adapt better to minor imperfections, but high-end porcelain tiles demand a meticulously flat surface. Misjudging this can lead to tiles chipping or shifting over time. Professionals often use specific notched trowels or leveling systems tailored to each material; neglecting this detail can compromise your entire project. To learn the nuances, visit precise leveling techniques for flawless results.
### How Advanced Installers Spot Hidden Problems
Experienced floor installers look beyond the obvious. They perform comprehensive inspections including moisture levels, subfloor support, and surface flatness at a microscopic level. Using laser levels and moisture meters, they identify issues invisible to the naked eye. This advanced knowledge prevents expensive callbacks and repairs. If you’re curious about elevating your skills, explore mastering professional floor leveling secrets that make a difference.
Have you ever fallen into this trap? Let me know in the comments. Mastering the nuances in floor preparation is the difference between a good-looking floor and one that lasts for decades. Don’t just follow the standard recipe—consult the experts, prepare meticulously, and choose the right materials for a truly professional finish.Maintaining pristine floors over time requires the right tools and a strategic approach. First, I swear by a high-quality moisture meter like the Tramex CM-01, which provides instant, accurate readings to prevent moisture-related issues before starting any project. Investing in a professional-grade laser level—such as the BOSCH Cross Line Laser—ensures that your floor remains perfectly level as you install or repair, drastically reducing future troubleshooting. Using a moisture barrier that meets industry standards, like a 6-mil polyethylene sheet, creates an effective shield against rising damp, especially in basements or ground-level installations. Regularly inspecting your floors with a light, portable sander equipped with dust collection, like the Makita BO5041, makes touch-ups easier and prevents minor imperfections from ballooning into bigger problems. When it’s time for refinishing, I prefer a high-quality polyurethane applicator—brushes tend to leave streaks, but foam rollers or even micro-mesh pads can help achieve a smooth, durable finish.
Lessons From My Floor Bubble Battle
One of the most eye-opening lessons I learned was the importance of patience and attention to detail. Rushing through the surface prep or ignoring subtle moisture signs only worsened the bubbling issue. Now I know that understanding moisture levels and environmental conditions before applying finishes can make all the difference, preventing costly mistakes later.
Another insight was the value of proper surface prep—sanding and cleaning meticulously isn’t just tedious; it’s essential. Overlooking this step almost guaranteed a flawed finish, which taught me that quality results stem from diligent preparation rather than shortcuts.
Finally, I realized that even seasoned DIYers should consider seeking expert advice for complex issues like floor leveling or deep repairs. Sometimes, a quick consultation or reference to professional techniques can save you weeks of frustration and money.
Tools and Resources That Boost Success
My essential toolkit includes a reliable moisture meter like the Tramex CM-01, which helps diagnose moisture issues early. For precise leveling, the guide on floor leveling techniques has been invaluable—enabling me to handle uneven subfloors confidently. When selecting finishes, I trust high-quality polyurethane products recommended in hardwood floor refinishing tips to ensure durability. Lastly, brushing up with comprehensive tutorials from reputable sources like installation guides helps me prepare for every project, big or small.
Your Path to Better Floors Starts Now
Restoring and maintaining hardwood floors isn’t just about aesthetic appeal—it’s about creating a space where you feel proud and comfortable. With the right techniques, tools, and mindset, you can master floor repair and installation, transforming your home step by step. Remember, every challenge is an opportunity to learn and improve. Keep experimenting, stay patient, and don’t hesitate to seek expert guidance when needed. Your hardwood journey awaits—dive in today and turn your floors into lasting works of art.