
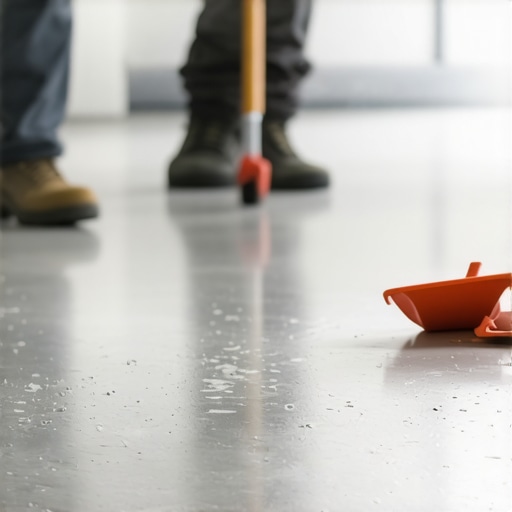
I’ll never forget the morning I stepped onto my newly installed hardwood floor, only to be greeted by a fine cloud of dust billowing up from below. It was one of those gut-wrenching moments where you realize that all your careful planning has gone sideways. That unexpected dusting from my concrete subfloor not only marred the finish but also made me question if I’d made a critical mistake from the start.
The Hidden Enemy Underneath Your Feet
It turns out, dusting from a concrete subfloor is more common than you might think — and it’s often a silent culprit behind uneven floors, cracking tiles, and persistent grime. This dust isn’t just surface dirt; it’s tiny particles of concrete, trapped moisture, and residual debris that become airborne every time you walk or work on the floor. Over time, these particles can compromise the adhesion of your flooring materials, leading to costly repairs down the line.
And here’s the kicker — a study from the Occupational Safety and Health Administration indicates that inhaling fine concrete dust can cause respiratory issues, making it not just a flooring problem but a health concern as well. So, addressing this dust isn’t just about aesthetics; it’s about safeguarding your indoor air quality and your investment.
The Promise to Clear the Dust and Protect Your Home
Today, I want to share with you the exact steps I took — and wish I had known earlier — to stop my concrete subfloor from dusting and to ensure a strong, lasting surface for my flooring. You’ll learn practical, proven techniques that will save you time, money, and the frustration of redoing a job that could have been prevented. Whether you’re planning to install tile, hardwood, or vinyl, understanding how to properly prep your subfloor is essential.
Is Dusting Really Such a Big Deal, or Just a Minor Nuisance?
You might be wondering if this dusting problem is exaggerated or if it’s something you can ignore. Believe me, the mistake I made early on was assuming that a quick sweeping would do the trick. It wasn’t. That little oversight led to uneven surfaces and a compromised bond that I had to correct later. Proper prep is crucial, and ignoring it only invites bigger headaches down the road.
In the next sections, we’ll dive into the essential techniques for assessing and treating a dusty subfloor, so you can lay down your flooring with confidence and peace of mind. Ready to transform your space? Let’s get started!
Start with a Deep Clean to Remove Dust and Debris
Before anything else, I vividly remember grabbing a heavy-duty vacuum and meticulously vacuuming every inch of the subfloor, focusing on corners and seams where dust tends to hide. This step is crucial because loose particles can compromise the adhesion of your flooring. Use a shop vac with a HEPA filter to trap fine dust particles for a cleaner surface, much like cleaning a lens before capturing a clear photograph. Skipping this step leads to dust settling under the new flooring, causing uneven surfaces down the line.
Use a Moisture Barrier or Primer to Seal the Subfloor
Once the dust is cleared, applying a moisture barrier or primer is like giving your subfloor a waterproof jacket. I opted for a bonding primer designed for concrete, which not only seals residual dust but also enhances adhesion. Spread it evenly with a rollers or brush, making sure every corner is coated. This step prevents moisture from seeping through and causing dusting or bonding issues later. Think of it as laying a solid foundation before building a house; the better the base, the sturdier the structure.
Employ a Self-Leveling Compound for an Even Surface
Next, if your subfloor has noticeable irregularities, pouring a self-leveling compound is essential. I used a high-quality mix, following the manufacturer’s instructions carefully. Pour it in small sections, distributing with a notched trowel or straightedge to ensure it flows and levels out smoothly. This process is akin to pouring pancake batter into a pan—wait until it spreads evenly and fills the gaps. Achieving a level surface reduces the risk of uneven flooring, cracking, or bouncing under foot traffic.
Tip: Flatten High Spots and Fill Low Spots
For stubborn high spots, I gently sand them down after drying, and for depressions, I filled them with additional leveling compound. This meticulous process saved me from future headaches, especially when installing tiles or hardwood. A flat, consistent base is the secret to professional-looking results, and investing extra time here pays off in durability and aesthetics.
Test the Subfloor for Dust and Moisture
After prepping, I performed a simple flashlight test: shining a light across the surface in a dark room revealed any remaining dust or uneven patches. Additionally, doing a moisture test by placing a plastic sheet and checking for condensation helped ensure the subfloor’s dryness—especially important for wood or laminate floors. This verification step is like a quality control check, ensuring your prep work is solid before proceeding.
Final Inspection and Prep
Last but not least, I visually inspected the surface for dust, debris, or irregularities, making sure everything was smooth and clean. I also used a straightedge or self-leveling laser to verify flatness. This diligence is comparable to straightening a picture frame before hanging—small adjustments now prevent major mishaps later. Only after confirming a pristine, flat, and dry surface did I proceed to lay my flooring materials, ensuring a flawless finish that lasts.
Remember, neglecting these steps is a common mistake that leads to uneven floors, cracking, and additional work. Follow these core techniques, and you’ll set a durable, beautiful foundation that stands the test of time, saving you money and frustration in the long run. For more detailed tips on flooring installation and leveling, visit here.
Many DIY enthusiasts and even seasoned contractors often fall prey to oversimplified assumptions when it comes to flooring installation, flooring leveling, and tile or hardwood floors. One pervasive misconception is believing that a perfectly level subfloor isn’t crucial, leading to issues like cracked tiles or squeaky hardwoods down the line. However, as experts highlight, achieving a true flatness within a millimeter tolerance is essential for longevity and aesthetic appeal. Skipping detailed assessments, such as the precise floor leveling procedures, can be a costly mistake. Another common myth involves the use of cheap or inadequate adhesives, which can cause tiles to lift or hardwood planks to shift unexpectedly. Advanced users recommend investing in high-quality setting materials and understanding their compatibility with your chosen flooring type. When it comes to tile installation, many underestimate the importance of proper substrate preparation, including moisture barriers and crack isolation membranes, to prevent tile cracking and grout failure over time. Also, professionals caution against rushing the curing process of leveling compounds; patience here ensures a solid, durable base. Among sophisticated questions, some wonder:
How can subfloor flex impact long-term floor performance, and what techniques best counteract this issue?
Experts like those involved in flooring engineering stress that subfloor flex can cause grout joints to crack and tiles to loosen. Reinforcing joists, using thicker plywood overlays, or employing self-leveling underlayments are effective strategies. According to recent studies, addressing underlying structural issues provides a more resilient foundation than decorative fixes alone. So, next time you choose materials or prepare your space, remember these nuances—small details can make the difference between a floor that endures and one that fails prematurely. For step-by-step guidance, visit our comprehensive flooring tips or reach out via our contact page. Have you ever fallen into this trap? Let me know in the comments.
Keep It Working: Tools and Maintenance Strategies
Maintaining your flooring over the years requires more than just occasional cleaning; it involves the right tools chosen meticulously for durability and precision. I personally rely on a high-grade oscillating multi-tool for detailed cuts and edge work when refinishing or repairing floors. Its versatility allows me to remove stubborn adhesives or sand tight corners without damaging surrounding areas, which is crucial for preserving the overall integrity of hardwood and tile surfaces. Additionally, I always keep a moisture meter on hand, like the Tramex Moisture Encounter, to monitor the subfloor and flooring materials’ moisture levels. This device ensures you’re not sealing in excess moisture, which can cause warping or mold growth over time. Predicting where flooring trends head, I believe smart, sensor-integrated tools will become standard, providing real-time feedback for ongoing maintenance—as detailed by innovative tile design innovations.
How do I maintain hardwood floors and tiles over time?
Regular upkeep, such as using a microfiber mop with pH-neutral cleaners, prevents dirt buildup without harming finishes. For deep cleaning, employing steam cleaners designed specifically for hardwood or tile floors ensures thorough sanitation without stripping protective coatings. Furthermore, applying protective pads to furniture legs and area rugs can significantly reduce scratches and wear—preserving your investment long-term. Remember, even the best-looking floors require periodic expert assessments: scheduling a professional inspection helps identify issues like minor cracks or moisture ingress before they escalate. Continue to monitor these aspects with tools like moisture meters and specialized humidistats, especially if your home has a basement or is located in a humid climate. For detailed guides, consider reviewing our expert flooring tips to stay ahead of challenges. I encourage you to try calibrating your moisture levels with a high-precision device—it’s an early step in effective long-term maintenance that can prevent costly repairs and preserve your floors’ beauty.
3 Hard-Earned Lessons That Changed How I Approach Floor Installation
One of the most valuable insights I gained was that rushing through subfloor prep is a recipe for disaster—cracks, unevenness, and future repairs. Taking the time to assess moisture levels, level out high spots, and thoroughly clean creates a foundation that makes the entire project smoother and more durable.
Another revelation was the importance of investing in quality materials and tools. Skimping on primer, leveling compounds, or adhesives might save money initially, but it often leads to costly setbacks. Trusting reputable brands and understanding their application is an investment in the longevity of your floors.
A lesson I learned the hard way is that even minor imperfections can significantly impact the final look. Using laser levels and meticulous measurements might seem tedious, but they ensure your flooring isn’t just beautiful but also resilient over time. Precision isn’t just for perfectionists; it’s a necessity for lasting results.
Tools and Resources That Elevated My Flooring Projects
I rely heavily on a high-quality moisture meter, like the precision moisture tester, to determine the ideal conditions before laying any new floor. It’s a non-negotiable tool that prevents future issues from excess moisture.
The comprehensive guide to floor leveling helped me understand optimal techniques, and I recommend reading it thoroughly for foundational knowledge. My favorite leveling compounds come from trusted brands, which I’ve found provide consistent results and ease of use.
If you’re serious about professional finishes, consider incorporating a laser level or straightedge. They’re game changers for ensuring your surface is truly flat and ready for the next step. And don’t forget quality tools for cutting and finishing—these small details elevate your craftsmanship.
Your Hard Floors’ Bright Future Begins Today
Embarking on a flooring project is a rewarding journey that requires patience, attention to detail, and the right mindset. Remember, a well-prepped subfloor isn’t just about aesthetics; it’s about creating a sturdy, long-lasting foundation that will serve your home for years to come. So, take these lessons to heart, arm yourself with quality tools, and start your journey towards flawless floors with confidence.
What aspect of floor preparation have you found most challenging or surprising? Share your experiences below—I’d love to hear your story and help troubleshoot any hurdles you might face.
}**}#END#