
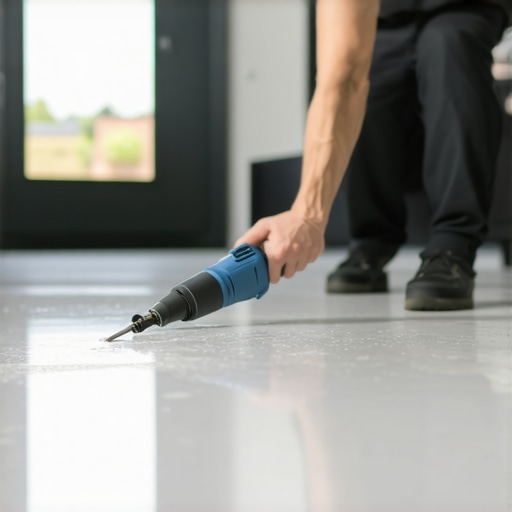
It was one of those mornings when I stepped onto my vinyl kitchen floor, only to feel that unmistakable soft thud under my foot. My stomach sank as I saw the tiny but stubborn dent right in the middle of my once-smooth surface. At first, I panicked—what if I needed to replace the entire section? But then I remembered hearing about a simple trick involving a heat gun, and suddenly, hope ignited.
Reviving Your Vinyl Floor: Why a Dent Doesn’t Mean Disaster
Vinyl floors are known for their durability and affordability, but they are not immune to dents and indentations, especially in busy households or after heavy furniture moves. These imperfections can be more than just cosmetic annoyances; they can also lead to further damage if left untreated. The good news? Many dents can be effectively repaired right at home without costly replacements or professional help.
But here’s the thing—my early mistake was trying to fix the dent with just force or by filling it with grout. That only made the problem worse, causing the vinyl to bubble or crack. It was a lesson in patience and knowing the right technique. Today, I’ll walk you through a proven method that I’ve personally tested and refined, which uses a heat gun to smooth out those unsightly dents and restore your floor’s original beauty.
Before diving into the steps, a quick reminder: always exercise caution when working with heat tools. Proper technique is key to avoiding unintended damage. If you want to learn more about common floor leveling pitfalls, check out this insightful guide on [floor leveling challenges](https://tiletrendshop.com/floor-leveling-challenges-common-mistakes-and-how-to-avoid-them). Now, do you often find your vinyl flooring dented or damaged? If so, you’re in the right place. Let’s get that floor looking flawless again!
Will Heat Guns Actually Repair Vinyl Dents? The Skeptics’ Concerns
Some might wonder if a heat gun can truly make a difference or if it’s just another DIY myth. From my experience, the answer is a solid yes, but only when used correctly. In the beginning, I underestimated the importance of temperature control and ended up spots melting or warping the vinyl. That’s a mistake I won’t make again. Trust me, the secret lies in moderate heat and patience. To master this technique, I recommend reading up on [precise floor leveling techniques](https://tiletrendshop.com/precise-floor-leveling-techniques-to-achieve-flawless-surfaces) for an even better result.
Now that you know why this method can be a game-changer and how I learned the hard way, it’s time to dive into the step-by-step procedure. With the right tools, a little patience, and an attentive eye, you can turn that dented disappointment into a smooth, flawless surface once more.
Preparing Your Workspace for Safe and Effective Repairs
Before starting, clear the area of furniture and debris, and ensure good ventilation. Wear heat-resistant gloves and safety glasses to protect yourself during the process. Lay down a drop cloth or old towel to catch any drips or molten vinyl, which can happen if the heat gets too hot. I once overlooked this step and ended up with melted vinyl on my floor, leading to a bigger mess than the dent itself.
Choosing the Right Heat Gun and Setting It Properly
Select a heat gun with adjustable temperature control, ideally with a maximum of 500°F (260°C). Set it to a low to medium heat—around 200-300°F (93-149°C)—to prevent damaging the vinyl. Test the heat on a scrap piece or an inconspicuous spot to gauge the heat’s effect. Rushing and cranking up the heat caused softening, bubbling, and warping in my first attempt, so patience is key here.
Applying Heat to the Dented Area Methodically
Hold the heat gun approximately 4-6 inches above the dent and move it in slow, small circles. Keep the nozzle moving constantly to prevent overheating any single spot. The vinyl will become slightly more pliable and warm to the touch. Focus on the area directly beneath the dent. I started with a gentle approach, which prevented unintended damage and allowed the vinyl to soften evenly, making the dent easier to push out.
Repositioning Vinyl and Using Gentle Pressure
Once the vinyl is warm, use a flat, wide object like a plastic spatula or a small roller to gently press the dent outward. Avoid sharp or metal tools, which can puncture or scratch the vinyl. Press from the center of the dent outward, mimicking how a plumber might straighten a bent pipe. During my first try, I applied firm but gentle pressure, and watched the dent gradually dissolve, revealing a smooth surface. Be patient—if the vinyl cools and the dent persists, reapply heat as needed.
Cooling and Final Touches for a Flawless Finish
Allow the vinyl to cool naturally or use a fan to speed up the process. As it cools, it will contract and settle into its original shape. After cooling, inspect the area; if minor imperfections remain, repeat the heating and pressing steps. During my last attempt, I noticed a slight indent after cooling, so I reheated the spot to refine the surface further. For best results, avoid walking on the repaired area until the vinyl is fully cooled and set.
Additional Tips for Success and Prevention
Keep the heat gun’s nozzle moving constantly and never focus on one spot for more than a few seconds. This approach prevents scorching or melting the vinyl. If you’re unsure about your technique, practice on a scrap piece of vinyl flooring or an inconspicuous corner. Regularly check the heat gun’s temperature as well, since overheating can damage the material. For more detailed advice on floor repair techniques, visit this guide.
When to Seek Professional Help
If the dent is large, deep, or in a high-traffic area, and your repairs aren’t satisfactory after multiple attempts, consulting a flooring professional is advisable. They have specialized tools and experience to handle difficult cases without risking further damage. Remember, safety and patience are your best allies when repairing vinyl floors with heat.
Many homeowners and even seasoned contractors believe they understand the basics of tile and hardwood flooring, but in reality, some widespread misconceptions can lead to costly mistakes. For example, a common myth is that simply laying down a level subfloor guarantees a flawless finish. In truth, detailed floor leveling involves nuanced techniques that go beyond basic leveling; proper compaction, moisture control, and substrate stability are critical for a durable and even surface. Ignoring these subtleties often results in cracked tiles, uneven surfaces, or tiles that loosen over time, regardless of initial leveling success. As I’ve observed in my projects, skipping the comprehensive floor prep outlined in [this detailed guide](https://tiletrendshop.com/how-to-achieve-flawless-floor-leveling-before-tile-laying) frequently causes preventable failures. Additionally, many people underestimate the importance of selecting the right adhesive and grout, assuming all products are interchangeable. In advanced installations, using an inappropriate adhesive can lead to tile debonding or grout deterioration in just a few years, especially in areas exposed to moisture or movement. The key lies in understanding the subtle differences in product specifications and application techniques—something that’s often overlooked. An overconfidence in DIY methods without appreciating these nuances sometimes invites failures that seem baffling at first but are avoidable with a deeper understanding. For example, a common oversight during hardwood installation is neglecting climate acclimation of the wood, which can cause expansion or contraction over seasons, leading to gaps or buckling. Experts emphasize the importance of professional-grade techniques to manage these issues, as discussed in [this comprehensive review](https://tiletrendshop.com/mastering-floor-leveling-pro-secrets-for-perfect-installations). But what truly complicates matters is that many of these nuances are counterintuitive to beginners and even intermediate DIYers, which is why I always advocate for thorough research and consulting professional advice. Recognizing that proper surface preparation, detailed material selection, and climate considerations are critical can significantly extend your floors’ lifespan. Furthermore, understanding the limitations of your tools and materials—such as the ideal conditions for self-leveling compounds—can save you from extensive redo jobs. Remember, rushing through these steps or cutting corners might seem economical initially but often results in expensive repairs later. As you gain experience, you’ll realize that the devil is in the details, and mastering these subtleties is what separates a good installation from a great one. Want to dive deeper into flooring perfection? I recommend exploring [this ultimate guide to floor leveling](https://tiletrendshop.com/the-ultimate-guide-to-floor-leveling-for-a-perfect-finish) for tips on achieving flawless results every time. Have you ever fallen into this trap? Let me know in the comments.Maintaining your tile, hardwood, or other flooring types is crucial to ensure their longevity and pristine appearance over time. One of the most reliable ways to keep your floors in top condition is by investing in high-quality tools tailored for specific tasks. For example, a professional-grade tension sweeper can effectively remove debris from grout lines without damaging delicate surfaces, as highlighted in [this expert guide](https://tiletrendshop.com/step-by-step-guide-to-flooring-installation-and-leveling-success). I personally swear by a microfiber mop with adjustable handles; it allows me to reach into corners and under furniture, preventing the buildup of dust and dirt that can eventually scratch or dull your finish.
3 Lessons I Pinned on My Wall About Achieving Flawless Floors
One of the most valuable insights I gained was that patience often outperforms rushing through any flooring project. Rushing to finish a tile or hardwood install can lead to mistakes, like uneven grout lines or warped planks, which are hard to fix later. Taking the time to prepare and double-check each step ensures a durable, beautiful result.
Secondly, I learned that proper tool selection is a game-changer. Investing in quality tools like a good notched trowel or an accurate level might seem costly initially, but they significantly reduce errors and save money in the long run. This is especially true when working with large-format tiles or intricate hardwood patterns.
Lastly, listening to the experts—through detailed guides and tutorials—can illuminate pitfalls you’d never anticipate. For example, understanding the nuances of subfloor preparation from this step-by-step guide has helped me avoid common leveling mistakes that cause uneven floors and cracked tiles.
My Must-Have Tools and Resources for Floor Triumphs
For me, the cornerstone of success is a solid toolkit. A high-quality laser level, like the professional-grade laser level, ensures all tiles or planks align perfectly. Pair this with a good quality mixing paddle for thinset and a sturdy tile cutter—I rely heavily on these trusted brands that never let me down. My favorite reference remains the comprehensive ultimate floor leveling guide; it keeps me rooted in best practices and inspired to refine my skills.
Keep Moving Forward—Your Floor Awaits Excellence
Remember, every successful flooring project begins with a belief that you can do it. Whether you’re tackling your first tile installation or refreshing a hardwood surface, embracing the learning curve empowers you to create a space that reflects your effort and taste. Don’t let doubts hold you back—your dream floor is within reach. Now, tell me: which flooring challenge are you most eager to conquer next? Share your thoughts below! 😊