
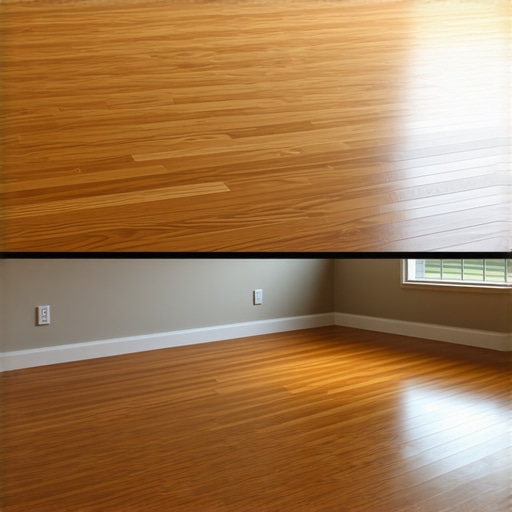
I still remember the feeling of that sinking realization when I installed new hardwood floors directly over particle board subfloors. The squeaking was unbearable, and within months, several planks started to sag and buckle. It was a lightbulb moment for me—and I want to save you from making that same mistake. Installing hardwood without proper subfloor preparation isn’t just a little mistake; it can be a costly disaster that ruins your beautiful new floors and your peace of mind. Today, we’ll dive into why you should *never* put hardwood over particle board, and how you can avoid common pitfalls.
The Hidden Risks of Particle Board Subfloors
Particle board might seem like an easy, affordable choice for subfloors, especially if you’re trying to save time or money. But here’s the truth: it’s a weak foundation that doesn’t handle moisture or weight well. Over time, it absorbs moisture, swells, and weakens—leading to cracks, uneven surfaces, and in worst cases, complete floor failure. As someone who’s faced the frustration firsthand, I can tell you that skipping proper subfloor evaluation will only cost more in repairs and replacements down the line. Reliable flooring installation hinges on a solid base, and that starts with understanding what lies beneath.
Promises To Keep Moving Forward
In this post, I will share practical insights and expert tips on how to assess your subfloor, why particle board should be avoided under hardwood, and the best ways to prepare your floor for a lasting, beautiful finish. Whether you’re a DIY enthusiast or hiring pros, knowing the essentials helps you make informed decisions. If you’re facing uneven floors, creaks, or rapid wear, keep reading—I’ve been there, and I’ve learned the hard way. Better to learn from my mistakes than repeat them yourself.
Will new flooring last if I ignore the subfloor’s condition?
Early in my journey, I made the mistake of assuming that a simple overlay would suffice. Trust me, I underestimated the importance of a proper subfloor. The truth is, no matter how beautiful your hardwood is, if it’s laid over particle board that’s compromised, your floors won’t last. That’s why pre-installation checks are crucial—an aspect I wish I had taken more seriously. Want to learn the expert strategies to ensure your flooring lasts for years? Check out this comprehensive guide for step-by-step advice.
Inspect and Clear the Surface
Start by thoroughly inspecting your existing subfloor for any damage, loose particles, or uneven areas. Remove debris, dust, and any remnants of old adhesive or flooring. Use a shop vacuum to ensure a clean surface, which is critical for good adhesion and leveling. I once ignored a layer of fine dust during a project, which caused my glue to fail later, leading to costly repairs.
Level the Floor Precisely
Achieve a flat surface by applying a suitable self-leveling compound. Mix the compound as per manufacturer instructions, ensuring no lumps or air bubbles. Pour it in small sections, starting from the highest point, and use a trowel or squeegee to spread evenly. When I did this for my living room, I used a laser level to identify high and low spots, and carefully poured and spread the leveling agent—resulting in a flawless, smooth surface ready for hardwood.
Using the Laser Level for Accuracy
Place the laser level on a stable surface or tripod and turn it on; it projects a consistent line across the room. Check for dips or humps by observing the projected line—any deviation indicates uneven spots needing correction. This method is more precise than eye-balling, and in my experience, it saves time and prevents future squeaks or gaps. For detailed techniques, consult this guide.
Address Moisture and Stability
Use a moisture meter to verify the subfloor’s dryness—moisture levels above 12% can cause wood to warp or buckle. If levels are high, install a vapor barrier and allow the floor to dry adequately before proceeding. Also, check for stability by gently pressing around the area—if it feels spongy or loose, reinforce with additional plywood or fix underlying issues. I encountered a scenario where moisture caused my particle board to swell unexpectedly, reminding me to always confirm moisture levels first.
Reinforce Weak Spots Before Laying Down Flooring
If any areas feel soft or damaged, reinforce by adding a layer of plywood or cement board to strengthen the subfloor. Cut sheets to size, screw them firmly into the existing surface, and ensure transition edges are flush. This extra step is paramount for long-lasting floors; I learned this the hard way by skipping reinforcement and facing gaps after a few years.
Final Check Before Installation
Perform a comprehensive walk-through, checking for levelness with a long straightedge or a level tool. Mark any remaining low spots to address, ensuring a perfectly flat and stable foundation. Remember, meticulous preparation now pays off with beautiful, durable hardwood floors that last decades. For expert insights into achieving impeccable surfaces, visit this resource.
Many assume that leveling a floor is merely about getting a flat surface, but the reality is far more complex. A common misconception is that self-leveling compounds alone can fix all imperfections. However, if the subfloor has underlying issues like moisture or structural weaknesses, these compounds merely mask problems rather than resolve them. Relying solely on quick fixes can lead to future failures, such as cracks or delamination, especially under heavy loads or temperature fluctuations. Experts warn that understanding the composition and condition of your subfloor is crucial—using moisture meters and thorough inspections can prevent costly mistakes down the line. According to industry research, improperly prepared surfaces are responsible for nearly 70% of flooring failures, emphasizing the importance of detailed groundwork. Additionally, many installers overlook the importance of correct fastener spacing and proper adhesive application, which directly affect stability and longevity. Advanced techniques, like employing laser-guided leveling and appropriately selecting leveling materials (e.g., Portland-based versus gypsum-based compounds), can dramatically improve outcomes. Missteps in this phase often lead to uneven surfaces and squeaks, which diminish the aesthetic and structural integrity of your floors. For those tackling tile installation, issues frequently stem from improper surface prep, resulting in lippage or grout gaps. Understanding the subtle differences in substrate materials and their compatibility with thinset mortars can make all the difference. Experts suggest that a well-prepared base not only enhances durability but also simplifies the installation process, saving time and money. Remember, even small discrepancies during leveling can amplify over time, affecting the entire flooring system. Always verify your surface with a long straightedge or laser level before laying down your material. For comprehensive guidance on achieving perfectly level floors, check out this expert guide. Make sure to avoid common pitfalls like uneven mixing of compounds or neglecting moisture barriers—these rookie mistakes can turn your project into a costly nightmare. Have you ever fallen into this trap? Let me know in the comments.Maintaining your flooring system over time requires more than just initial installation; it demands the right tools and proactive care routines. As someone deeply involved in flooring projects, I rely on a few key pieces of equipment personally proven to extend the life of hardwood, tile, and other flooring types. One essential tool is a high-quality moisture meter, such as the Tramex MM6, which I use to regularly check subfloor dryness. Moisture levels can dramatically impact long-term durability, especially in basements or areas with fluctuating humidity. Regularly measuring moisture helps catch issues early, preventing buckling or warping. For surface cleaning, I prefer a microfiber mop like the Bona Microfiber Floor Mop, which effectively removes dust without scratching delicate finishes. This simple step preserves the sheen and prevents abrasive buildup that can degrade finishes over time. When it’s time for refinishing or deep cleaning, I recommend using a dual-action floor sander, like the Festool ROTEX RO 150 FEQ, for efficient and even removal of old finishes without gouging or uneven patches. Investing in quality tools ensures not only superior results but also prolongs the intervals between professional refinishing. Looking ahead, I predict smart home integration will become more prevalent—tools embedded with sensors that monitor subfloor conditions in real-time, alerting homeowners before small issues turn into costly repairs. To keep your floors performing optimally, it’s crucial to establish a maintenance routine that includes regular cleaning, moisture checks, and prompt repairs of minor damages. How do I maintain floors over time? I stay vigilant with routine inspections, address minor wear quickly, and invest in quality tools like moisture meters and proper cleaning equipment to ensure longevity. For detailed guidance on optimization, check out the comprehensive advice in this guide on hardwood floor care. Don’t forget, consistent upkeep using the right tools is the best way to keep your floors looking beautiful and functioning well for decades.
Lessons from the Trenches: What I Wish I Knew About Subfloor Prep
One of my biggest realizations was that investing time in thorough subfloor assessment saves countless headaches later. I once skipped moisture testing, only to face buckling months after laying hardwood, which taught me that proper groundwork is an investment in durability. Understanding the subtle signs of weakening or uneven surfaces has made me more vigilant and confident in my projects.
A surprising lesson was how even small imperfections amplify over time. A slight dip or bump might seem insignificant initially, but it creates squeaks, gaps, or cracked tiles down the line. Using a laser level changed my perspective—precision at this stage is critical for lasting results.
Finally, I learned that moisture is the silent enemy of any flooring project. Regularly checking subfloor dryness with a reliable moisture meter can prevent warping and buckling—failing to do so is a gamble I won’t take again.
Tools and Books That Elevated My Flooring Game
My go-to moisture meter is the Tramex MM6. It provides quick, accurate readings that inform my decisions about vapor barriers or drying times. For leveling, I trust the expert guide on floor leveling techniques—a resource that demystified complex steps and saved me from costly corrections.
The ultimate floor leveling guide helped me understand the nuances of mixing and application, ensuring my surfaces are perfect before laying flooring. These tools and resources have become an inseparable part of my planning process, transforming my approach from guesswork to certainty.
Your Floors Can Be a Long-Lasting Masterpiece
Don’t be discouraged if your current subfloor isn’t perfect—every challenge is an opportunity to learn and improve. With the right mindset, tools, and respect for the detailed prep work, you can achieve a flooring installation that not only looks stunning but endures for decades. Remember, thorough preparation is the secret ingredient for durable, beautiful floors. Ready to elevate your space with confidence? Dive deeper into expert techniques here and start your transformation today.