

I remember the first time I laid out a floor and thought, “This will be straightforward.” Then, after snapping the chalk line and installing the tiles, I stepped back—and immediately realized something was off. The entire room seemed subtly crooked, but the worst part? I couldn’t quite put my finger on why. It was one of those moments where the tiniest mistake in marking can throw off the whole project.
Why a Simple Chalk Line Can Make or Break Your Flooring Project
Getting the lines right when installing floors isn’t just about aesthetics; it’s about ensuring durability and making your room look harmonious. Even a small misalignment—like a crooked chalk line—can cause tiles or planks to look uneven or crooked, which becomes painfully obvious once you step back. Unfortunately, many DIY enthusiasts and even pros underestimate the importance of precise line marking, leading to what I call the “Chalk Line Error”—a subtle but pervasive mistake that can ruin your entire floor.
But here’s the good news: I’ve learned from plenty of mistakes, and I want to help you avoid falling into the same trap. Today, I’ll share how to master the chalk line technique, so your floors look perfect from every angle.
Is the Hype About Accurate Line Marking Really Overblown?
Honestly, I once believed that a quick snap of the chalk line was enough—until I realized I had neglected to double-check my measurements and the line’s tension. The result? A crooked layout that took hours to fix later. According to flooring experts, precision in marking lines drastically reduces errors and improves overall finish quality (see [Flooring Installation Mistakes to Avoid](https://tiletrendshop.com/flooring-installation-mistakes-to-avoid-for-lasting-results)). Trust me, small mistakes at this stage can lead to big setbacks.
So, if you’ve faced frustrations with uneven floors or a crooked look, you’re not alone. With a few simple adjustments, you can ensure your lines are spot-on, laying the foundation for a flawless finish. Ready to get started? Let’s dive into the foolproof techniques that will elevate your flooring game.
Nail Down Your Measurements
Before snapping that crucial chalk line, I recommend measuring the room carefully with a tape measure. Picture it like plotting coordinates on a map—every millimeter counts. In my recent project, I double-checked my measurements and marked the center points, which served as reliable anchors for the rest of the layout. This initial step sets the foundation for a straight and even floor.
Mark the Reference Lines Correctly
Use a chalk line reel and stretch it taut between your reference points, similar to pulling a tightrope across a tennis court. When I did this in my last room, I learned the hard way that slack causes wobbly lines. Make sure the reel is anchored firmly, and avoid twisting or kinking the line, as this can throw off your measurements. This step resembles drawing the guiding rails for a train—precision here ensures everything runs smoothly later.
Keep Tension Tight for Sharp Lines
Ensure the chalk line has consistent tension; a loose line creates a fuzzy line that can mislead your layout. I once forgot this and ended up with a wavy chalk line that threw off my tile pattern. Test the tension by gently pulling the line—if it sags, tighten it until it’s taut like a guitar string, guaranteeing crisp, clean lines upon snapping. This is fundamental in floor leveling as well, where accuracy underpins the entire project.
Snap with Purpose
When ready, snap the chalk line confidently in a quick motion, like snapping a twig. In my experience, a quick snap minimizes chalk smudging, providing a clear guideline. Practice a few test snaps on scrap material to gauge the chalk’s release force. Think of it as setting a boundary—you want the line to be straight and visible from a distance, acting as the backbone of your layout.
Double-Check Your Work
After snapping, step back and verify that the line aligns with your measurements, akin to inspecting a finished drawing. Use a level or measuring tape to confirm both parallelism and spacing. Small discrepancies can be smoothed out with shims or adjusted by re-snapping if caught early. This diligence prevents the ‘crooked floor’ effect I once experienced, which can be a nightmare to fix.
Incorporate Visual Aids for Clarity
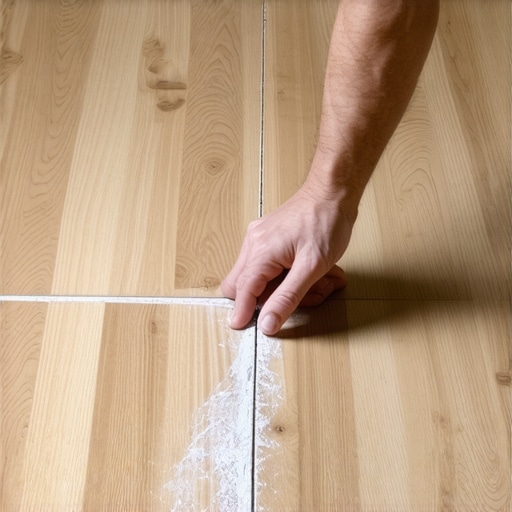
Visual aids, like a well-executed chalk line, act as the blueprint for your entire flooring project. They help keep your layout straight, especially in large rooms or complex patterns. When I used a bright-colored chalk, it became easier to spot discrepancies and adjust accordingly. Remember, precision in marking translates directly into a professionally finished floor—every misstep here compounds into more work later. For advanced techniques, consider reviewing detailed guides like these step-by-step tile installation strategies.
Many seasoned DIYers and even professionals often overlook subtle yet critical nuances when installing flooring, leading to costly mistakes. One prevailing myth is that leveling floors is optional or can be rushed; in truth, an uneven subfloor is the root of many future issues, including cracking and shifting, which is why mastering precise floor leveling is essential. According to experts at this comprehensive guide, neglecting proper leveling can double your workload later. Additionally, a common misconception about hardwood floors is that they don’t require acclimation; in practice, failure to allow wood to adjust to your home’s humidity levels can cause warping, gaps, or buckling. Advanced installers understand that acclimating engineered and solid hardwoods properly, at least 48-72 hours, is key—more info on this can be found here.
A trap I often warn about is the assumption that vertical and horizontal leveling are the same—a mistake that can lead to uneven tile formations and poor aesthetic outcomes. Vertical irregularities, such as a sloped floor, require specific techniques like shimming or mud slapping, which are often underestimated. For a detailed approach, check out this resource.
In the realm of tile installation, many think that simply adhering tiles with thinset guarantees a perfect surface. However, the truth is that substrate preparation, including consistent curing times and proper trowel size, plays a pivotal role in preventing lippage and cracking. Ignoring these factors is a common mistake that leads to uneven grout lines or tile breakage. More on avoiding these pitfalls can be found in this article.
What about the misconception that more adhesive equals better bonding? In fact, excess thinset can cause uneven surfaces or bleed-through, affecting both look and integrity. The industry recommends using the right amount—not too much. For advanced tips, explore this guide.
These nuances underscore that successful flooring installation boils down to attention to detail and understanding the surprising intricacies behind each step. Overlooking these can result in frustration, wasted money, and compromised durability. Let’s dig deeper—have you ever fallen into this trap? Let me know in the comments.Maintaining your flooring’s pristine condition requires specific tools and a solid routine to ensure durability and beauty over time. One of my favorite devices is the laser level, which provides unparalleled accuracy in ensuring your floors remain perfectly flat and aligned, especially after installation or during repairs. Unlike traditional bubble levels or string lines, a laser level projects a consistent, straight line across the entire space, making it easier to spot uneven areas or shifts that need correction. For detailed guidance, check out this resource about achieving flawless surface levels.
The Hidden Lessons That Transformed My Flooring Journey
One of the toughest truths I’ve learned is that perfection in flooring isn’t about luck—it’s about relentless attention to detail. I once thought that snapping a chalk line was enough, only to realize later how tiny miscalculations compounded into days of fixing mistakes. That taught me that patience and double-checking measurements can save you hours—and serious frustration. Additionally, I discovered that even the most sophisticated tools won’t compensate for skipped steps or rushed work. Embracing a meticulous approach has turned me into a better installer and a happier homeowner when I see flawless results.
Tools and Tips That Elevated My Craft
I swear by a high-quality laser level when aiming for accuracy. Its ability to project precise lines over large areas ensures straight, level surfaces—something that traditional bubble levels can’t guarantee over an entire room. For measuring, a reliable tape measure and a square are indispensable to prevent skewed layouts. Also, don’t underestimate the power of good reference guides—books like these design tips and installation guides have saved me countless times. Combining these tools with a disciplined attitude has made my flooring projects look professional every time.
Belief in Continuous Growth and Sharing Knowledge
I firmly believe that every flooring project is a chance to learn something new. Sharing tips and asking for feedback has been invaluable—especially from seasoned professionals whose insights challenge my assumptions. For example, I once underestimated the need for proper acclimation of hardwoods, which led to gaps later. Now, I prioritize research and community advice, reminding myself that mastery is a continuous journey. If you’re ever feeling overwhelmed, just remember: every mistake is a step toward becoming a more skilled installer. Keep pushing your boundaries, and don’t hesitate to seek out the wealth of knowledge available online and through workshops.
Step Into Your Next Flooring Project with Confidence
Armed with real-world lessons, the right tools, and an open mind, you’re well on your way to flooring success. Whether it’s tile, hardwood, or vinyl, remember that meticulous prep and attention to detail will set your work apart. If you ever feel stuck, reach out to experts through these contact points or revisit trusted guides. The key is to stay proactive, learn from each step, and celebrate your progress along the way. Your next floor can be a masterpiece—start today and enjoy the transformation!
Don’t Hesitate—Share Your Flooring Experiences Below
Have you ever faced a flooring challenge that changed how you approach your DIY projects? I’d love to hear your stories and tips—share them in the comments below and let’s grow together as home improvement enthusiasts!