
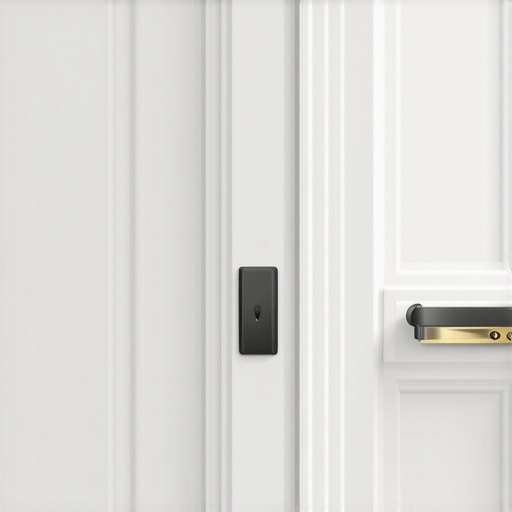
Walking into a room after installing new hardwood floors and noticing that your door casings don’t sit flush—it’s a frustrating sight. I remember my first project where I didn’t think much about the door casings, only to realize afterward that the gap between the flooring and the casings was glaring. That lightbulb moment hit me hard: **undercutting your door casings makes a huge difference**. It’s a small tweak, but it leads to a seamless transition between your floor and walls, elevating the entire space.
The Hidden Power of Undercutting Door Casings
Many DIYers and even some pros overlook this crucial step. They see the door jambs as fixed objects, not realizing that a simple adjustment during installation can save a lot of headache—and ensure a polished look. When I started undercutting my door casings, I immediately noticed how much cleaner and professional my floors looked. The flooring slides perfectly underneath, eliminating those unsightly gaps and the need for nasty trimming or filler work later.
But why is this step so often skipped? Some think it’s unnecessary or too tedious, especially if they’re eager to finish up. Others fear it might damage the trim or wall. Trust me, I’ve made those mistakes early on, and I can tell you from experience: not understating the importance of this step can lead to uneven gaps, critter entrances, or worse, the need to rip out and redo the work.
In this guide, I’ll walk you through why undercutting is essential, how to do it right, and the best tools to make the job quick and accurate. By the end, you’ll wonder how you ever installed flooring without it. Plus, a few helpful tips from seasoned pros will save you time and effort. And if your goal is a truly professional finish, this step is not optional—it’s *the* secret to getting it right.
If you’ve ever faced that ugly gap between your door frame and floor, then stick around. You’re about to learn a simple trick that instantly upgrades your project. Ready to dive into the details? Let’s go.
Is Undercutting Really Worth the Extra Step? The Honest Truth
When I first considered skipping this step on a quick renovation, I convinced myself it was fine. But after installing a new hardwood floor and seeing that gap, I knew better. Early on, I made the mistake of trying to cut the casing with a utility knife, which resulted in uneven edges and a sloppy finish. Now, I always use a proper multi-tool with a fine-tooth blade for clean, accurate cuts. This experience taught me the importance of precise tools and technique for flawless results.
For comprehensive guidance on this, check out my detailed post on [flooring installation fundamentals](https://tiletrendshop.com/flooring-installation-fundamentals-leveling-for-a-seamless-look). It’s packed with tips that can help you avoid common pitfalls and get perfect edges every time.
Cutting the Door Casings with Precision
To start, remove the door from its hinges and set it aside to prevent any accidental damage. Use a straight edge and a pencil to mark the desired cut line on the casing, typically aligning it with the height of your flooring. For a clean and professional cut, equip a fine-tooth oscillating multi-tool with a flush-cut blade. Think of this tool as the scalpel of flooring—very precise, allowing you to make smooth, straight cuts without chipping the finish. As I learned the hard way, trying to saw through casings with a hand saw or utility knife often led to jagged edges. Once you make the cut, test the fit by slipping your flooring plank underneath the shortened casing. It should slide in snugly, like a key fitting into a lock, without forcing or gaps.
Dealing with Curved or Ornate Casings
If your door trim features curves or decorative profiles, opt for a flexible trim saw blade or a high-quality hand saw, and cut slowly to preserve the profile. If the profile complicates the cut, consider a small plunge cut with a oscillating tool for detailed areas. Remember, the goal is a neat, flush fit that makes the transition between flooring and wall seamless. Don’t forget to wear safety glasses—the fine dust from cutting can be hazardous, and a mask is also recommended especially in enclosed spaces. After making the cut, lightly sand the cut edges with fine-grit sandpaper to remove splinters and ensure a smooth surface.
Test Fit and Adjust
Once you’ve cut the casings, dry-fit your flooring planks beneath the trim. It’s common to make small tweaks—perhaps a millimeter or two—to the cut line to achieve perfection. If gaps appear due to uneven cuts, gently sand or trim the edges. This iterative process is like tuning a musical instrument; patience here ensures a tight, clean junction, not a sloppy mess. During my first attempt, I underestimated how much variance even small imperfections could cause, resulting in gaps that needed filling later. Now, I always take my time to verify fit before permanent installation.To ensure the best results, refer to detailed guides on floor leveling and best installation practices. Properly underscoring the casings at this stage will save you hours of work and frustration during the actual flooring installation, leading to a professional, seamless finish that elevates your entire space.Many DIY enthusiasts and even seasoned professionals often get tripped up by misconceptions about flooring installation, tile work, or hardwood floors. One prevalent myth is that leveling just involves pouring self-leveling compounds and walking away—when in fact, the process is much more nuanced. Proper surface preparation, understanding substrate properties, and assessing moisture levels are critical steps often underestimated, leading to future cracks, warping, or delamination. For example, some believe that level subfloors negate the need for detailed leveling techniques. However, a flat surface isn’t always truly even; subtle high spots or ridges can cause uneven tile joints or squeaks under hardwood. Invest in proper testing methods, like the {{the flashlight test}} to detect subfloor ridges, ensuring your base is solid—skipping this can cost you hours of remediation later, as explained in our post on {{mastering-floor-leveling-secrets}}.
Another common mistake is overlooking the importance of adequate expansion gaps—especially in large-format tile or hardwood installations. Many assume that simply leaving a standard gap suffices, but environmental factors like humidity fluctuations demand larger, controlled expansion joints to prevent buckling or gaps over time. It’s a nuanced aspect often missing from beginner guides but covered thoroughly in expert resources like {{the expansion-joint rule}}.
Now, a question for advanced readers: *How do you address irregularities caused by substrate settling in retrofitted floors?* This is where understanding different leveling techniques becomes vital. Using specialized tools such as 🏗️ ultra-fine spatulas or vibrating spiked rollers can improve adhesion and surface smoothness. According to industry research, tailored approaches to substrate irregularities significantly enhance the lifespan and appearance of flooring, reducing maintenance costs. For comprehensive strategies, be sure to check {{the full-spread-glue method vs. dot method}} and {{precise-floor-leveling techniques}}.
Remember, rushing or cutting corners in these subtle areas can lead to problems down the line, such as tile cracking or hardwood finish failure. Do you have stories of hidden pitfalls? Share your experience below! Elevate your craftsmanship by paying attention to these complex details, and don’t forget to review our guide on {{revamp your home with expert flooring tips}} for more insights.When it comes to flooring installation, tile, or hardwood, having the right tools can make all the difference in achieving professional-quality results that stand the test of time. I personally swear by certain equipment and methods that streamline the process and ensure longevity. For instance, I rely heavily on a precision laser level—I’ve found the laser level a game-changer for checking subfloor flatness before laying down tiles or hardwood. This tool saves hours by quickly pinpointing high and low spots, helping me correct issues early, preventing future cracks or uneven wear.
Another indispensable item I recommend is a high-quality oscillating multi-tool fitted with a flush-cut blade. I use mine when undercutting door casings; its fine control allows for clean, precise cuts that result in a seamless transition between flooring and baseboards. Trust me, trying to switch to a manual saw or utility knife just complicates the job and risks uneven edges. For long-term results, I also invest in a good moisture meter to monitor subfloor conditions, as hidden moisture can cause flooring to warp or cup over time. A consistent hand with these measurements helps maintain a stable environment, adding years to your flooring’s lifespan.
To keep everything in tip-top shape and avoid costly mistakes, I recommend maintaining your tools regularly—clean blades, calibrate laser levels annually, and store equipment properly. Doing so ensures your tools perform accurately during every project, preventing errors that could compromise floor integrity.
Looking forward, I believe technological innovation will make flooring installation even more precise and accessible. Automated leveling systems and smart moisture sensors are on the horizon, promising to reduce human error and optimize long-term durability.
**How do I maintain my tools over time?** Regular cleaning, proper storage, and calibration are key. Also, replacing worn blades before they cause damage to your flooring can not only save money but also elevate the quality of your work. Implementing these habits ensures your equipment remains reliable, making every project smoother and more successful.
If you’re ready to take your flooring projects to the next level, I highly recommend giving a try to a high-quality laser level or moisture meter. These tools might seem like an investment now, but their impact on the durability and appearance of your floors will be worth it. For more expert insights on best practices and avoiding common pitfalls, check out our comprehensive flooring tips. Happy flooring!
Lessons Learned from the Flooring Field
One of the biggest surprises I encountered was how seemingly minor steps, like undercutting door casings, can dramatically improve the final look. Early in my journey, I underestimated the importance of precise cuts, leading to gaps and uneven transitions. That lightbulb moment taught me that patience and attention to detail elevate craftsmanship. Additionally, I learned that tools matter—investing in a quality oscillating multi-tool made a significant difference in achieving clean, professional edges. Lastly, understanding the nuances of working around curved or ornate trim pushed me to develop creative solutions, like flexible blades and careful blade control, that I now always incorporate to ensure a flawless finish.