
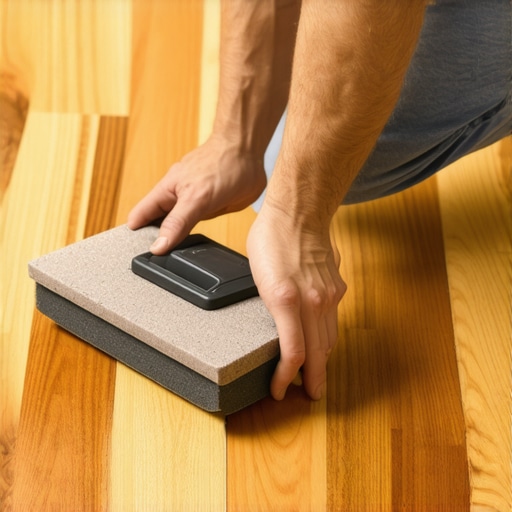
Have you ever completed a beautiful hardwood flooring project only to be disappointed when the finish looked uneven, bubbled, or peeled off sooner than expected? I vividly remember my first attempt at applying polyurethane—thinking I was doing everything right, only to discover the hard way that skipping a simple yet crucial step could sabotage all my efforts. That lightbulb moment hit hard when I realized I had neglected to sand between coats, and it cost me time, money, and frustration.
The Secret Why Sanding Between Coats Matters More Than You Think
When I first started refinishing my hardwood floors, I believed that applying multiple coats of polyurethane would be a straightforward process. I brushed on the first layer, let it dry, and eagerly moved on to the next. It wasn’t until I noticed tiny bubbles and rough patches emerging that I understood the importance of lightly sanding in between layers. Sanding smooths out imperfections, ensures better adhesion, and leads to a flawless finish that lasts. In fact, according to expert tips for 2025, proper surface preparation—including sanding—is essential for durability and a professional look. This step might seem tedious, but it pays off big time in both appearance and longevity.
Is Sanding Between Coats Overhyped or Essential?
I admit, early in my DIY journey, I was skeptical. I thought, “Doesn’t the polyurethane level itself out eventually?” My mistake was underestimating the microscopic bumps and dust particles that can ruin a finish. Skipping sanding might save a few minutes initially, but it often leads to uneven, cloudy, or sticky surfaces that require stripping and redoing everything. Trust me, I’ve been there. Learning from my misstep, I started embracing the sanding process, and I’ve never looked back. For those curious about the technical side or wanting to avoid common pitfalls, this article on flooring installation mistakes offers valuable insights on achieving a seamless, durable finish. Next, we’ll dive into the step-by-step process so you can get professional results without the hefty price tag.
Prepare Your Surface Carefully
Start by cleaning your hardwood thoroughly, removing dust, grease, and old finish residues. Use a vacuum and tack cloth to ensure no debris remains, as particles can cause bubbles and bumps in the final coat. Think of preparing the surface like setting a canvas before painting—everything must be smooth and spotless for the best results.
Sand Between Coats to Achieve a Flawless Finish
Apply the first coat of polyurethane with a high-quality brush or roller, then let it dry completely—usually 24 hours. Lightly sand the surface with a fine-grit (220) sanding block or orbital sander to remove dust nibs and ensure adhesion for the next layer. This step is like smoothing a rough sketch before adding details; it creates a seamless surface that reflects light evenly. I recall once rushing through this step, which resulted in a cloudy, uneven finish that I had to sand off and redo, costing me extra time and material.
Use the Right Sanding Technique and Tools
Sand with the grain of the wood using gentle, even strokes. Avoid pressing down too hard, which can gouge the surface. For larger areas, an orbital sander can speed up the process, but always follow the grain direction for a professional look. Wipe down the dust with a tack cloth before applying the next coat. Proper sanding creates microscopic scratches that the polyurethane can grip onto, enhancing durability. Remember, a quick pass with a worn-out sander will leave uneven abrasions and rough patches, undermining your effort.
Apply Multiple Thin Coats for Durability
Don’t be tempted to slather on thick coats—apply thin, even layers instead. Use a good-quality synthetic brush or a foam roller to spread the finish smoothly. After each coat, repeat the sanding process to eliminate imperfections and promote adhesion. This method might take more time upfront but results in a glass-like, durable finish that resists peeling and bubbling. Skipping this iterative process can lead to finish failure, especially in high-traffic areas.
Maintain Consistency and Patience
Consistent application is key. Keep the environment dust-free by closing windows and turning off fans. Work in well-ventilated areas, but avoid drafts that can disturb the drying process. Patience pays off—rushing the drying or skipping a step can cause bubbles, ripples, or adhesion issues. I learned this lesson the hard way when I hurried drying overnight, only to wake up to a tacky, uneven surface that needed sanding and refinishing all over again.
Final Tips for a Long-Lasting Finish
After the last coat dries, consider applying a wax or topcoat for added protection. Also, customize your choice of finish—matte, satin, or gloss—based on your desired aesthetic and maintenance needs. Regular cleaning with appropriate products extends the life of your finish and keeps it looking new. Remember, a beautiful finish relies heavily on detailed preparation, consistent application, and patience throughout every step.
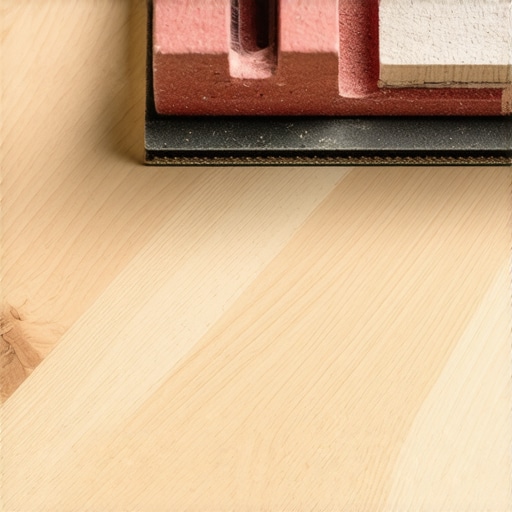
While most DIY enthusiasts focus on the visible aspects like choosing the right tile or hardwood stain, there’s a hidden layer of nuance often overlooked—especially by those aiming for long-lasting, professional results. One common misconception is that as long as the surface appears smooth, the job is done. However, subtle errors in preparation, leveling, and material compatibility can undermine your efforts over time.
Why Flat Isn’t Always Perfect
Many assume that achieving a ‘flat’ floor merely involves pouring a self-leveling compound and waiting. But the real challenge lies in understanding the substrate’s condition. For example, a concrete slab with high moisture levels or residual unevenness can cause issues like cracking or delamination, even with the thickest topcoat. According to experts in concrete preparation, assessing moisture levels and pre-treating the substrate are critical steps that often get skipped. Overlooking these nuances can lead to expensive repairs down the line.
The Myth of One-Size-Fits-All Flooring Materials
Everyone says you should pick the most durable or trendy material, but in reality, matching the right product to your environment and existing structure is key. For instance, installing hardwood directly over a subfloor with inconsistent moisture levels can cause cupping and buckling. Similarly, choosing tiles without considering the thermal expansion of adjacent materials might result in cracked groutlines. Dive into latest tile trends to see how the right combination elevates your space—an often-overlooked factor that distinguishes amateurs from pros.
How Do Advanced Techniques Prevent Floor Failures?
Implementing precise leveling techniques, like the Rake Method or using feather finish compounds, can make or break a project’s longevity. These methods demand attention to detail—like ensuring the substrate is clean, dry, and free of high spots—yet many DIYers rely solely on visual inspection. Incorporate tools like laser levels and moisture meters, and always follow the detailed steps outlined in floor leveling guides. The payoff? A seamless surface that resists creaking, cracking, and even future moisture-related warping.
Take caution when using self-leveling compounds; improper mixing or application can cause peeling or unevenness. Remember, every material has its quirks—an understanding that comes with experience and research. Common pitfalls include over-thinning, insufficient curing time, or neglecting to prime porous substrates.
Moreover, advanced floor installation isn’t just about the materials but also about planning around your environment. For example, controlling humidity levels, temperature, and even air circulation during installation can significantly impact the final outcome. Don’t let small oversights turn into costly fixes—getting it right from the start saves time, money, and frustration.
Have you ever fallen into this trap? Let me know in the comments. Mastering these nuances elevates your craftsmanship from good to exceptional, ensuring your floors stand the test of time and style.
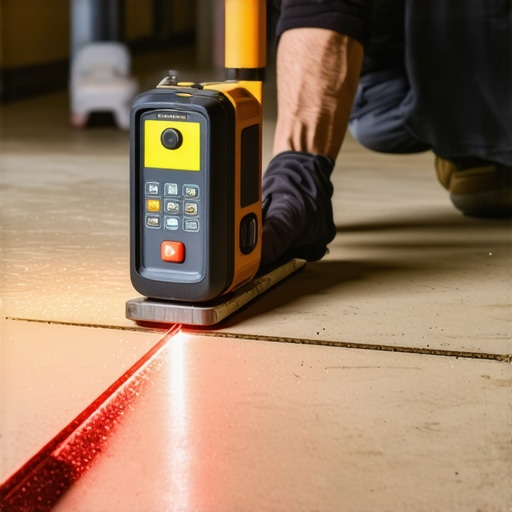
Keep Your Floors in Top Shape with the Right Tools
Maintaining beautifully installed floors is as crucial as the initial installation itself. To ensure longevity and pristine appearance, investing in quality tools and adopting proper maintenance routines is paramount. I personally swear by a high-quality microfiber mop paired with a pH-neutral cleaner, like Bona Hardwood Floor Cleaner, which effectively preserves the finish without causing wear. Additionally, a soft-bristle broom ensures that dust and debris are gently removed, preventing scratches that can compromise the surface over time.
For more stubborn stains or grime, a damp (not wet) microfiber cloth works wonders. Keep a pair of ultra-fine grit sandpaper (220 grit) on hand for occasional touch-ups, especially in high-traffic areas where minor scratches tend to accumulate. Regularly inspecting for loose boards or tiles allows you to address minor issues before they escalate into costly repairs. Having a reliable cordless vacuum with adjustable suction and soft-brush attachments, such as the Dyson V8 Absolute, simplifies daily cleaning while being gentle on the surface.
Tools That Make Maintenance Smarter and Easier
Beyond those basics, certain specialized tools help in tactical maintenance. For instance, a floor buffer with a soft pad can recondition dull finishes and restore luster without needing professional resurfacing. An infrared thermometer is invaluable for monitoring temperature fluctuations in heated flooring systems, preventing expansion issues that could eventually damage the finish. For periodic deep cleaning, I recommend using an oscillating floor scrubber—like the Fill-Rite Electric Scrubber—to reach into cracks and textured surfaces, ensuring debris removal in every nook and cranny.
Switching to innovative accessories like microfiber cleaning pads and wax applicators designed specifically for hardwoods prolongs the life of your floors and enhances their appearance. Remember, equipment maintenance counts, too: cleaning and storing your tools properly after each use prevents contamination and preserves their effectiveness.
Future Trends in Floor Maintenance Technology
Looking ahead, smart cleaning devices integrated with IoT technology may soon revolutionize how we care for our floors. Imagine robotic cleaners programmed specifically for hardwood or tile surfaces, equipped with sensors that detect dirt levels and automatically adjust cleaning power. Advances in nano-coating sprays promise to add a self-healing layer to the finish, resisting scratches and minor damages proactively. Staying ahead of these innovations allows homeowners and professionals alike to adopt maintenance strategies that not only preserve, but also enhance, the durability of their flooring investments.
How do I maintain my hardwood floors over time?
The key to long-term hardwood floor care lies in consistent, gentle maintenance. Regular sweeping prevents abrasive particles from grinding into the finish, while minimal moisture cleaning using pH-neutral solutions maintains surface integrity. Periodic inspections for loose tiles or boards help catch issues early. It’s also wise to refinishing or resealing the surface when signs of wear appear; for guidance, I suggest consulting expert tips for 2025 on refinishing techniques. Most importantly, avoid harsh chemicals and abrasive tools that can strip the finish, opting instead for recommended cleaning products and techniques that suit your specific flooring type.
Start today by trying a professional-grade microfiber mop paired with a conditioning cleaner—this simple step can dramatically extend the life of your floors. With proper tools and consistent care, your floors will continue to impress for years to come.
Add a Protective Layer to Your Investment
Implementing a periodic application of wax or specialized topcoat can seal in your flooring’s beauty. Choose finishes that align with your desired maintenance level and aesthetic, whether matte or high-gloss. Remember, maintaining proper humidity and temperature levels in your environment complements these efforts, preventing expansion and contraction that could lead to cracks or gaps. Regularly inspecting and maintaining your tools, along with scheduling professional assessments when necessary, will keep your floors resilient and stunning.
For advanced techniques, consulting detailed guides such as floor leveling techniques can provide deeper insights into preserving a seamless surface. Try incorporating some of these expert-recommended maintenance practices—you’ll be amazed at how they prolong your flooring’s life and beauty.
These Surprising Truths Changed My Flooring Game
- I once believed that choosing a high-quality finish alone would suffice for a durable floor. The lightbulb moment came when I realized surface prep, especially sanding between coats, was the real secret to longevity. It’s like cake—no matter how good the icing, the foundation has to be solid.
- Skimping on small details, like properly cleaning the substrate or using the right tools, might seem minor initially but can lead to costly repairs down the line. I’ve learned that patience and precision save time and money more than rushing through the process.
- Watching tutorials and reading guides is great, but hands-on experience taught me the most. Each project revealed nuances—like the importance of sanding with the grain—and I wish I’d started practicing them sooner for perfect results.
- Advanced techniques such as precise leveling and moisture assessment aren’t just for pros. Implementing these early on gave me a smoother, more professional finish that truly lasts, confirming that investing in better methods pays off.
- Consistency in my application process, environment control, and tool maintenance became my pillars of success. These lessons, learned through trial and error, transformed my approach from amateur to confident DIYer.
My Key Tools and Resources for a Flawless Floor
- Orbital Sander: Reliable for achieving smooth, even surfaces between coats. I trust brands like Makita for durability.
- Moisture Meter: Essential for assessing subfloor conditions, avoiding future warping—my secret weapon before laying down new materials.
- Bona Hardwood Floor Cleaner: Gentle yet effective—keeps floors looking pristine without damaging the finish.
- Expert Guides: I highly recommend this resource on hardwood refinishing techniques. It’s a game-changer for understanding the professionals’ mindset and practices.
Now It’s Your Turn to Elevate Your Flooring Skills
Every step in the flooring process offers an opportunity to learn, refine, and achieve excellence. Whether you’re just starting or looking to perfect your craft, embracing these lessons will help you create stunning, long-lasting results. Remember, mastery isn’t about speed—it’s about precision, patience, and passion. Take action today, and watch your floors transform into works of art that stand the test of time.
What unexpected challenge did you face in your last flooring project, and how did you overcome it? Share your story below—I’d love to hear how you elevated your craft!
.