
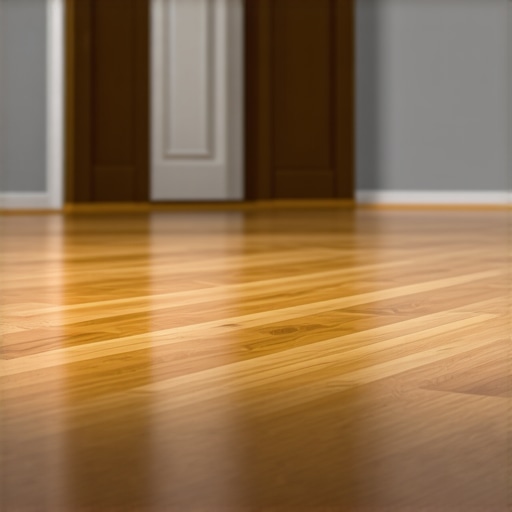
I remember the first time I installed wide-plank hardwood in a basement only to come back a few months later and see it warping, cupping, and looking more like a ripple pool than a luxurious floor. It was a lightbulb moment for me—hardwood, especially wide planks, can be very unforgiving in high-humidity environments. The frustration of those buckled boards was real, but it also sparked a mission to understand the underlying causes and, more importantly, how to avoid them.
The Hidden Dangers of Humidity for Wide-Plank Hardwood Floors
High humidity levels can spell disaster for wooden floors, especially in basements where moisture tends to be more persistent. Wide planks have a larger surface area, which means they absorb more moisture and expand accordingly. But expansion isn’t the only issue—if the moisture levels fluctuate wildly, the wood can contract and swell repeatedly, leading to gaps, buckling, and even structural damage over time.
Early in my career, I made a mistake by assuming that a good-quality hardwood would handle humidity swings without issue. I neglected to measure the basement’s moisture levels properly before installation, assuming that sealing the floor would suffice. That turned into a costly lesson—because the environment’s humidity was way above the optimal range for hardwood, and my efforts went to waste. According to industry experts, controlling moisture is key—humidity should ideally stay between 30% and 50% for hardwood to perform well (source: Tile Trend Shop).
So, what can you do if your basement’s humidity is out of control? How do you keep your beautiful wide planks from turning into warped nightmares? That’s exactly what I’ll show you in the upcoming sections. If you’ve faced similar struggles or you’re anxious about your upcoming project, keep reading—you’re not alone, and there’s a solution.
Prepare the Subfloor Carefully
Start by thoroughly inspecting your basement’s subfloor. Use a laser level or a long straightedge to identify high and low spots. An uneven surface causes gaps and uneven wear in wide planks. If you find dips or humps, learn the best leveling techniques to correct these issues. I once spent a day grinding down a particularly uneven section, which prevented future buckling and made installation smoother.
Use Proper Adhesives and Underlayments
Choose a high-quality underlayment that acts as a moisture barrier and provides cushioning. Think of it as a shock absorber for your hardwood—protecting against ground moisture and minor subfloor imperfections. When I installed a wide plank in my basement, I opted for a moisture-resistant underlayment, which significantly reduced expansion and contraction caused by humidity fluctuations. Remember, for floating installations, the correct adhesive and underlayment choice can make or break your flooring’s longevity.
Acclimate Your Hardwood Properly
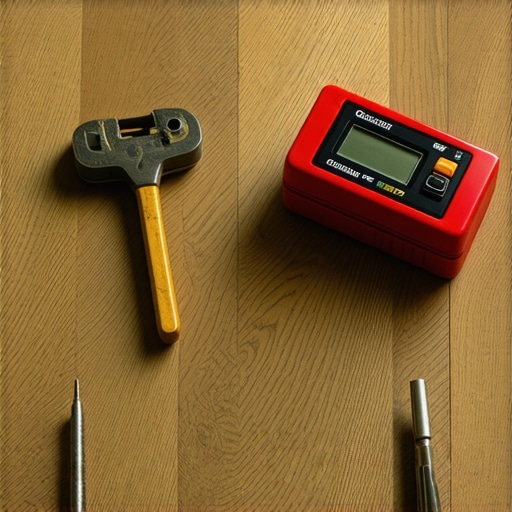
Never install hardwood immediately after a delivery. Instead, allow the planks to acclimate in the installation environment for at least 72 hours. During this time, the wood adjusts to the room’s temperature and humidity, reducing the risk of warping. I learned this the hard way when I skipped acclimation and ended up with cupped boards a few months later. To ensure proper acclimation, store the planks flat and avoid stacking them tightly, as this can trap moisture.
Master the Installation Technique
When dealing with wide planks, precise spacing is essential. Use spacers to maintain expansion gaps around the perimeter—typically 1/4 to 1/2 inch. Secure the boards with appropriate nails or staples, ensuring consistent pressure across the length of each plank. I once used a pneumatic stapler for quicker installation, but I meticulously checked each row for gaps. For the best results, study the installation fundamentals to prevent common mistakes that lead to future buckling.
Control Humidity During and After Installation
Maintain your basement’s humidity at 30-50%. Use a dehumidifier if necessary, especially during humid seasons. I installed a hygrometer and a small dehumidifier last summer, which stabilized the environment and preserved my new floor. Proper humidity control minimizes the wood’s expansion and contraction, preserving the appearance and structural integrity of your wide planks for years to come.
Many homeowners and even professionals often believe that laying hardwood floors is simply about matching planks and nailing them down, but the truth is far more complex. One common myth is that selecting the best-looking hardwood guarantees a long-lasting floor. However, material quality alone isn’t enough; understanding the environmental conditions and proper installation techniques is crucial. For instance, neglecting the importance of acclimation — allowing wood to adjust to your home’s humidity and temperature—can result in unexpected warping or gaps, even with premium materials. A study by the Forest Products Laboratory emphasizes that wood’s dimensional stability heavily depends on its environment during installation, not just its inherent quality. Therefore, always give your hardwood the necessary acclimation period, typically 72 hours, to prevent future issues. Another mistake I see frequently is uniform installation without considering expansion gaps. People often forget that wood needs room to expand and contract with seasonal humidity shifts, which can cause buckling if ignored. Properly planning for this with adequate gaps and control of indoor humidity levels, ideally between 30-50%, can save you a costly redo. When it comes to flooring leveling, many installers assume that a level subfloor is optional or can be fixed post-installation. But uneven surfaces are a hidden hazard that can compromise the entire flooring lifespan. Precise subfloor preparation, including grinding high spots and filling dips, is essential — and using advanced methods like self-leveling compounds detailed in [this guide](https://tiletrendshop.com/precise-floor-leveling-techniques-to-achieve-flawless-surfaces) can help achieve a seamless, durable surface. One nuanced detail that often trips people up is tile-laying on uneven floors. Even minor imperfections can lead to lippage and aesthetic issues that detract from your design. A professional tip is to use a combination of proper substrate preparation and self-leveling cement to ensure a perfectly flat base. For further insight, check out [this comprehensive resource](https://tiletrendshop.com/step-by-step-guide-to-flooring-installation-and-leveling-success). Have you ever fallen into this trap? Let me know in the comments.
Maintaining pristine hardwood floors and perfectly level tile surfaces requires more than just a good eye and careful planning; it demands the right tools and a commitment to precise techniques. Over the years, I’ve zeroed in on equipment that truly elevates quality and efficiency, enabling me to deliver results that stand the test of time.
Invest in a High-Quality Laser Level
A laser level isn’t just a fancy gadget—it’s an essential for ensuring straight, level installations every time. I personally swear by the Bosch GSL2 Professional Laser Distance Measurer; its pinpoint accuracy helps me detect subtle imperfections in the subfloor, which can be a hidden cause of future issues like tile lippage or hardwood gaps. Using a laser level during initial subfloor checks guarantees a seamless surface, significantly reducing the need for later adjustments.
Bring Out Your Best with a Spiked Roller
When it comes to self-leveling compounds and thinsets, a spiked roller is often overlooked but invaluable. I use one to eliminate air bubbles and improve adhesion after pouring self-leveler or applying thinset. This small investment pays off in the form of a uniform, durable surface—crucial when you’re working with large format tiles or wide-plank hardwoods. According to industry experts, the spiked roller can prevent voids that cause unevenness and cracking later in the lifespan of your flooring (source).
Choose an Accurate Wet Tile Saw
The precision of your cuts directly affects aesthetic and functional quality. My preferred tool is the DeWalt DWC860W Wet Tile Saw; its water-cooled blade minimizes dust and provides smooth, accurate cuts, especially important for intricate border work or large tiles. A clean, consistent cut reduces grout lines and prevents chipping, prolonging tile life and enhancing visual appeal.
Long-Term Care Demands the Right Cleaning Tools
Maintaining your floors over the years hinges on using appropriate cleaning equipment. I recommend a microfiber mop paired with pH-balanced cleaner designed specifically for hardwood or tile surfaces. Avoid harsh chemicals or abrasive brushes that can damage finishes or grout. Regular cleaning with gentle tools maintains luster and prevents dirt buildup that can cause surface wear.
Planning for Future Scaling and Maintenance
As your space evolves, upgrading or extending your flooring may become necessary. I foresee a growing trend in modular, click-lock systems that facilitate easy repairs and expansion—think of them as the plug-and-play of flooring. Investing in quality tools now, like a reliable subfloor grinder and precise measuring devices, ensures your renovations will be smoother, less costly, and yield perfect results every time.
How do I keep hardwood and tile looking great over time? Consider dedicated maintenance routines like honing, sealing, and periodic professional inspections. Using a specialist-approved cleaning kit can extend lifespan and preserve beauty.
Now, I challenge you to try the advanced leveling technique with a self-leveling compound combined with a spiked roller. This simple step can dramatically improve surface flatness, reduce future tile lippage, and enhance the overall appearance of your installation. Remember: precision tools coupled with meticulous technique form the foundation of a durable, stunning floor that lasts for decades.
The Hidden Lessons from My Flooring Journey
One of the most impactful lessons I learned was that even the best materials can falter without proper environmental control—humidity isn’t just a background factor; it’s a primary player in flooring longevity.
I realized that acclimation isn’t a luxury but a necessity. Rushing the process led to warping, and patience saved me from costly replacements later. Small details, like verifying subfloor flatness with a laser level, can make the difference between a seamless floor and future repair bills.
When I first thought that sealing a basement was enough to prevent humidity issues, I underestimated nature’s power. Regular environmental monitoring, including using a hygrometer, became my secret weapon to preserve the beauty and integrity of my wide planks.
Tools and Resources That Changed My Approach
For precise subfloor leveling, I trust the comprehensive techniques outlined in this detailed guide. It helped me understand that the foundation of a durable floor starts with impeccable subfloor prep.
My laser level, the Bosch GSL2, became indispensable for ensuring straightness and detecting minor imperfections early. Investing in quality tools like a spiked roller for self-leveling compounds has paid off by preventing future unevenness and cracks.
Additionally, I rely on industry insights from this resource to stay updated on best practices, ensuring my projects stand the test of time.
Your Next Step Could Be Easier Than You Think
Remember, achieving a long-lasting hardwood floor in a challenging environment isn’t about luck—it’s about applying strategic steps with the right tools and mindset. Embrace patience, meticulous preparation, and proactive environment management, and you’ll be rewarded with stunning, resilient floors.
What environmental challenge have you faced in your flooring projects? Share your experiences or questions below—I’d love to hear how you’re tackling humidity or subfloor issues in your space!