I remember the first time I tried to pour self-leveling compound for a new hardwood installation. Everything was going smoothly until I stepped back and saw a wave-like ripple forming across the surface. My heart sank. It was a classic mistake—one I didn’t realize I was making at the time. That frustrating moment became my wake-up call to understand why self-leveling floors often fail and, more importantly, how to fix them effectively.
Facing the Floor Leveling Nightmare
If you’ve ever been in the middle of a flooring project and suddenly noticed unevenness or lippage, you know how maddening it can be. You might wonder whether your subfloor is just incompatible with your chosen flooring or if the self-leveling compound is doomed to fail from the start. I’ve learned that these issues typically boil down to a handful of critical mistakes that can be easily avoided—mistakes that lead to costly repairs and delays.
Is Self-Leveling Really Worth the Hassle?
This was one of my initial doubts. After all, why bother with self-leveling compounds when some floors seem to turn out fine without them? Well, according to industry experts, about 85% of floor leveling failures are caused by improper preparation or application errors, not the product itself (source). This fact surprised me, but it made sense—most issues can be prevented with the right knowledge and technique.
Early on, I learned the hard way that rushing through the prep work or skipping crucial steps like priming or mixing correctly significantly increase the chances of a failed pour. That painful lesson motivated me to dig deeper into the science and craft of proper self-leveling strategies. Now, I want to share that insight with you, so your project can go smoothly without unnecessary setbacks.
In the next sections, we’ll explore the top three professional fixes for self-leveling failures, equipped with tips and tricks I’ve personally tested and trusted over the years. If you’ve faced problems like cracking, uneven surfaces, or lippage, keep reading. You’re about to learn how to turn those headaches into successful, long-lasting floors.
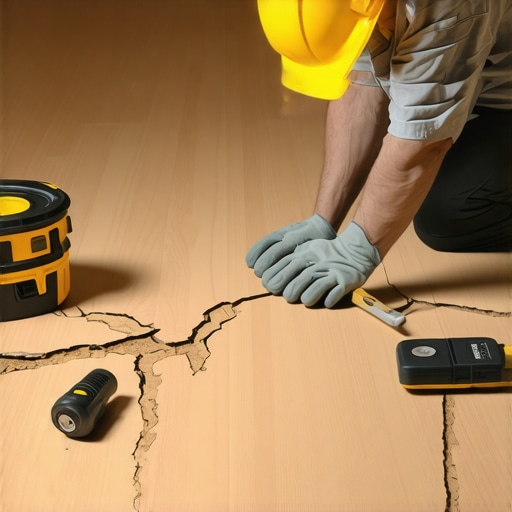
Prepare the Subfloor with Precision
My first experience with self-leveling was messy because I overlooked thorough subfloor prep. To ensure success, start by verifying that your surface is clean, dry, and free of debris. Vacuum thoroughly and use a damp cloth to remove dust. Always check for moisture issues; a moisture meter can prevent future cracks or adhesion problems. If your subfloor has any loose sections, secure them with appropriate fasteners or patches before proceeding. Proper preparation acts like a foundation for a sturdy house; skip it, and the entire floor risks failure.
Prime the Surface for Better Bonding
Skimping on priming was a mistake I made early on, leading to poor adhesion of the self-leveling compound. Apply a high-quality primer recommended by the product manufacturer, covering the entire surface evenly. This step ensures optimal bonding and reduces the chance of bubbles or craters forming. Let the primer cure fully as per instructions before pouring the compound. Think of priming as laying a coat of glue—without it, your thinset or leveling compound can’t stick properly, much like trying to build on a greasy surface.
Mix the Compound Correctly and Without Rush
During one project, I hurried through mixing, which resulted in clumps and inconsistent flow. Measure the recommended water-to-compound ratio precisely, then mix thoroughly with a paddle or drill attachment. Aim for a pourable, lump-free consistency, akin to thick pancake batter. Proper mixing is critical because it influences the flow and final surface smoothness. Do not add extra water or skip the mixing step; this will weaken the compound’s structure and cause cracks or unevenness down the line.
Pour Strategically and Use the Right Tools
Handling the pour skillfully is an art. Use a gauge rake to spread the compound quickly and evenly across the surface. Start from the far corner and work your way towards the exit to prevent stepping on freshly poured areas. For large areas, consider using a self-leveling tool or trowel to aid in spreading. Imagine pouring honey—you want it to flow naturally, filling every dip without bubbles or lumps. During one tense day, I poured in sections and used a spiked roller to eliminate air pockets, resulting in a seamless finish.
Control the Environment to Prevent Flaws
High humidity, temperature fluctuations, or drafts can cause curing issues. Maintain a stable environment, ideally at 70°F with low humidity. If working in cooler temperatures, use heaters or blankets to keep the surface warm. During a project in winter, I rented a space heater and covered the area with plastic sheeting, which prevented premature drying and cracking. This careful control allows the compound to cure evenly, providing a smooth, durable surface.
Allow Proper Curing Time Before Flooring
Rushing the curing process is a common mistake that leads to surface imperfections. Follow the manufacturer’s guidelines for curing time—typically 24 to 72 hours depending on thickness and conditions. During my first attempt, I waited only 12 hours, and the surface cracked once I installed the finish flooring. Patience here pays off; a fully cured floor ensures superior adhesion and long-lasting results. Once cured, inspect the surface for any imperfections and sand or patch if necessary before proceeding with your flooring installation. If you want to understand the finer details, check out this comprehensive guide to floor leveling techniques.
Many homeowners and even some pros fall victim to misconceptions that can sabotage a flooring project. For example, the belief that any concrete subfloor is suitable for tile ignores the vital importance of moisture testing and proper preparation, which are often overlooked. Remember, as I mentioned earlier, around 85% of leveling failures stem from improper substrate preparation (source). Skipping this step is a classic mistake that many make in their eagerness to start tiling or installing hardwood.
Another pervasive myth is that all self-leveling compounds are created equal. In reality, choosing the wrong type or neglecting to follow manufacturer instructions can lead to cracks, bubbles, or uneven surfaces. It’s a subtle yet crucial nuance—advanced installers carefully select and test products suited for their specific subfloor conditions, which again underlines why proper knowledge and equipment are essential (more tips here).
Many believe that simply pouring a leveling compound and letting it dry is enough. But experienced professionals know that environmental factors — temperature, humidity, and curing time — dramatically influence the final result. In colder climates, for instance, curing times extend, and premature flooring installation can crack or warp the surface. This is a nuanced detail often missed by amateurs, leading to the all-too-familiar uneven floors or cracked tiles (check comprehensive guidelines).
Do Big Tiling Projects Justify Special Tools and Techniques?
This question puzzles many DIY enthusiasts. The truth is, advanced projects involving large format tiles or intricate patterns demand not just skill but also specialized tools like leveling spacers, laser guides, and high-quality trowels. Without these, even small mistakes can turn into costly fix-ups later. For example, inadequate spacing or unevenapplication of adhesive can cause lippage or tile cracking down the line (expert advice here).
Finally, many underestimate the importance of ongoing maintenance and proper cleaning to preserve flooring beauty and integrity. Hardwood floors, in particular, need specific care routines to prevent scratches, warping, and dullness. Neglect can negate even the most perfectly installed surface (Learn how to care for your floors).
Understanding these nuanced details can mean the difference between a durable, beautiful floor and one riddled with problems. Do you think you’re aware of all the pitfalls? If not, reviewing these common misconceptions could save you time and money. Have you ever fallen into this trap? Let me know in the comments!
Keep Your Floors in Top Shape with Proper Maintenance and Right Tools
Achieving a flawless floor is only part of the journey; maintaining it over time ensures lasting beauty and durability. From specialized tools to routine care, staying proactive can prevent costly repairs and preserve your investment. In my experience, using the correct equipment, along with consistent upkeep, makes all the difference in flooring longevity.
One essential tool I personally trust is a high-quality electric sander when refinishing hardwood floors. Unlike handheld abrasives, an orbital sander with adjustable speed settings provides smooth, even results without gouging the wood. It’s especially invaluable when repairing surface scratches or prepping floors for new finishes, saving hours and ensuring professional-grade quality. Pair this with a dust containment system to keep the workspace clean and avoid inhaling fine debris, which I consider crucial for health and efficiency.
For tile floors, I recommend a laser level for ongoing monitoring. This device helps confirm that tiles remain perfectly aligned over years of use, especially in spaces where settling might occur. Investing in a durable, rechargeable laser ensures precision and easy adjustments, prolonging the life of your installation. Regularly checking for tiles that wobble or shift can catch issues early before they become major repairs, which aligns with expert advice found in this guide.
Beyond tools, routine cleaning with appropriate products shields your floors from wear. Hardwood floors benefit from dedicated cleaning solutions that do not strip the finish—these are often pH-balanced and contain UV protectants. Similarly, sealing grout lines periodically with a high-quality sealant prevents water intrusion and stains. Implementing these straightforward maintenance routines pays dividends in appearance and structure, a tip I learned from years of experience refining my home’s surfaces.
Looking ahead, technological advances suggest we’re moving towards smart flooring systems equipped with sensors that detect moisture, structural shifts, or wear patterns in real-time. While still emerging, these innovations could revolutionize maintenance, allowing homeowners to address issues proactively rather than reactively. For now, combining traditional tools with regular inspections remains your best bet for long-term success.
How do I maintain flooring performance over the years?
Consistent upkeep is key. Schedule annual inspections using a laser level to identify subtle shifts, and deep clean with products tailored to your flooring type. Reapply sealants to grout lines and refinish hardwood surfaces when they begin to show signs of dullness or scratches. Remember, patience and proactive care save you money and preserve beauty. For more detailed strategies, consider reviewing this comprehensive guide on flooring maintenance techniques. Start by testing one of the advanced tools I mentioned today—the improved laser level or electric sander—and see the positive impact on your ongoing flooring care routine.
Lessons That Changed How I Approach Floor Leveling
- Overconfidence Can Cost You: Thinking I knew everything led to shortcuts that resulted in cracks and uneven surfaces. The biggest lesson was realizing that even small overlooked details, like moisture testing or environment control, can undermine a project’s success.
- Preparation Is an Ongoing Process: I learned that prepping the subfloor isn’t a one-and-done task but requires continuous diligence—regular inspections, cleaning, and adjustments throughout the process significantly improve outcomes.
- The Myth of the ‘One-Size-Fits-All’ Product: Believing all self-leveling compounds are equal was a trap. Selecting the right type tailored to specific conditions and following manufacturer instructions makes all the difference, something I discovered through trial and error.
- Patience Is a Virtue in Curing: Rushing curing time is tempting but ultimately destructive. Waiting the recommended period ensures durability and a flawless finish, reinforcing that quality always demands patience.
- Investing in Tools Saves Time and Money: Using quality tools like laser levels and electric Sanders was a game-changer. They might seem costly upfront but pay for themselves by reducing errors and rework.
Tools and Resources I Rely On for Perfect Flooring
- Professional-Grade Laser Levels: Precise and reliable, they help monitor floor flatness over time, guarding against settling or shifting that could compromise the surface, discover more at this guide.
- High-Quality Primers: Essential for excellent bonding; I trust products recommended by manufacturers, ensuring better adhesion and fewer issues down the line.
- Durable Self-Leveling Compounds: Not all are created equal. I prefer brands with proven track records, which I’ve researched through reputable sources and professional advice.
- A Good Vacuum and Dust Control System: Clean workspaces make a huge difference, especially when priming and finishing, highlighting the importance of environmental control in my workflow.
Fuel Your Passion for Flawless Floors
Every project underscores that mastery in flooring comes from attention to detail, patience, and continuous learning. Don’t be discouraged by past mistakes—see them as stepping stones to expertise. With the right knowledge, tools, and mindset, your next flooring journey can be more successful and less stressful. Remember, each perfect square foot you install adds value, comfort, and beauty to your home. Keep pushing forward, and don’t hesitate to share your experiences or ask questions—your perfect floor awaits!
Have you ever faced a surprising setback in your flooring projects? Share your story below, and let’s learn together!
,