
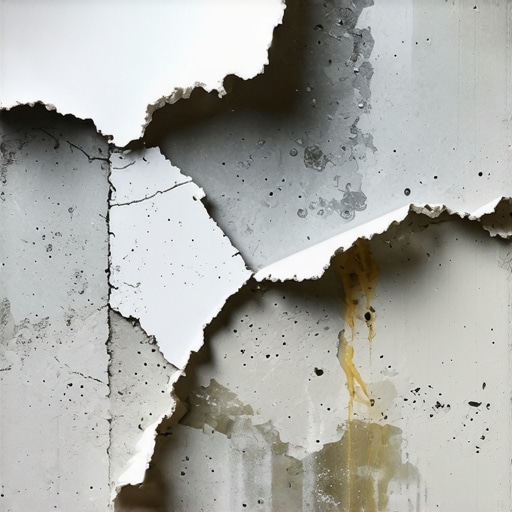
There was a moment during my first major flooring project where I almost gave up on tile installation altogether. I had poured self-leveling compound on a freshly prepared concrete slab, eagerly awaiting a smooth, flat surface. But instead of settling into a perfect finish, the surface began to bubble and peel away, as if my concrete was rejecting the very effort I put into preparing it. The sight was disheartening, and I couldn’t help but wonder, ‘What did I do wrong?’
Facing the Frustration of Peeling Self-Leveler
This experience was a wake-up call. I realized that understanding why self-leveler peels off concrete like wet paper isn’t just about avoiding costly mistakes—it’s about getting the project right the first time. And let me tell you, this problem is more common than you’d think, especially among DIY enthusiasts and even some pros who overlook the critical preparation steps.
In this post, I’ll share the ins and outs of preventing this issue, based on what I’ve learned through trial, error, and lots of research. Together, we’ll explore the end-to-end process to ensure your self-leveling compound bonds securely, providing a flawless base for tile, hardwood, or vinyl flooring. If you’ve ever faced this peeling nightmare, you know how it can derail your whole schedule. But don’t worry—I’ve got practical, proven tips that will save your flooring dreams from disaster.
Will I Ever Trust Self-Leveler Again?
Early in my learning curve, I made the mistake of skipping a crucial step: not properly cleaning the concrete surface before applying the self-leveler. That oversight is a common culprit behind adhesion failure. According to industry experts, preparing the surface thoroughly is the secret to success. For more detailed strategies, check out this comprehensive guide.
So, if you’re tired of seeing your DIY efforts peel away seconds after drying, stay tuned. We’ll walk through the exact causes of peeling and, more importantly, how to prevent them. Because your next flooring project deserves a solid, long-lasting foundation—no peeling, no surprises.
Prepare Your Subfloor Like a Pro
Start by thoroughly cleaning the concrete surface to remove dust, grease, or loose debris, ensuring a solid bond. Use a high-quality vacuum and a damp cloth to reach every corner. Then, check for moisture using an appropriate meter—wait for the readings to indicate dry conditions before proceeding. If the slab has uneven patches, consider applying a primer designed for porous surfaces (primer tips here). This step lays the foundation for a successful pour and prevents future peeling.
Master the Mixing and Pouring Technique
Measure your self-leveler components precisely, following the manufacturer’s instructions. Mix slowly to reduce air entrapment, and use a paddle on a drill for about 2-3 minutes until the mixture is smooth and lump-free—think of it like stirring a perfect pancake batter. When pouring, work swiftly but carefully, starting from the far corner and rolling outward. Use a trowel or a screeding tool to guide the compound evenly across the surface, avoiding puddles or thin spots. I once poured too much in one area and had to re-level, which delayed the project—so pace yourself. For larger areas, employ a leveling pin system to ensure uniform thickness (see the method).
Level Accurately Using the Correct Tools
Set up adjustable screeds or straight edges on your freshly poured self-leveler. Drag them across the surface with steady, consistent pressure to eliminate high spots and promote a flat finish. A good trick is to place shims or spacers beneath the tools for precise control, especially over large expanses. I once used a makeshift level to check the surface and caught a slight hump—a mistake that would have led to tile lippage later. Using a laser level or a long spirit level enhances accuracy, ensuring every inch meets the desired height (floor leveling techniques).
Allow Proper Drying and Curing
Avoid walking on the fresh self-leveler for at least 24 hours—think of it as letting a cake cool completely before frosting. Maintain consistent temperature and humidity, as rapid changes can cause cracks or peeling down the line. In high-traffic areas, consider blocking access or placing temporary barriers. During curing, keep an eye out for any signs of bubbling or pinholes, which indicate improper mixing or contamination. If such imperfections appear, patch them with a small amount of mixed self-leveler and smooth out with a trowel (patching tips).
Transition Seamlessly to Flooring Installation
Once your surface is fully cured—usually 24 to 48 hours—perform a final inspection. Use a straightedge to verify flatness; any deviation over 1/8 inch over 10 feet can cause issues later. Clean the surface thoroughly again to remove any dust or residues. Remember, a smooth, level surface is essential for tile, hardwood, or vinyl flooring to lay properly. For detailed guidance on laying tile or hardwood on your newly leveled floor, visit installation strategies.
Many DIY enthusiasts and even seasoned professionals fall prey to misconceptions around tile and flooring installation. One widespread myth is that a perfectly flat subfloor guarantees a flawless finish. While surface flatness is important, experts emphasize that understanding moisture management and substrate compatibility is equally critical for long-term durability. For instance, improper moisture barriers can lead to tile cracking or self-leveler peeling, as highlighted in recent industry studies. An advanced mistake often overlooked is neglecting substrate movement; installing flooring on unstable or poorly prepared foundations can cause buckling or gaps over time. Moreover, assuming that all adhesives are suitable for every situation is a trap—soil conditions, temperature, and material compatibility influence adhesion significantly. When it comes to hardwood floors, many believe that sanding alone restores old planks; however, understanding the nuances of different finishes—oil versus water-based—is vital for effective refinishing, as discussed in expert guides. Don’t underestimate the importance of subtle details like expansion gaps or moisture levels; overlooking these nuances can compromise your entire project. For detailed strategies on troubleshooting and perfecting your flooring work, visit this resource. Remember, success in flooring projects hinges on mastering these often-neglected nuances—your floors will thank you. Have you ever fallen into this trap? Let me know in the comments.Maintaining your flooring tools is crucial for long-lasting, professional results. I rely heavily on high-quality trowels with notched blades tailored to specific tile sizes, such as 1/4-inch for small tiles and 1/2-inch for large-format porcelain. These precise notches ensure optimal thinset adhesion and prevent lippage. For leveling large surfaces, I recommend a laser level; its accuracy surpasses traditional spirit levels and saves time by providing continuous feedback during floor leveling. Additionally, I keep a damp sponge and microfiber cloth handy for quick clean-up of excess grout and dust, which helps maintain tile surfaces over time. An angle grinder fitted with a diamond blade is invaluable for smoothing out uneven edges or cutting tiles snugly against jambs, especially when precision is non-negotiable. To keep tools in top shape, I suggest cleaning blades and trowels immediately after use with warm water and a stiff brush to remove mortar residues—this prolongs tool life and maintains their performance. As the trend toward sustainable practices grows, investing in ergonomic tools reduces fatigue during extended work sessions, leading to better quality workmanship and less injury risk. Soon, advancements like digital moisture meters will become standard for verifying subfloor dryness before installation, avoiding costly failures like peeling or cracking. How can I maintain hardwood floors to maximize their lifespan over time? Regular cleaning with gentle, pH-neutral products and periodic refinishing with quality sealers are essential. For insights into hardwood care, check out this guide. I recommend utilizing a handheld wet-dry vacuum to remove debris from under appliances and along baseboards—it prevents scratches and grime buildup. Now, I challenge you to apply a strategic sealing technique after your next tile grout job; sealing not only preserves the aesthetic but also prolongs the surface’s durability. Thanks to ongoing innovations, future tools will likely incorporate smart sensors to detect substrate issues early, making maintenance even more straightforward. Staying proactive with these tools and practices ensures your flooring remains pristine for years to come, saving you time and money in the long run.
Unseen Pitfalls Hidden in Plain Sight
One of the biggest lessons I learned was that even tiny overlooked details—like moisture levels or the cleanliness of the subfloor—can make or break your project. It’s tempting to rush through preparation, but the truth is, investing time upfront saves you from heartache later. Sharing my experience, I realized that consistently verifying the moisture content and thoroughly cleaning the surface are essentials that should never be skipped.
Why Experience Matters More Than Tools
I once believed that high-end tools alone could guarantee perfect results. However, I discovered that a novice’s patience, attention to detail, and willingness to learn from mistakes are what truly elevate the quality of flooring installation. The right tools help, but understanding *when* and *how* to use them turns a good job into a great one. For handy tips on choosing and maintaining your tools, check out this resource.
Myths That Led Me Astray (And How I Corrected Course)
I bought into the myth that a perfectly flat surface was enough, not realizing that moisture management and material compatibility are equally critical. It took some costly repairs and extra work to learn that subfloor stability plays a vital role in flooring longevity. Learning to recognize these nuances has prevented future mishaps, making me more confident in tackling complex projects. To avoid common DIY mistakes, visit this guide.
Small Details, Big Impact: The Truth About Long-Term Success
From consistent curing environments to strategic sealing, I’ve realized that paying attention to small details dramatically extends the lifespan of my floors. For instance, using precise expansion gaps and testing the cured surface ensures that my hard work won’t crack or delaminate over time. These lessons have transformed my approach, embracing careful planning over hasty execution. For step-by-step strategies, explore this comprehensive guide.
Curated Resources to Elevate Your Flooring Knowledge
I’ve found that continuous learning is vital, especially from sources that combine practical experience with expert insights. The following tools and references have been game-changers for me:
- The Leveling Pin System: Ensures uniform thickness across large areas, saving time and reducing errors.
- High-Quality Primers: Improve adhesion and prevent peeling, especially on porous or contaminated surfaces.
- Professional-Grade Moisture Meters: Help avoid future issues caused by hidden moisture, which is a common culprit behind peel-offs and cracks.
- This detailed tutorial has guided many project successes with clear, actionable steps.
Your Next Step Starts Today
Embarking on your flooring journey with awareness and care turns a daunting task into a deeply rewarding craft. Remember, these lessons from my experience are meant to guide you toward flawless, long-lasting results. When in doubt, take the extra time to prepare, research, and verify every step. Your floors will thank you for it, shining as a testament to your dedication and attention to detail. So, what aspect of your flooring project will you tackle with a fresh perspective today?
Share your plans or ask questions in the comments below. I’d love to hear about your experiences and help you succeed in your next flooring endeavor!
,