
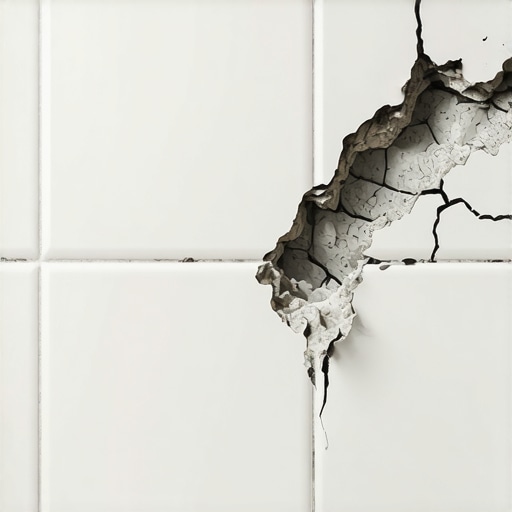
I remember the day I first noticed it—cracks sneaking across my bathroom tiles like tiny fractures in ice. At first, I thought it was just a cosmetic issue, something easily patched up. But as time went on, those cracks proliferated, and I couldn’t shake the feeling that something deeper was going on. That’s when I had my lightbulb moment: those tile cracks weren’t just about the tiles—they might be a warning sign of a foundation problem beneath.
The Hidden Message Behind Cracked Bathroom Tiles
Tile cracks in bathrooms can be more than mere surface flaws; they often tell a story about what’s happening underneath your home. As a homeowner and someone passionate about home improvement, I learned that uneven or shifting floors can cause tiles to crack as the foundation moves or settles. It’s akin to the way a photo frame warps when the wall behind it shifts—your tiles are the visible tip of the iceberg.
Early on, I made the mistake of dismissing minor cracks as superficial. But ignoring them can lead to more serious issues. Foundation problems can cause uneven settling, leading to increased stress on your tiles and grout. This isn’t just about replacing cracked tiles; it’s about understanding the root cause to protect your entire home. For a comprehensive approach, I highly recommend checking out [the ultimate guide to floor leveling for a perfect finish](https://tiletrendshop.com/the-ultimate-guide-to-floor-leveling-for-a-perfect-finish). It helped me realize that proper floor leveling and foundation inspection are crucial steps.
Has this ever happened to you—a seemingly simple crack turning into a home-related headache? If so, you’re not alone. Many homeowners overlook the warning signs until they become costly problems. Recognizing the signs early can save you hundreds or even thousands of dollars in repairs.
In the next sections, I’ll walk you through how to diagnose whether your tile cracks are just cosmetic or indicative of a more serious foundation issue—and what steps you should take to address it. Trust me, understanding what your cracks are really telling you could be the best homeowner decision you make this year.
Inspect and Identify the Root Cause
Start by thoroughly examining your cracked tiles to determine if the damage is isolated or part of a larger problem. Gently tap around the cracks with a hammer or your finger; a hollow sound indicates possible underlying issues. Check if the cracks are expanding or if new ones are forming—this suggests movement beneath the surface. Take photos for reference and note the locations of cracks to monitor over time.
Prepare the Area for Repair
Clear the workspace by removing any furniture or fixtures nearby. Protect your surroundings with plastic sheeting, especially if you plan to use adhesives or leveling compounds. Wear safety goggles and a dust mask to prevent inhalation of debris. Carefully score around the cracked tiles using a grout saw or angle grinder with a diamond blade—this helps remove damaged grout and loose tiles, providing a clean surface for repair.
Remove Damaged Tiles and Assess the Subfloor
Using a chisel and hammer, gently pry out the broken tiles, taking care not to damage surrounding tiles or the subfloor. Once removed, inspect the subfloor beneath. Look for signs of water damage, rot, or unevenness. If the subfloor shows weakness or damage, it needs to be repaired or replaced before proceeding. Addressing foundation movement is essential—consult a structural engineer if significant shifting is suspected.
Level the Subfloor for a Smooth Finish
If the subfloor is uneven, apply a self-leveling compound. Mix it according to the manufacturer’s instructions, ensuring a smooth, pourable consistency—think pancake batter. Pour the compound gradually, starting at the lowest point, and spread it with a trowel or smoothing tool. Use a microscope or a level to check for flatness—any high spots can be sanded down after curing. This step is crucial to prevent future cracks and ensure tiles sit perfectly.
Tip:
During my first attempt, I rushed the leveling process, leading to a lumpy surface that caused more cracking when tiles were laid. Patience and proper mixing made all the difference. For detailed techniques on achieving flawless surfaces, explore this guide to floor leveling.
Apply an Underlayment for Stability
After leveling, install a suitable underlayment—such as cement board or uncoupling membrane—to provide a stable base. Secure it with corrosion-resistant screws, spacing them evenly about 8 inches apart. Avoid over-tightening, which can crack the board. This additional layer helps absorb minor movements and prevents tiles from cracking again, especially in areas prone to shifting.
Set the New Tiles Carefully
Mix thinset mortar following manufacturer instructions, aiming for a peanut butter-like consistency—sticky enough to hold tiles without sliding. Use a notched trowel (generally 1/4-inch v-notched for most tiles) to spread mortar uniformly on the subfloor or underlayment. Press tiles into place, applying firm, even pressure with a slight twisting motion to ensure proper bonding. Use tile spacers to maintain consistent joint widths, typically 1/16 to 1/8 inch.
Pro Tip:
During my own project, I employed a “mirror” technique—placing a level or mirror on the tile surface to check for lippage and adjust as needed before the mortar sets. This helps achieve a flat, professional finish and avoids uneven edges. For best practices, see tips for flawless grout lines.
Allow Proper Curing and Final Checks
Let the mortar cure undisturbed for at least 24 hours—avoid foot traffic. Once set, remove spacers and grout the joints using a rubber float held at a 45-degree angle—squeeze excess grout into the joints and wipe the surface with a damp sponge. After grout cures, seal the surface to prevent staining and moisture penetration, extending the life of your repairs. Regular maintenance, such as sealing and cleaning, keep flooring in prime condition and help avoid future cracks.
Many homeowners assume that installing new flooring is as simple as laying down tiles or hardwood planks. However, a common misconception is that surface-level fixes are enough to ensure longevity, when in reality, understanding the subtleties of floor leveling and material compatibility is crucial. For example, it’s a mistake to think that simply applying a self-leveling compound on an uneven subfloor will solve persistent issues; if the subfloor is contaminated with moisture or debris, the self-leveler may peel or sink, leading to costly repairs down the line. Experts emphasize that proper substrate preparation and understanding the environmental conditions are essential steps often overlooked by DIYers. Additionally, many believe that wider grout joints or larger tiles can mask subfloor imperfections, but this approach frequently exacerbates unevenness if the underlying issue isn’t addressed. Advanced installers know that meticulous attention to the subfloor’s flatness—measured with precision tools—is vital for achieving flawless results, as highlighted in this guide to flooring leveling techniques. A particularly sneaky trap is assuming that new flooring will automatically accommodate minor shifts over time. In reality, materials like engineered hardwood are more stable, but only if installed with proper expansion gaps and acclimated correctly—something many often ignore, leading to warping or gaps during seasonal changes. Understanding the nuances here is what separates a durable, professional result from a short-lived DIY hack. For instance, using improper underlayment or neglecting moisture barriers can compromise the entire installation—check this post on common installation mistakes to avoid pitfalls that look minor but cause major headaches. Let me ask you—have you ever fallen into this trap of underestimating the importance of subfloor preparation? Share your experiences in the comments. Remember, real expertise involves mastering these hidden nuances, turning routine installation into a lasting investment.Maintaining your flooring installation over time requires the right tools and proactive care. My go-to equipment includes a high-accuracy moisture meter, which I consider indispensable for ensuring subfloor readiness before installation. A reliable laser level helps me verify floor flatness with precision, preventing issues like tile lippage or hardwood gaps that can arise from uneven surfaces. Investing in quality tile cutters, such as a wet saw with a diamond blade, allows me to make clean cuts on large-format tiles, reducing waste and rework. For hardwood refinishing, I rely on a detail-oriented orbital sander and high-quality dust extraction systems to keep the workspace clean and avoid dust settling into finishes, prolonging their shine and durability. Regularly using a damp microfiber cloth to clean grout lines helps prevent staining and buildup, which can compromise long-term aesthetic appeal.
How do I maintain my flooring tools over time?
Proper maintenance starts with cleaning tools after each project—wiping down blades and vacuuming out power tools prevents dust and debris buildup. Storing equipment in a dry, temperature-controlled environment avoids rust and warping, especially critical for sensitive tools like moisture meters and laser levels. Recalibrating laser devices annually ensures measurements remain accurate. Dull blades or worn-out pads should be replaced promptly to maintain cutting precision and safety. Regularly inspecting my tools for signs of wear and tear helps prevent unexpected failures during vital installation phases. In the future, I anticipate the integration of smart tools that connect via Bluetooth or Wi-Fi, offering real-time diagnostics and maintenance reminders, streamlining workflow and reducing downtime. Periodic calibration and proper storage are vital—think of it as giving your tools a spa day—so they’re always ready for the next project. For insights into advanced maintenance practices, check out https://tiletrendshop.com/maintenance-for-hardwood-and-tile-tools. One effective tip I recommend is to invest in a quality, extendable drill/driver with adjustable torque settings; it’s invaluable for tasks from mixing leveling compounds to screwing underlayment, and maintaining its battery health ensures longevity. Don’t overlook the importance of these little details—keeping your tools in top shape directly translates to professional results that stand the test of time. Want to take your maintenance game even further? Try calibrating your laser level using a dedicated calibration device or a known flat surface; it’s surprisingly straightforward and can save you headaches down the line. Your floors—and your wallet—will thank you.
Uncovering Hidden Lessons in Floor Restoration
One of the most profound realizations I had was that patience and attention to detail are the foundation of lasting flooring work. Rushing through the process to finish quickly often leads to overlooking subtle issues, which can manifest later as costly repairs. I learned that taking the time to thoroughly assess the subfloor and ensuring proper surface preparation is not just an extra step—it’s the secret to a professional finish that endures.
Another lesson emerged from misjudging materials—choosing the wrong underlayment or neglecting environmental factors like moisture can sabotage even the best installation. For example, I once installed tiles over a damp subfloor without proper moisture barriers, resulting in a few tiles lifting months later. This taught me that understanding the nuances of material compatibility and environmental conditions is crucial, and resources like this comprehensive guide can help prevent such pitfalls.
Finally, I discovered that investing in quality tools and mastering their maintenance is a game-changer. Dull blades or miscalibrated laser levels can silently cause errors that compromise your entire project. Regular tool upkeep, from cleaning to recalibrating, ensures precision and saves money in the long run. Learning to spot early signs of tool wear and knowing when to replace or recalibrate has been a vital part of my journey toward consistent, quality results.
My Essential Toolkit for Flooring Success
Over the years, I’ve curated a set of tools that I trust wholeheartedly. A high-accuracy moisture meter helps me determine if the subfloor is truly ready—something I consider indispensable. A laser level ensures that every row and edge is perfectly aligned, preventing lippage and uneven grout lines. For cutting large-format tiles, a quality wet saw with a diamond blade minimizes waste and delivers clean, flat cuts, making installation smoother and more professional. Recalibrating these tools annually, based on tips from this expert advice, keeps my work consistently top-notch.
Investing in reliable equipment and dedicating time to its maintenance translates into floors that not only look stunning but stand strong over time. Whether it’s rechecking the flatness of a newly applied leveling compound or ensuring your tool blades are sharp, these small practices accumulate into big gains—saving you frustration and rework.
Your Next Step: Embrace the Learning Curve
Remember, every crack tells a story—sometimes of neglect, but often of opportunity. Embracing continuous learning, honing your skills, and understanding the intricacies of floor leveling and tile installation can transform setbacks into victories. Don’t hesitate to dive into detailed guides like this resource or seek advice from seasoned professionals. Your floors—and your sense of achievement—will thank you.
So, what personal lesson have you learned from a flooring project that changed how you approach future repairs? Share your story below—your insights could inspire someone else on their journey to durable, beautiful floors.