
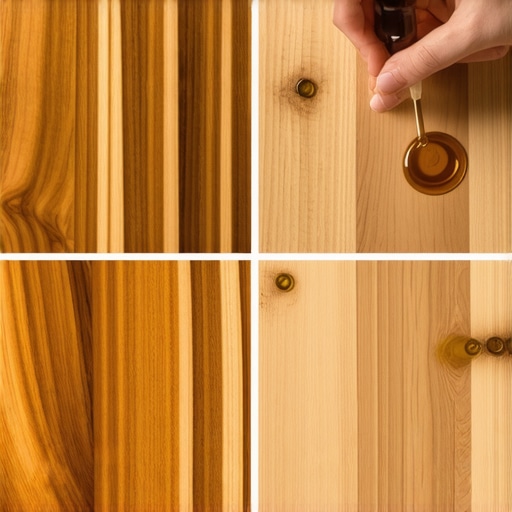
It was a hot summer afternoon when I finally looked at my once-pristine hardwood floor and realized I had made a mistake. The glossy polyurethane finish had started to peel, revealing dull patches and tiny cracks that made the entire room look worn out. I remembered the countless hours I’d spent applying it, thinking I was doing the best for my home. But as I watched that shine fade, I wondered: was there a better way?
Discovering the Secret to Stunning, Durable Hardwood Finishes
I’ve since learned that natural oil finishes can transform your hardwood floors, giving them a rich, warm glow that only gets better with time. Unlike traditional polyurethane, which often creates a plastic-like surface, natural oils penetrate deep into the wood, enhancing its natural beauty and offering superior protection. The good news? Making the switch is easier than you might think, and I’m here to guide you through the journey.
Is the Hype Around Natural Oil Finishes Justified?
I’ll admit, I was skeptical at first. Early on, I made the mistake of believing that polyurethane was the only durable option. But I also learned that applying the wrong type of finish or using inferior products can lead to problems down the line. Research shows that natural oils like tung or linseed oil can improve the overall lifespan of your floors, especially when properly maintained (source: [the-natural-oil-finish-that-makes-white-oak-planks-pop](https://tiletrendshop.com/the-natural-oil-finish-that-makes-white-oak-planks-pop)).
If you’ve faced peeling, cracks, or dullness, you’re not alone. Many homeowners brush off these signs until the damage becomes too obvious to ignore. The key is understanding what works and what doesn’t so that you can preserve your investment beautifully.
In the next sections, I’ll share my personal experience, practical tips, and additional resources on choosing and applying natural oil finishes, transforming your worn-out floors into stunning focal points of your home. Ready to see your floors in a whole new light? Let’s dive in!
Preparing Your Floor for Oil Application
Start by thoroughly cleaning the floor with a vacuum and damp mop to remove dust and debris. Any existing wax or old finish must be stripped; use a chemical stripper designed for hardwoods and follow the manufacturer’s instructions. Sand the surface lightly with fine-grit sandpaper (220 grit) to open the wood grain, which allows the oil to penetrate better. Wear protective gear and ensure adequate ventilation. Once sanding is complete, vacuum and wipe the floor with a tack cloth to remove all dust, preventing imperfections in the finish.
Choosing the Right Natural Oil
Select a high-quality tung or linseed oil suited for hardwood floors. Consider products that contain natural drying agents to ensure proper curing. Verify the application properties—some oils are better for deep penetration, others for surface finishing. For instance, tung oil provides a water-resistant layer, ideal for high-traffic areas. Decide whether to pre-mix oils with a solvent or apply pure, based on the product instructions and desired finish.
Application Techniques for Uniform Coverage
Pour a small amount of oil onto a lint-free rag or applicator pad. Work in manageable sections, such as a single plank or square foot area, to prevent uneven absorption. Apply the oil in the direction of the wood grain, using a circular motion to ensure deep penetration. This approach mimics polishing a fine shoe—small, deliberate movements deliver a smooth, even coat. Let the oil sit for 15-20 minutes, allowing it to soak in.
Wiping Off Excess for a Smooth Finish
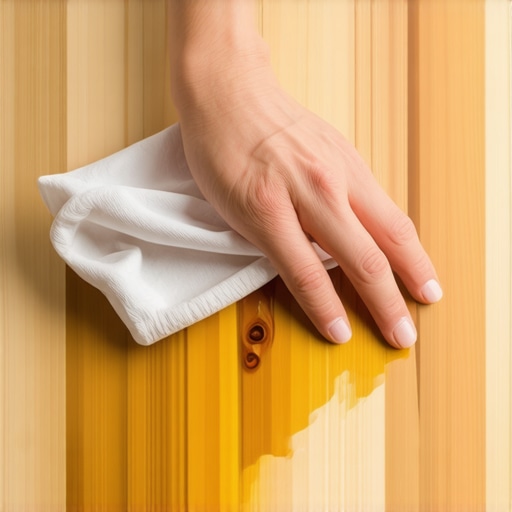
After the waiting period, use a clean, dry cloth to wipe away any excess oil. This prevents sticky buildup and uneven patches. Think of it as buffing out a waxed car—removing excess product enhances gloss and smoothness. Repeat the process across the entire floor, working quickly to maintain uniformity. For better durability, apply several thin coats instead of a single thick one, allowing each layer to cure fully before applying the next.
Ensuring Proper Curing and Final Touches
Allow the oil to cure in a dust-free environment for at least 24-48 hours. During this period, avoid foot traffic. For added protection and sheen, buff the surface gently with a polishing cloth after curing. If desired, a light buffing with fine steel wool (0000 grade) can enhance the luster, but do so cautiously to avoid penetrating the finish.
For a more detailed process, I recommend reviewing expert refinishing tips. Remember, patience and attention to detail are your best tools for achieving professional-looking results at home. Practice on a small, inconspicuous area first to perfect your technique before tackling the entire floor.
 While the basics of flooring installation seem straightforward, many homeowners and even professionals overlook critical nuances that can compromise the final result. A common misconception is assuming that a flat subfloor guarantees a perfect finish; however, subtle imperfections often go unnoticed yet cause uneven tiles or squeaky floors over time. Advanced practitioners emphasize the importance of meticulous subfloor preparation, including precise leveling and moisture control, to avoid costly corrections later. For instance, insufficient attention to subfloor moisture levels can lead to tiles popping or hardwood boards cupping, despite expert installation. A myth persists that quick-setting adhesives save time, but rushing the process without thorough surface prep often results in lippage or bond failure, as highlighted in recent industry studies.
How does incorrect substrate preparation affect long-term durability?
The answer is significant: improper substrate prep can lead to uneven settling, causing cracks and uneven wear. External sources, like the comprehensive guides from industry leaders, stress that proper leveling with self-leveling compounds or slush mixes is vital, especially for large-format tiles or uneven slabs. In practice, I’ve seen projects where ignoring detailed leveling steps resulted in repeated repairs, proving that patience and precision outweigh shortcuts in flooring projects. Additionally, many underestimate the importance of vibration-free installation areas—vibrations can settle the substrate unevenly, risking future failures.
To visualize properly, a detailed inspection of your subfloor and adherence to rigorous leveling protocols is paramount. Check out this step-by-step process on flawless floor leveling for a comprehensive guide. Remember: even small deviations can have a domino effect, leading to aesthetic flaws and structural issues down the line. Don’t let common oversights undermine your investment. Have you ever fallen into this trap? Let me know in the comments.
Keeping Your Floor in Prime Condition with the Right Tools
Maintaining hardwood, tile, or leveled floors requires precision support from specialized tools. One of my go-to instruments is a high-quality planetary floor buffer, which I use for regular polishing to remove minor scratches and maintain sheen without the need for complete refinishing. I prefer models with variable speeds and a soft pad attachment, such as the BuffPro Elite, because they allow me to gently rejuvenate the surface and extend the life of the finish. Additionally, an infrared moisture meter is crucial for monitoring subfloor and material moisture levels, helping prevent issues like warping or tile lippage caused by hidden moisture. I always rely on the precision tools for leveling to ensure the foundation remains stable over time.
Software and Techniques to Extend Your Floor’s Longevity
Beyond physical tools, I utilize specialized floor management software to keep track of maintenance schedules, product specifications, and inspection logs. My favorite is FloorMaster Pro, which not only helps schedule buffer and sealing jobs but also stores detailed data on each project for future reference. Regularly updating your maintenance routines based on floor type and usage predictions can significantly improve your results. For example, setting reminders for re-application of natural oils or sealants prolongs visual appeal and protection. Practice preventive measures like applying UV-resistant finishes and using furniture pads, which protect your investment from daily wear and tear.
Strategies for Long-Term Results and Scaling Up
Planning for long-term results means investing in scalable systems. When renovating multiple rooms or large commercial spaces, I recommend a modular approach to maintenance—using portable, battery-powered tools like cordless scarifiers and drum sanders, which I find invaluable for large surface areas. Proper scheduling and consistent application of protective coatings, such as semi-permanent sealants, help ensure uniformity and durability across all tiles and planks. Technological advancements, including automated moisture control sensors integrated into subfloor systems, are shaping the future of flooring maintenance by providing real-time alerts to prevent issues before they escalate. These innovations will likely become standard practice soon, making proactive care easier than ever.
How do I keep my flooring systems functioning smoothly over time?
Regular inspections combined with advanced tools like a moisture meter, buffer, and software tracking can drastically improve your flooring’s lifespan. I highly recommend incorporating an annual evaluation using a refinishing strategy that adapts to your specific flooring types. Don’t forget that minor touch-ups—such as spot recoating or timely sanding—can prevent costly repairs. A proactive maintenance plan, backed by the proper tools, is simply the best way to ensure your floors remain stunning and functional for years to come. Try applying a semi-permanent sealant to high-traffic areas this month as an advanced tip, and observe how it enhances durability.
Uncovering Hidden Lessons From My Flooring Journey
- Never underestimate the importance of meticulous subfloor prep; I learned that rushing this step can cost hours—and money—in repairs later. Taking the time to level and control moisture ensures a flawless finish and long-lasting durability.
- Choosing the right finishing product is half the battle. Natural oils like tung or linseed have layers of benefits—deep penetration, enhanced beauty, and increased longevity—that I didn’t fully appreciate until I experienced the difference firsthand.
- Applying finishes with patience and attention to detail transforms a mundane project into a showcase. I discovered that multiple thin coats, properly cured, create a more durable and aesthetically pleasing surface than rushing through a single heavy application.
- Investing in quality tools and monitoring equipment, such as moisture meters and buffers, elevates your craftsmanship. These investments pay off by preventing issues like uneven drying and surface imperfections.
- When facing challenges, don’t shy away from seeking expert advice or dedicated resources—it’s the best way to avoid costly mistakes and elevate your craftsmanship to professional levels.
Tools and Resources That Transformed My Approach
- Mastering hardwood refinishing tips—this guide is my go-to for understanding the nuances of oil application and curing. It’s packed with expert insights that helped me refine my technique.
- Floor leveling techniques—nothing beats a perfectly leveled subfloor for achieving a seamless finish. I rely on these proven methods to prevent lippage and cracking.
- Precise leveling tools—precision is key. My favorite tools help me monitor and correct moisture levels and flatness, ensuring longevity and beauty in my flooring projects.
- Design inspiration sources—these sources inspire me to blend textures and colors, elevating the aesthetic appeal of my floors beyond expectations.
Your Next Move in Flooring Mastery Starts Now
Transforming your floors into stunning, durable surfaces is within your reach—armed with the right knowledge, tools, and patience. Every step you take toward mastering these techniques enhances not only your home’s beauty but also your confidence as a DIY enthusiast or professional. Don’t wait for perfection; start today, and watch your flooring projects evolve into true works of art. Are you ready to elevate your flooring game and achieve results that last for generations? Share your plans or questions below—I’d love to hear your journey.