
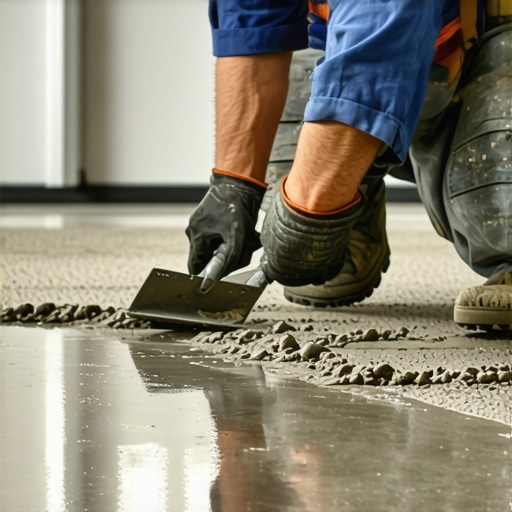
I remember the moment clearly—standing in the middle of my living room, staring at a patch of uneven floor, frustration bubbling up. After pouring my hard-earned money and countless hours into what I thought would be a simple flooring project, I was left with a stubborn, lumpy mess. The leveling compound refused to bond properly, and I knew I wasn’t alone in this struggle. It was a lightbulb moment for me: understanding the root causes of why my compound wasn’t sticking could save me—and you—from repeating the same costly mistakes.
Why Your Leveling Compound Might Fail You
If you’ve ever felt that sinking suspicion that your recent flooring project isn’t going as planned, you’re not alone. Many DIY enthusiasts and even seasoned pros encounter this frustrating hurdle. The key is to figure out what’s going wrong before you pour more time and money into repairs. From improper surface preparation to incorrect application techniques, the reasons are varied but fixable. In my experience, early mistakes—like skipping the primer step—can sabotage your efforts from the start. Trust me, understanding these pitfalls is essential to achieving that flawlessly level surface you crave.
Is Your Primer The Hidden Culprit?
One of the most common mistakes I made early on was neglecting the importance of surface preparation. Specifically, I underestimated how crucial a proper primer is. Skipping this step or applying it improperly can create a barrier that prevents your leveling compound from adhering securely. According to experts, a good primer improves bond strength significantly—some studies even suggest it can increase adhesion by up to 50% — making it an essential component of a successful installation. Want to learn more about mastering surface prep? Check out this comprehensive guide to floor leveling.
If you’re nodding along, realizing that you might have overlooked this critical step, don’t worry. There’s a lot you can do to correct course and prevent future failures. Next, I’ll walk you through the exact practices to get your leveling compound to stick like it’s supposed to, so you can enjoy that perfectly flat floor you’ve been dreaming of. Are you ready to dive into the step-by-step process? Let’s get started.
Prepare Your Surface with Precision
Start by thoroughly cleaning the subfloor—vacuum, sweep, and mop to remove all debris. Then, assess moisture levels using a moisture meter; anything above 4% can compromise the bond. Sand down high spots and rough patches to create an even, clean surface. Apply a high-quality primer specifically designed for your subfloor material, ensuring it covers all areas where the leveling compound will be applied. This primer acts like a glue, much like adhesive between two puzzle pieces, ensuring a strong bond and preventing future failures.
Mix and Apply Leveling Compound Correctly
Follow the manufacturer’s instructions meticulously—measure water-to-compound ratios precisely. Use a clean, cold bucket and a sturdy mixing paddle, mixing at a slow speed to avoid introducing air bubbles. Pour the mixture into the prepared area starting in the deep spots. Use a trowel or a gauge rake to spread it evenly, pushing the compound into corners and low spots. Think of it like spreading frosting evenly over a cake—smooth but firm enough to hold its shape. Once poured, tap the surface gently with a float or a trowel to knock out trapped air and ensure full contact with the substrate. For larger areas, consider using a self-leveling compound that spreads itself out, reducing work and increasing uniformity.
Achieve Evenness with Proper Technique
Work swiftly, as most leveling compounds set quickly—within 20-30 minutes. Use a straightedge or a long level to check for dips and rises; drag it across the surface to verify flatness. For stubborn high spots, lightly sand after curing, but only if necessary. If gaps or unevenness persist, reapply a thin layer of fresh compound on top, repeating the process for perfection. Remember, patience and attention to detail now save you headaches later, preventing tiles or flooring from cracking or shifting.
Allow Adequate Curing and Quality Control
Allow the compound to cure fully—typically 24 hours or as specified—before proceeding with flooring installation. During curing, keep the area free from foot traffic and vibrations. Once cured, recheck the surface with a straightedge; it should glide smoothly without catching. If imperfections remain, identify underlying issues, such as substrate movement or improper mixing, before moving forward. This step is crucial—think of it as ensuring a mirror is perfectly flat before hanging it. Proper curing ensures your floor will be level and durable for years to come.
Leverage Expert Resources to Perfect Your Technique
For detailed guidance, consult trusted resources like this step-by-step guide. These resources offer insights that can make a significant difference, especially when tackling complex or large-scale projects. Remember, precision at each step leads to a seamless finish, elevating the overall look and longevity of your floor.
When it comes to flooring, there’s a lot more beneath the surface than most DIY enthusiasts realize. For instance, a common misconception is that quality hardwood or tile alone guarantees a long-lasting finish; in reality, it’s the detailed prep work and understanding subtle nuances that make or break your project. Many assume that applying a thick layer of leveling compound will mask imperfections, but without proper surface assessment and precise mixing, cracks and unevenness can still appear over time. This is where advanced techniques—like moisture testing and substrate analysis—are essential, as noted by flooring experts who emphasize that preparation drastically influences durability.
Why do some professional installations last decades while others fail prematurely? The answer often lies in nuanced missteps like overlooking substrate stability or neglecting proper curing times. For example, many mistakenly believe curing time can be shortened to save days, yet rushing this process can lead to delamination or surface cracks, as supported by studies from the Building Research Establishment. To avoid these pitfalls, consult comprehensive guides such as this expert flooring installation guide. Ensuring every step is meticulously executed—including correct primer application and thorough substrate evaluation—can be the difference between a flawless finish and costly future repairs. Remember, perfection often resides in the details most overlook; mastering these nuances elevates your work from average to professional-grade. Have you ever fallen into this trap? Let me know in the comments.Invest in Quality Tools for Longevity
When it comes to maintaining your flooring, having the right tools can make all the difference. Personally, I swear by a high-quality oscillating tool with flexible blades. This allows me to carefully sand out minor scratches or imperfections on hardwood surfaces without causing additional damage. For tile maintenance, a grout saw with diamond grit helps in removing stubborn grout haze or repairing cracked joints efficiently. Using precision tools ensures repairs are seamless and preserves the integrity of your floor for years to come.
Implement a Routine Maintenance Schedule
Consistency is key. I recommend setting a regular cleaning routine that includes gentle sweeping and damp mopping with pH-neutral cleaners. Avoid harsh chemicals that can degrade sealing layers or damage wood finishes over time. Also, periodically inspect for signs of wear or damage—early detection prevents minor issues from escalating. For hardwood, applying a fresh coat of wax or polish once or twice a year can revive the surface and extend its lifespan. Incorporating these habits helps your flooring retain its beauty and strength longer.
Tools I Recommend for Precision and Care
For detailed cleaning and maintenance, I rely on a microfiber detailing cloth paired with a specialized cleaning solution designed for your flooring type. This combo traps dust and prevents scratches. A laser leveled measuring stick ensures that floor slopes or unevenness don’t go unnoticed, allowing you to address issues proactively. For more comprehensive guidance on maintaining a flawless finish, check out the fundamentals of flooring maintenance. Investing in the right tools, like a quality vacuum with adjustable height settings, can also prevent debris from scratching surfaces during routine cleaning.
Future Trends in Flooring Upkeep
Advancements in smart home technology are beginning to influence flooring maintenance. Future tools may include IoT-enabled sensors that monitor humidity, temperature, and foot traffic, alerting homeowners when professional attention is needed. Automated cleaning robots tailored for different floor types could also become standard, reducing manual effort. Staying aligned with these innovations can make long-term upkeep more effortless and effective. Implementing sophisticated moisture meters, such as the ones discussed in precision floor leveling techniques, ensures your subfloor remains dry and stable, preventing costly issues down the line.
How do I maintain my hardwood or tile flooring over time?
To keep your floors in top shape, prioritize regular cleaning with gentle products, schedule routine inspections, and reapply protective finishes as needed. Investing in tools like a microfiber cloth, a good-quality vacuum, and moisture meters can help detect early signs of damage. For tile, replacing grout and sealing joints periodically prevents moisture infiltration and maintains overall durability. Consider integrating smart sensors or automated cleaning devices in the future to simplify maintenance even further. Stay proactive, and your flooring investment will reward you with decades of beauty and performance. Ready to upgrade your maintenance routine? Try using a laser leveled measuring stick to identify subtle unevenness—it’s a game-changer for long-term results. For a comprehensive approach, explore the detailed techniques in the ultimate guide to floor leveling.
What Spice Up My Floor Leveling Journey
One of the most eye-opening lessons I learned was that patience truly is the secret ingredient. Rushing through primer application or curing times often led to setbacks. The importance of meticulously preparing the surface—cleaning, moisture testing, and ensuring a solid foundation—cannot be overstated. I also discovered that using a laser level or straightedge makes all the difference in catching subtle unevenness early on, saving time and frustration later. Lastly, investing in quality tools and materials, though initially seemingly more expensive, pays off in the longevity and appearance of your flooring project.
Tools and Resources That Transformed My Approach
Over the years, I’ve come to trust some game-changing resources and tools. The comprehensive guide on floor leveling success provided me clarity on complex steps and pitfalls to avoid. My favorite tool remains a high-quality moisture meter, which helps me diagnose subfloor issues before they escalate. For perfect mixing, a sturdy paddle and a slow-speed drill ensure consistency. Lastly, I lean on expert tutorials and forums that share real-world tips beyond textbook instructions, helping me troubleshoot unexpected challenges effectively.
Transforming Challenges into Confidence
Taking on flooring projects can feel daunting, but each mistake is a stepping stone towards mastery. The key is to approach each task with curiosity and a willingness to learn from setbacks. Remember, even seasoned professionals hit bumps; what matters is the resolve to deliver a flat, durable surface. Embrace the process, seek out reputable resources, and don’t hesitate to ask for help when needed. Your future self will thank you for the effort—you’ll enjoy a beautifully level floor that stands the test of time.