
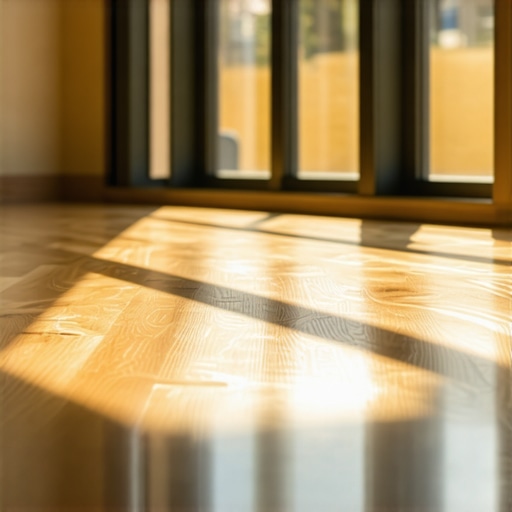
I vividly remember the moment I stepped into a client’s sunlit living room and noticed their new luxury vinyl planks warping right near the large window. It was a sunny Saturday, and as the sunlight streamed in, those planks seemed to bubble and buckle, ruining what should have been a sleek, modern floor. At that point, I realized that despite all the careful planning and installation, there was a heat-related culprit I hadn’t fully grasped. That light bulb moment made me dig deeper, and today, I want to share what I’ve learned about the tricky relationship between vinyl flooring and sunlight.
Understanding Why Vinyl Warps in the Sunlight
Vinyl flooring is known for its durability and ease of maintenance, making it a popular choice. However, it isn’t invincible. The main issue is heat and moisture. When large windows let in intense sunlight, especially during warm seasons, the temperature around the vinyl can significantly increase. Vinyl planks, being sensitive to temperature fluctuations, tend to expand when heated. If this expansion isn’t accounted for during installation—like using proper expansion gaps—buckling and warping become almost inevitable.
Early in my career, I made a mistake that taught me a valuable lesson. I overlooked the importance of controlling temperature and humidity variations near large windows. This oversight led to warped floors just months after installation. Since then, I always ensure to incorporate these considerations, including proper subfloor preparation and ventilation strategies. For a comprehensive understanding of why these issues happen, I recommend reviewing [floor leveling techniques](https://tiletrendshop.com/the-ultimate-guide-to-floor-leveling-for-a-perfect-finish) to ensure your subfloor is perfectly flat and stable, reducing the chances of future problems.
Have You Faced This Problem?
If your vinyl floors near large sunny windows are buckling or showing signs of warping, you’re not alone. It’s a common challenge that many homeowners and installers face. Recognizing the cause is the first step towards safeguarding your floors for the long haul.
Seal Windows to Block Harmful Sunlight
Start by installing high-quality window treatments like UV-blocking films, blinds, or curtains. During a recent project, I applied reflective film to a client’s large bay windows, which reduced sunlight intensity and kept the vinyl planks from warping. Ensure the film is rated for UV protection to maximize benefit.
Use Sound Installation Practices
Leave Expansion Gaps
Vinyl expands with heat, much like a rubber band stretched in summer heat. During installation, I always double-check that I leave the recommended expansion gaps around the perimeter, especially near windows. This prevents buckling when the room heats up.
Prepare the Subfloor Carefully
A flat, smooth subfloor is essential. I once faced a warped vinyl floor because I neglected to level the surface properly. Use a self-leveling compound when necessary, following precise mixing ratios from this guide. This step ensures uniform support, reducing the risk of warping.
Control Indoor Climate Effectively
Maintaining consistent humidity and temperature is similar to keeping a plant healthy; fluctuations cause stress. Invest in humidifiers and thermostats. During one installation, I added a small fan to circulate air near large windows, which helped stabilize temperature and prevent vinyl expansion. For detailed techniques, see humidity control strategies.
Enhance Ventilation Near Windows
Good airflow reduces localized heat buildup. During a renovation, I set up fans to exhaust hot air from the room during peak sunlight hours, ensuring the vinyl stayed cooler. Proper ventilation is like opening a window for your floor—allowing heat to escape keeps the vinyl stable. For effective methods, review ventilation tips.
Consider Protective Window Films and Shades
Applying window films or heavy shades can dramatically cut sunlight exposure. For a client with a west-facing window, I recommended blackout shades combined with reflective film. This layered approach reduced heat gain and preserved the vinyl’s integrity. It’s like using an umbrella and sunglasses—double protection works best.
Regular Maintenance and Inspection
Check your vinyl flooring periodically for signs of warping or buckling, especially after sunny days. Early detection allows for prompt action, such as adjusting AC settings or adding temporary shading. This proactive approach prolongs the life of your floors and keeps them looking pristine.
By systematically applying these steps—sealing windows, ensuring proper installation techniques, controlling indoor climate, enhancing ventilation, and using protective coverings—you create a protective shield for your vinyl floors against sunlight damage. Remember, the key is consistency and attention to detail. With these methods, your floors will stand the test of time and sun.
While many believe that choosing the right flooring material guarantees a perfect result, the devil is often in the details. An often overlooked nuance is the importance of precise subfloor preparation; even a small dip or bump can lead to uneven flooring or gapping over time. Failing to address this can result in costly repairs and frustration down the line. Moreover, there’s a common misconception that all flooring installations require minimal expertise; in reality, proper installation demands meticulous attention to moisture levels, climate conditions, and expansion gaps. Neglecting these factors is a trap many fall into, leading to buckling or cracking, issues that could have been avoided by understanding the intricacies involved.
A surprising but critical point is that not all leveling compounds are created equal. Using the wrong type or mixing it improperly can cause it to crack or peel, compromising the entire floor. For example, self-leveling compounds require precise mixing ratios and application techniques—something that an amateur might overlook. Professionals advocate checking the manufacturer’s guidelines thoroughly and performing adhesion tests before proceeding, as noted by experts in [floor leveling techniques](https://tiletrendshop.com/the-ultimate-guide-to-floor-leveling-for-a-perfect-finish).
Another advanced nuance involves the type of subfloor. It’s a myth that the same installation methods suit every surface. Plywood, concrete, and existing vinyl each require tailored approaches, including different primers and adhesives. For instance, epoxy primers are essential on concrete to prevent moisture transmission, which is a leading cause of hardwood warping. If these details are neglected, the entire project risks failure.
Consider the role of climate control during installation. Many underestimate the importance of maintaining a stable environment, especially concerning humidity. Fluctuations cause wood to expand or contract, leading to gaps or buckles. Installing in a controlled environment significantly prolongs the lifespan of hardwood. For those interested, comprehensive strategies are detailed in guides like [transforming your space with the right hardwoods](https://tiletrendshop.com/elevate-your-space-choosing-the-right-hardwood-floors-for-your-home).
Finally, tackling tile work reveals a similar pattern of overlooked nuances. Proper joint spacing and substrate compatibility are critical—something not immediately obvious. Using the wrong thinset or neglecting to cure it properly can cause tiles to crack or debond. This is why experts recommend following precise [installation pointers](https://tiletrendshop.com/tile-installation-pointers-that-save-time-and-money) to avoid pitfalls.
Have you ever fallen into this trap? Let me know in the comments. The key takeaway is that mastery lies in understanding the hidden nuances, ensuring each step—from proper subfloor prep to climate control—is executed flawlessly. Only then can you achieve the durability and aesthetics that true expertise delivers.
Maintaining the longevity and appearance of your hardwood, tile, or vinyl flooring requires more than just routine cleaning; it involves the right tools and strategic approaches. As a seasoned installer, I emphasize the importance of investing in equipment that offers precision and durability. One tool I swear by is the digital moisture meter. Unlike standard moisture probes, my personal favorite is the Tramex MX5, which provides instant, non-destructive readings of subfloor moisture levels. Consistently checking moisture variance helps prevent issues like buckling or warping, especially if you’re installing over concrete or existing tiles.
For leveling and surface prep, I rely on the self-leveling underlayment systems from trusted brands like LEVELQUICK. I prefer their rapid-drying formulas because they allow me to correct uneven subfloors swiftly, reducing delays. But application quality depends on the correct mixing ratios—an aspect I pay close attention to by using a commercial-grade drill with a mixing paddle to achieve smooth, lump-free consistency. Proper mixing ensures the compound bonds well, preventing future cracks or crumbles. To learn more about the nuances of floor leveling, I recommend reviewing this detailed guide.
When it comes to cutting and fitting, I use a high-quality flooring saw equipped with a diamond blade, which provides clean, precise cuts. For intricate trims and moldings, I turn to a multipurpose oscillating tool with a fine blade attachment, allowing me to make detailed adjustments on-site. The importance of sharp blades cannot be overstated—they prevent chipping and ensure a neat finish. Investing in these tools pays off in the form of professional results and reduced rework.
The digital era has also introduced an array of software to assist with planning and visualization. I utilize flooring layout software like RoomSketcher, which helps me simulate various configurations and optimize placement before actual installation. This minimizes waste and aligns expectations with clients, especially when dealing with complex layouts or large-format tiles.
Looking ahead, I predict that automation and smart tools will increasingly become part of our trade—think automated laser leveling and AI-assisted diagnosis of potential subfloor issues. Embracing these innovations now gives you a competitive edge and ensures your projects stand the test of time.
How do I keep my tools in top shape for ongoing performance?
Regular calibration and cleaning are key. For example, I clean my moisture meters after every use with compressed air and alcohol wipes. Sharp blades are sharpened or replaced periodically to maintain precision—dull blades can cause uneven cuts, leading to gaps or chipping. Lubricating moving parts of power tools prevents overheating and prolongs their lifespan. Incorporating routine maintenance into your workflow not only preserves your equipment but also enhances the overall quality of your work. For professionals wanting to push their skills further, mastering these equipment maintenance routines is essential—it’s like tuning your instrument before a performance. Additionally, staying updated with technological advancements through resources like industry publications ensures you’re utilizing the most effective tools and methods available. Start today by inspecting your current arsenal—perhaps investing in a high-quality digital moisture meter or a versatile saw will elevate your craftsmanship. Remember, reliable tools are the backbone of flawless flooring installations.
The Hardest Lesson I Learned About Sunlight and Flooring Durability
Early in my career, I underestimated how much sunlight could affect vinyl and hardwood floors, leading to costly repairs and frustration. This taught me that even the most durable materials require thoughtful planning around natural light exposure.
One surprising realization was that windows are not just sources of light but also heat, which can cause floors to expand, warp, or buckle if not properly managed. It’s essential to consider these factors during installation, including leaving sufficient expansion gaps and controlling indoor climate.
My Go-To Resources for Sunlight-Resilient Flooring
I trust this comprehensive guide for mastering floor leveling and subfloor prep, which is vital to prevent warping. Additionally, this resource helps me choose the right hardwood types resilient to sunlight and moisture. For practical installation tips, I rely on industry-standard tools like digital moisture meters and self-leveling compounds to ensure a flawless finish that withstands environmental stress.
Embrace the Sun and Walk Confidently
Conquering sunlight-related challenges isn’t just about reacting to problems; it’s about proactive design and installation choices. From sealing windows with UV-blocking films to optimizing indoor climate and ventilation, these strategies empower you to protect your floors effectively.
Remember, mastery in flooring comes from attention to detail—consistent climate control, proper installation practices, and using the right protective measures can preserve your investment for years to come. Don’t let sunlight catch you off guard; instead, leverage these insights, and your floors will thank you for it.
Have you ever struggled with warping or buckling near sunlit windows? Share your experience below—I’d love to hear your story!
Comments are closed.