

Ever stepped onto your brand-new luxury vinyl flooring and instantly felt that unsettling bounce or sponginess beneath your feet? I remember the first time I experienced it—initially thinking I had somehow made a mistake during installation or that maybe the flooring was defective. But after some digging, I uncovered a hidden culprit that often goes unnoticed: improper subfloor leveling.
It’s a frustrating problem that can turn what should be a sleek, sturdy surface into a springy nightmare. That unexpected give not only affects comfort but can also lead to premature wear and damage over time. Don’t worry, though—I’m here to help you identify and resolve the root cause so your floors feel firm and stable again.
How an Uneven Subfloor Turns Your Floors into a Bouncy Surface
Is your floor really worth the hype? Think again.
Many homeowners dismiss small imperfections or assume that modern flooring installation techniques can compensate for an uneven subfloor. I made this mistake early on by ignoring the importance of proper subfloor prep, which led to years of discomfort and ongoing repairs. It wasn’t until I realized that subfloor inconsistencies play a crucial role in how your flooring performs that things started to turn around.
Experts emphasize that a level subfloor is essential for the longevity and stability of luxury vinyl, hardwood, and tile floors. When the surface beneath your new flooring isn’t flat, the material can’t make proper contact, resulting in that spongy feeling you might be experiencing. Studies have shown that even minor dips and humps can cause uneven wear and structural failures over time (source: https://tiletrendshop.com/precise-floor-leveling-techniques-to-achieve-flawless-surfaces).
Understanding this simple yet critical point will save you from unnecessary frustration and costs. So, if your floors are feeling more like trampolines than polished surfaces, it’s time to check the subfloor quality.
If you’ve faced this problem, ask yourself: Is the unevenness affecting not just the look but the comfort and durability of your flooring? The answer could be closer than you think. Next, we’ll explore practical steps you can take to level your subfloor properly and restore that firm footprint you’re after.
Check the Subfloor Integrity First
Start by visually inspecting your subfloor for obvious dips, humps, or cracks. Use a long level or a straight 2×4 board and place it across suspicious areas. If it rocks or creates gaps, you’ve identified spots that need attention. I once used a 6-foot level to run across my basement floor and discovered a hump I hadn’t noticed, which caused tiles to crack later. Recognizing these issues early prevents costly fixes down the line.
Measure and Mark Low Points
Identify areas that sit below the rest of the surface. Mark these spots with chalk or painter’s tape. These will be your targets during leveling. In my experience, double-checking with a laser level helps ensure accuracy, especially on large or uneven floors. This step makes the subsequent leveling process more controlled and effective.
Prepare for Leveling
Clean the subfloor thoroughly, removing dust, debris, and any loose material. If your subfloor has minor cracks or holes, fill them with a suitable patch or self-leveling compound. Be sure to follow manufacturer instructions for curing times. When I did this on my kitchen floor, proper cleaning and patching resulted in a smoother, more stable surface that made tile installation much easier. This prep sets the stage for a successful leveler application.
Apply a Primer or Bonding Agent
Use a primer recommended for your floor type—concrete, wood, or existing tile—to improve adhesion of the self-leveling compound. Skipping this step can cause the leveling material to peel or separate. I learned this the hard way when my first layer failed within a year, leading me to remove and reapply with proper bonding agents. Proper priming ensures long-term stability.
Mix and Pour the Self-Leveling Compound
Mix the compound thoroughly following the supplier’s guidelines. Use a paddle mixer attached to a drill for a consistent, lump-free mix. When pouring, start at the lowest point identified earlier. Use a gauge rake or notched trowel to spread the material evenly, working quickly before it begins to set. During my own project, I poured the compound in one continuous session, ensuring an unbroken, flat surface. Speed and consistency are key here.
Spread and Feather the Surface
Use a gauge rake or long trowel to level out the compound, feathering the edges to blend with the surrounding floor. If necessary, add more compound to depressions or remove excess from high spots. This step is crucial for achieving a perfectly flat surface. I recommend working in sections, especially in large areas, to maintain control and avoid reworking dried patches.
Allow Complete Curing
Follow the product’s curing time—usually 24-48 hours—before walking on or installing your flooring. Protect the surface from dust, traffic, and moisture during this period. Rushing this step causes uneven settling or cracking, undermining your effort. Once cured, perform a final check with your level; the surface should be uniformly flat and ready for installation.
Verify Flatness Before Installation
Use a long straightedge or a 2-foot level across the entire surface to confirm the flatness. Small deviations can be corrected with additional patching or re-leveling of specific sections. I’ve found that taking the time for this inspection saves headaches during the actual flooring install, whether it’s hardwood, tile, or vinyl. Properly leveled subfloors form the foundation for durable, lasting floors.
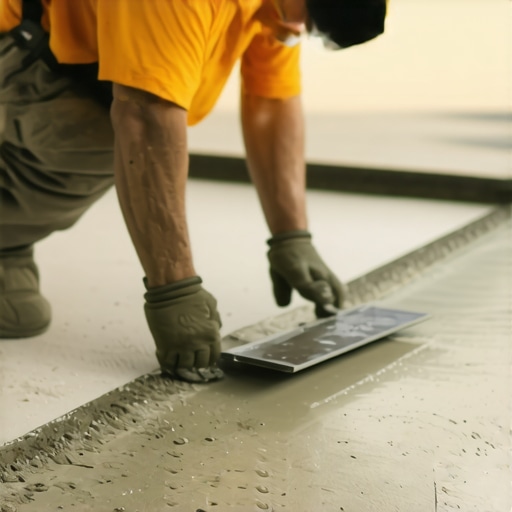 Many homeowners believe that simple surface adjustments like sanding or surface patching can fix uneven floors or ensure perfect tile installation. However, this misconception overlooks crucial nuances that can compromise your entire project. For example, many assume that minor bumps or dips are negligible, but in reality, underestimating the importance of thorough subfloor preparation often leads to unsightly lippage, cracked tiles, or squeaking hardwoods over time. Advanced techniques involve precise measurement of subfloor flatness, such as using a laser level or conducting flatness tests like the straightedge method, to identify hidden imperfections that need to be addressed before any material can be properly laid. Moreover, some think that layering additional adhesive or leveling compounds can compensate for a poorly prepared subfloor, but research indicates that this can sometimes exacerbate problems, especially if the primer or bonding agents aren’t applied correctly.
Another common misconception is that all subfloors respond similarly to leveling procedures. In reality, concrete, plywood, and old vinyl subfloors each demand distinct approaches, and disregarding these differences often results in failures like delamination or bond failure, especially under high-traffic or moisture-prone areas.
Why is it that some floors settle and fail while others last for decades?
Studies from flooring science experts show that proper subfloor stabilization, moisture management, and adherence to manufacturer guidelines significantly influence longevity. Skipping detailed assessment and advanced preparation steps can turn what seems like a minor oversight into a costly disaster. Want to master the art of flawless flooring? Check out our comprehensive guide to floor leveling for a perfect finish and avoid costly mistakes. Remember, rushing through preparation not only jeopardizes your warranty but shortchanges your space’s durability and appearance. Have you ever fallen into this trap? Let me know in the comments.Maintaining perfectly level floors over time requires the right tools and methods to ensure durability and aesthetic appeal. Personally, I swear by the **Laser Distance Meter** for measuring flatness at multiple points, which allows me to identify subtle dips or humps that might not be visible to the naked eye. Its precision helps prevent future issues with tile lippage or hardwood squeaks, and I use models like the Bosch GLM 50 C, appreciated for its accuracy to 1/16 inch and Bluetooth capability to sync measurements to my smartphone for detailed analysis.
Another indispensable tool is the **Vibrating Plate Compactor**, especially when working on subfloor stabilization or preparing the base for self-leveling compounds. The vibration ensures proper settling and removal of air pockets, which are critical for long-term stability, as detailed in various industry standards like ASTM F3010. I personally prefer models with adjustable amplitude and durable plates, which make the process smoother and more controlled, especially in large projects.
Using a **High-Quality Moisture Meter** is also vital for long-term success. I rely on pinless meters like the Tramex CME5 to quickly assess moisture levels in concrete slabs or wood subfloors, confirming they meet the necessary thresholds before proceeding with installation. Keeping moisture levels in check helps prevent warping, mold, and tile grout failure over the years. Remember, persistent moisture issues can be a hidden hazard, causing floor systems to fail prematurely.
For leveling and patching, I recommend the **Auto-Mix Self-Leveling System**, which automatically combines components at precise ratios, minimizing manual errors. This saves time and guarantees a consistent mixture, crucial for achieving that flawless finish discussed in our detailed guide on floor leveling. My tip is to always do a sample test mix to assess flow and curing properties before big pours—this practice helps you refine your technique and prevents costly rework later.
Predicting future trends, I believe that advanced digital leveling systems integrated with real-time feedback and app control will become standard. They’ll enable complete transparency and adjustment during application, making DIY projects and professional installations more accurate and less dependent on subjective judgment.
How do I maintain my floors over time?
Regular inspection is key. Use a long straightedge or laser level annually to verify the flatness and condition of your flooring. Address emerging issues promptly—whether it’s reapplying a patch, tightening loose boards, or resealing grout—to preserve the surface’s integrity. Incorporate moisture checks seasonally, especially in areas prone to humidity swings, to prevent foundation or subfloor problems. Implementing a routine maintenance schedule will significantly extend your floors’ lifespan and keep them looking pristine for years to come. For more detailed maintenance tips, visit our comprehensive guide on hardwood floor care. Start incorporating these advanced tools and practices today, and you’ll see your investment pay off with stunning, long-lasting results.
Lessons the Hard Way: Hidden Truths About Floor Leveling
One of the most valuable insights I’ve gained is that no matter how skilled you are or how much you research, truly understanding the unique characteristics of your subfloor is essential; every material, from concrete to plywood, demands different treatment, and ignoring these differences can lead to costly mistakes. I also learned that patience during curing and meticulous measurement can prevent a cascade of issues later, like cracked tiles or squeaky hardwoods, which are often symptoms of overlooked unevenness. Finally, I discovered that investing in quality tools, while seemingly expensive upfront, saves a lot of headaches and money over time, making precision and preparedness your best allies in achieving flawless flooring.
Tools and Resources That Changed My Approach
For anyone serious about elevating their flooring game, my go-to equipment includes a laser distance meter, like the Bosch GLM 50 C, to pinpoint subtle dips and humps with precision; a vibrating plate compactor, essential for subfloor stabilization; and a good moisture meter, such as the Tramex CME5, to combat hidden moisture issues before they become disasters. I also swear by the comprehensive guide Precise Floor Leveling Techniques for Flawless Surfaces, which provides step-by-step methods that have helped me avoid common pitfalls. These tools and resources, combined with continuous learning, have been instrumental in transforming my flooring projects from tentative beginnings to professional-quality results.
Take Charge and Create Flawless Floors Today
Remember, mastering floor leveling isn’t just about the technical skills; it’s about investing in your craft and ensuring every surface you touch stands the test of time. With patience, the right tools, and a keen eye for detail, you can turn your flooring aspirations into stunning reality. Don’t shy away from tackling uneven floors—every expert was once a beginner who dared to learn. Your perfect, durable, and beautiful floors are within reach; it’s time to get started and make your space truly exceptional.