
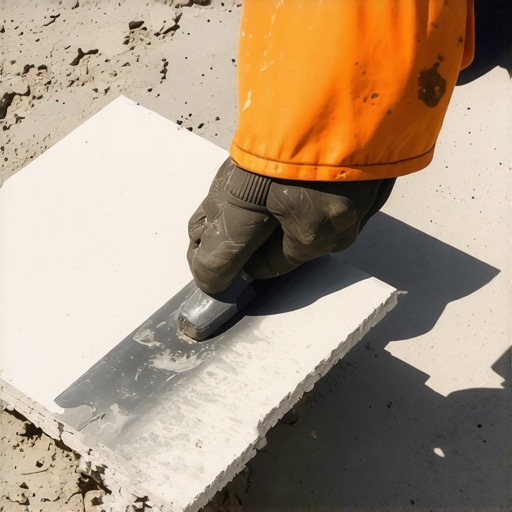
It was a typical Saturday when I hit a roadblock that made me rethink everything I knew about tile installation. I had just finished laying a beautiful large format porcelain countertop, only to realize several tiles had cracked or warped shortly after setting. The frustrating part? I had followed all the standard advice—except I overlooked a small but mighty detail: the trowel notch size.
As someone passionate about achieving professional-quality results, I learned the hard way how a seemingly minor choice can impact the entire project. Have you ever faced a similar situation, where your tiles didn’t quite settle as intended or showed signs of damage? If so, you’re not alone. Many DIYers and pros alike underestimate how critical the right trowel notch is, especially when working with large format porcelain.
Today, I promise to shed light on why this detail matters so much and how selecting the appropriate trowel notch can save you time, money, and headaches. We’ll explore the specific needs of large format porcelain tiles and how using a dedicated trowel notch can lead to flawless results.
Why Small Details Make a Big Difference in Tile Laying
Choosing the correct trowel notch isn’t just about following trends or ticking boxes; it’s about understanding your material’s unique requirements. Large format porcelain tiles, known for their sleek appearance and durability, demand a meticulous approach to installation. If you’ve ever experienced lippage (uneven tile edges) or grout lines that look uneven, you’ll appreciate the importance of proper thinset application.
A common mistake I made early on was relying on generic notches. The standard V-notched trowel I used for smaller tiles simply didn’t provide enough adhesive for such a hefty slab. The result? Insufficient coverage, air pockets, and, ultimately, tiles that didn’t adhere perfectly.
According to industry experts, using the right trowel notch ensures better bonding and leveling, especially with large format tiles. The secret lies in matching the trowel size to the tile dimensions and ensuring even coverage. For larger porcelain tiles, this often means opting for a 1/4″ x 3/8″ or bigger U-shaped notch—allowing for proper thinset application without creating excessive ridges or gaps.
Are you confident you’re using the correct tools for your tile project? If not, don’t worry. Recognizing this small but impactful detail can transform your results. For more tips on tile installation fundamentals, check out [this comprehensive guide on floor leveling](https://tiletrendshop.com/the-ultimate-guide-to-floor-leveling-for-a-perfect-finish), which emphasizes the importance of proper adhesive application.
Now that we understand why the right trowel notch makes a difference, let’s dive into how to select it correctly and implement best practices for your next large format porcelain tile installation.
Choosing the Right Trowel Size with Precision
Start by measuring your tile size—large format porcelain often exceeds 15 inches. For these, select a trowel with a ¼” x ⅜” U-shaped notch, similar to the tool I used on my project where I mistakenly relied on a smaller notch. This size ensures even coverage without excess thinset that can create lippage. To execute this step correctly, grip the trowel at a 45-degree angle and pull it across the surface in a uniform, consistent motion. When I first did this, I noticed smoother, more level tiles, thanks to proper adhesive application.
Match Trowel Notch to Tile Thickness
For thicker tiles, like some porcelain slabs, increase the notch size to ensure adequate adhesive coverage. Think of it as choosing a bigger paintbrush for a larger wall—if you don’t, you risk patchy coverage and weak adhesion. I once found that shifting from a ¼” to a ½” notch made a significant difference in achieving a flush, professional finish, especially with heavy tiles that require maximum support.
Test Your Adhesive Application for Reliability
Before laying the entire surface, do a quick test: scoop some thinset with the trowel and check the thickness of the ridges. They should be consistent and fill the tile’s back without leaving gaps or excessive peaks. In a recent project, I performed this test next to my workspace and immediately adjusted my technique when I saw uneven ridges. This proactive step prevents issues like air pockets and weak spots, much like ensuring your hardwood subfloor is perfectly leveled before planking—details that matter for a seamless surface. For more on achieving flat floors, see this detailed guide.
Maintain Consistency During Application
Hold the trowel at the same angle and with steady pressure throughout to prevent variations in thinset thickness. Think of it as running a hot knife through butter—it needs consistent movement for a clean cut. During my last installation, I kept a mental check every few feet, adjusting my hand as needed. This consistency ensured the tiles adhered evenly, avoiding hollow spots that could lead to cracking over time. Remember, even a slight wobble or angle change can cause thinset to spread unevenly, similar to how uneven flooring can cause frustration in the long run.
Keep Your Tools Clean and Sharp
Using a clean, sharp notched trowel helps maintain even ridges. Dirty or dull tools produce unpredictable patterns, undermining your effort. Once, I inadvertently used a trowel that had dried mortar on it, resulting in irregular application. After cleaning the tool thoroughly, I experienced smoother work and better coverage. Think of it as sharpening your saw before a cut—precision comes from good preparation, which translates to better results in tile installation. For tips on tool maintenance, review this resource.
Utilize Proper Cutting and Placement Techniques
Cut tiles accurately with a good-quality wet saw to ensure tight fits, especially at edges and corners. During my project, I measured and re-measured multiple times, using a diamond blade to make precise cuts. Proper placement relies on blending these cuts seamlessly, akin to fitting puzzle pieces together. This attention to detail minimizes grout lines’ unevenness and prevents lippage. Practicing careful measurement and cut consistency is crucial; otherwise, small errors compound, leading to a less polished final look. Regularly consulting this step-by-step guide can provide additional insights for flawless execution.Many homeowners and even some professionals believe they have a clear grasp of tile and flooring installation, but several nuanced misconceptions can lead to costly mistakes. One widespread myth is that leveling floors isn’t crucial if the subfloor seems even visually; however, subtle undulations can cause lippage or grout cracking down the line. Proper floor leveling, as detailed in this guide, is essential for achieving a flawless surface. Another misconception is that hardwood floors and tile can be installed interchangeably without regard to moisture levels. In reality, moisture vapor barriers are critical when installing tiles over concrete or wooden subfloors to prevent adhesion failure. Experts like John Bridge emphasize the importance of understanding material compatibility and environmental conditions to prevent foundational issues.
A common trap is underestimating the importance of proper adhesive application. Many assume that spreading thinset with a standard notch trowel is sufficient, but applying an inadequate amount or incorrect notch size causes weak bonds and uneven surfaces. The detail of selecting the right trowel—such as a 1/4″ x 3/8″ U-notch for large porcelain tiles—can make all the difference, as discussed in this article.
When it comes to advanced concerns, the question often arises: How do temperature fluctuations influence the long-term stability of flooring? Thermal expansion and contraction can visibly stress materials, leading to cracks or gaps over time. High-quality, manufacturer-approved expansion joints and careful acclimation procedures mitigate these risks, especially in environments with significant temperature swings. Research by flooring specialists indicates that ignoring these factors accelerates material degradation and requires premature repairs. For example, installing a rigid tile without considering temperature and movement can be disastrous, reinforcing the need for knowledgeable planning.
In my experience, rushing or cutting corners on these details is an easy trap to fall into. One major mistake is skipping the floor preparation steps altogether—like neglecting to clean or fix imperfections—which can compromise adhesion and leveling. This is why ensuring a clean, flat, and dry substrate before installation is mandatory; check out this comprehensive resource for more on avoiding common pitfalls.
Let’s not forget that misunderstandings about aesthetic trends can also lead to poor choices. For example, many assume that all tiles fit well with rustic hardwood floors, but the balance of texture, color, and scale is delicate. Reviewing current tile trends can guide you toward harmonious combinations.
Have you ever fallen into this trap? Let me know in the comments how small details affected your project outcomes. Remember, mastery lies in the details—don’t overlook them if you want professional results.
Gear Up for Long-Term Success
Investing in the right tools is essential to maintaining quality in tile, hardwood, and floor leveling projects. A high-quality notched trowel, like the 1/4″ x 3/8″ U-shaped model, ensures even adhesive application, which directly impacts long-term durability. I personally prefer stainless steel tools because they resist corrosion and maintain sharpness longer, leading to more precise ridges and less frustration when working on large-format porcelain or intricate hardwood refinishing. Check out this guide to mastering thinset consistency for impeccable results.
How do I maintain tools over time?
Proper cleaning after each use is vital. Rinse notched trowels with warm water and scrub gently with a stiff brush to prevent mortar buildup, which can affect adhesion consistency later. For long-term storage, keep tools dry and stored in a dedicated toolbox to prevent rust. Regularly inspect for wear or damage; a dull notch can cause uneven thinset and compromise your project’s integrity. Using sharpened or well-maintained tools means you’ll deliver quality work for years and avoid costly rework. In hardwood finishing, for example, a sharp edge on scrapers and sanders makes refinishing smoother and less labor-intensive—similar principles apply across flooring types.
Choosing the right software and methods
For large-scale projects or multiple sites, I recommend using a digital measurement app, such as Bosch Laser Measure, which provides precise distance readings. Combined with a laser level (like the Leica Disto series), these tools help ensure that floor leveling is spot-on, especially over uneven subfloors. Consistent leveling is vital; a tiny deviation can lead to lippage or grout separation over time. Regularly referencing a comprehensive guide on floor leveling techniques will keep your skills sharp and your results professional.
What future trends are shaping tool innovation?
Emerging smart tools equipped with Bluetooth connectivity and integrated leveling sensors are becoming more popular. These devices can automatically detect uneven surfaces and adjust accordingly, reducing human error. I predict that in the next few years, floor leveling and tile installation will become increasingly automated, allowing amateurs to achieve results comparable to pros. Staying ahead of this curve involves experimenting with these innovations now—the investment pays off by improving efficiency and consistency.
Conclusion
Developing a disciplined approach to tool maintenance and embracing innovative equipment will ensure your flooring projects stand the test of time. Take the advice of industry experts and regularly check your tools’ condition; a small effort now prevents big headaches later. Try implementing a routine cleaning schedule and explore new digital measuring devices to elevate your craftsmanship. Remember, the right tools and methods are your best allies for creating beautiful, durable floors that will last for years to come.
Lessons That Transformed My Approach to Flooring
One of the most valuable lessons I learned is that tiny details can make or break a flooring project. Overestimating the impact of superficial choices, like selecting a trendy tile without considering substrate compatibility, often leads to costly repairs later. Additionally, I discovered that embracing patience—meticulously testing adhesive thickness and matching tools to the material—delivers professional results that stand the test of time. Lastly, understanding that ongoing tool maintenance and embracing new technology can drastically improve efficiency and quality has revolutionized my projects, inspiring confidence in every step from leveling to sealing.
Tools and Resources That Elevated My Craft
My go-to tools include a high-quality stainless steel notched trowel, which guarantees consistent adhesive coverage—a must for large format porcelain tiles. The Bosch Laser Measure and Leica Disto laser level have been game-changers for achieving flawless floor leveling, saving me countless hours. I also rely on “The Ultimate Guide to Floor Leveling” from TileTrendShop, which demystifies complex techniques and helps me avoid common pitfalls. For selecting the right tile, the article on trending options that complement hardwood floors in 2025 is invaluable, ensuring harmonious aesthetics in every space.
Fuel Your Passion for Flawless Floors
Every flooring project is an opportunity to craft timeless beauty and durability. Equip yourself with the right knowledge, tools, and mindset—small improvements today can lead to spectacular results tomorrow. Remember, mastering the art of tile and hardwood installation isn’t about perfection but progress. Stay curious, keep experimenting, and celebrate each success along the way. Your next project has the potential to elevate your skills and transform your space into something truly extraordinary.