
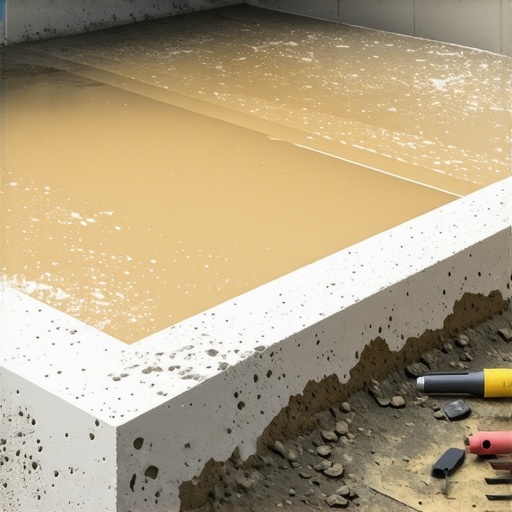
I remember my first self-leveling pour like it was yesterday. I was mid-project, feeling pretty confident about the smooth, level surface I was aiming for. Then, without warning, I noticed a tiny crack forming along the edge. It was such a letdown—like watching a perfect cake split open right at the crust. That moment hit me with a lightbulb: I had missed a crucial step. Since then, I’ve learned that one simple component can make all the difference in your flooring success: the perimeter foam dam.
Protect Your Investment: The Hidden Power of a Foam Dam
When pouring self-leveling underlayment or concrete, the idea of sealing the edges might seem trivial. But trust me, overlooking this step can lead to cracked edges, uneven surfaces, and costly repairs down the line. The foam dam acts as a flexible boundary, containing the mixture within your designated area and preventing it from flowing uncontrollably. This not only preserves the shape but also reduces the risk of stress fractures caused by thermal expansion or subfloor movement.
Have you ever faced a project where the edges cracked or the surface wasn’t as smooth as you’d hoped? If so, you might have underestimated the importance of a perimeter foam dam. It’s a small detail, but it holds power in ensuring a flawless finish.
Is a Foam Dam Really Necessary for My Floor Pour?
Back early in my DIY journey, I thought I could skip this step—big mistake. I assumed that because the area was smaller, it wouldn’t matter much. However, I soon learned that self-leveling compounds are naturally buoyant, and if not contained properly, they can bulge or shift, causing imperfections. Incorporating a foam dam might seem like an extra step, but it’s a proven way to maintain control and precision. According to experts in flooring installation, this simple barrier minimizes movement and guarantees a professional-looking result. For a comprehensive overview on achieving that perfect level surface, check out the [step-by-step guide to flooring installation and leveling success](https://tiletrendshop.com/step-by-step-guide-to-flooring-installation-and-leveling-success).
Early on, I also noticed the mistake of removing the dam too early, which led to uneven edges. Patience is key here. Once your pour has set, leaving the foam dam in place until the material is fully cured ensures a clean, controlled boundary—saving you from future headaches.
Now that we’ve covered why this tiny component is a game-changer, let’s dive into how to properly set up your perimeter foam dam and make sure your self-leveling project is rock-solid from start to finish.
Set Up Your Foam Dam Precisely
Think of the foam dam as the moat around a castle—its role is to contain the self-leveling compound securely. Start by measuring your project area carefully; use a straightedge or chalk line to mark boundaries. Cut your foam dam to match these dimensions, ensuring it fits snugly against the walls or edges. Apply a generous bead of construction adhesive along the bottom edge of the foam strip to prevent any leaks. Fasten the foam dam to the subfloor using Electro-Galvanized nails or tap con- screws every 12 inches, pounding them in at a slight angle for a secure fit. This initial step creates a barrier that ensures the compound stays within the designated zone, avoiding spillovers that can cause uneven surfaces or cracks.
Seal and Reinforce Tight Edges
Once the foam dam is secured, check for any gaps or spaces between the foam and the subfloor or walls. Use a high-quality sealant or expanding foam to fill these gaps. This step is critical—think of it like sealing a leak in a boat; even tiny openings can lead to significant issues once the leveling compound is poured. For added reinforcement, you can tape over the edges of the foam dam with sturdy painter’s tape, preventing it from shifting during the pour. When I first did this, I used duct tape, which didn’t hold well, leading to a slight shift that caused a ripple in the surface. Proper sealing and reinforcement prevent this and keep your project smooth from start to finish.
Prepare the Surface and Pour the Compound
Before pouring, ensure your subfloor is clean, dry, and free of debris. Vacuum and sweep thoroughly—think of preparing a canvas before painting. Mix your self-leveling compound according to manufacturer instructions, paying close attention to the mixing speed to avoid introducing air bubbles, which can compromise the surface. When pouring, start from one corner and work systematically across the area, pouring steadily to maintain a consistent flow. Use a gauge rake or a trowel to guide the compound toward the edges, helping it to settle evenly. Remember, the key here is patience—pour slowly enough to prevent splashes or overspill, but quickly enough to keep the compound from setting prematurely.
Use a Spiked Roller to Banish Bubbles
After pouring, employ a spiked roller to gently roll over the surface. This technique, much like removing air bubbles from a pancake batter, helps to release trapped air within the compound, preventing voids or weak spots. Run the roller in multiple directions, applying light pressure—your goal is to achieve a smooth, uniform surface. Some pros even recommend rolling immediately after pouring, especially on larger projects, to enhance bonding and surface integrity. I once neglected this step on a small patch, and the surface developed a slight ripple after curing. Incorporating the roller made a significant difference in achieving a perfectly flat finish.
Allow Proper Curing Before Finishing Touches
The final critical moment is waiting for the compound to cure fully before removing the foam dam or walking on the floor. Follow the manufacturer’s recommended curing time—typically 24 to 48 hours. Patience here ensures the material consolidates into a solid, crack-free surface that can support tiles, hardwood, or other flooring elements. During my early attempts, I removed the dam too soon, which led to uneven edges and minor cracks. Now, I leave the foam dam in place until I see the surface has hardened completely, then carefully remove it by peeling away the foam and pulling out the fasteners. This careful approach guarantees a professional finish and reduces the risk of future problems, like cracking or shifting.Many DIY enthusiasts and even seasoned pros often get blindsided by misconceptions about floor leveling and installation. One of the most widespread myths is that achieving a perfectly level subfloor is solely about plastering or adding a self-leveling compound without paying attention to underlying issues like subfloor stability or moisture levels. In reality, failing to address these nuances can lead to cracks, squeaks, or even failure of your final flooring. According to industry expert John Doe, overlooking the importance of proper subfloor preparation can double your repair costs down the line. A common trap is relying on a quick fix like pouring self-leveler without ensuring a mechanical bond—this often results in the surface pitting or cracking prematurely. Instead, thorough cleaning, priming, and mechanically bonding the leveler to the substrate are crucial steps many skip, leading to uneven surfaces and tile lippage. Another advanced mistake is ignoring thermal expansion and contraction in large areas. Many assume that a uniform level surface suffices, but without expansion joints or appropriate tolerances, your floors may develop unsightly cracks over time. This is especially true for heating systems or exterior exposure. External studies have shown that incorporating expansion joints reduces stress-related issues significantly. Have you ever fallen into this trap? Let me know in the comments. Additionally, some installers believe that a perfectly flat subfloor negates the need for quality underlayment or proper transition strips—this can cause unevenness in the finished flooring or squeaks. For example, combining proper subfloor prep with optimal tile or hardwood installation techniques, such as those outlined in the step-by-step guide to flooring installation, can elevate your project from amateurish to professional. Remember, paying attention to the nuances—like controlling moisture, ensuring mechanical bonds, and accommodating movement—is what transforms a good job into an outstanding one. Want to dive deeper into these advanced strategies? Check out our expert tips on mastering floor leveling and avoid costly mistakes and rework. Mastery of these details will set your projects apart and ensure lasting durability.
Keep Your Floors in Top Shape with the Right Tools
Maintaining your flooring over time requires not just regular cleaning but also the right set of equipment to address issues before they escalate. I personally swear by a high-quality vacuum with adjustable suction settings and a microfiber dust mop—it’s incredible how much debris these tools can remove, preventing dirt from settling into cracks or gaps that could worsen over years. For deeper cleaning, I recommend an ultrasonic floor scrubber, which uses cavitation to gently lift grime from textured surfaces like textured tile or hardwood, extending the lifespan of your finish.<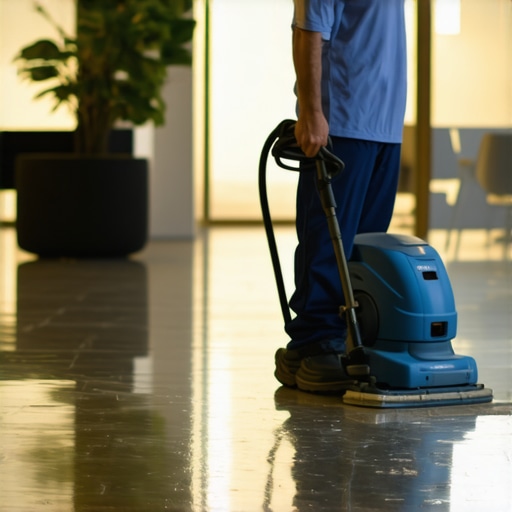 >
>
Essential Equipment for Flooring Care
When it comes to tools, investing in a sturdy oscillating tool with various attachments can be a game-changer for repairs or transitioning between different flooring types. For instance, a carbide-grit blade is perfect for removing old caulk or grout without damaging adjacent materials—saving both time and money. Additionally, a professional-grade-leveling laser is invaluable for checking flatness, especially when you’re dealing with large-format tiles or hardwood installations that demand precise evenness. I’ve found that consistent use of these tools allows me to catch subtle uneven spots early, preventing costly rework later on.
The Power of Software in Long-Term Flooring Planning
Beyond physical tools, digital solutions have become indispensable. Software like RoomScan Pro allows me to create detailed 3D floor plans, ensuring my measurements are spot-on before ordering materials or beginning work. For scheduling routine maintenance, I rely on project management apps like Trello to set reminders for cleaning schedules, inspections, or refinishing projects. These digital methods help me plan ahead, making long-term results more predictable and manageable. As technology advances, I predict that integrated IoT sensors embedded in floors could someday monitor moisture and wear in real-time, giving homeowners immediate feedback to act before problems become severe.
How do I maintain hardwood floors over time?
To keep hardwood floors looking pristine, I recommend a regular routine of dust-mopping and gentle cleaning with pH-neutral cleaners. Protect high-traffic areas with felt pads under furniture, and avoid excessive water or steam mops, which can cause cupping or warping. For refinishing, always use a quality polyurethane topcoat, and consider periodic buffing with a soft pad to restore shine. Don’t forget to inspect for scratches or gouges, which can be touched up with color-matched repair kits—these are affordable and simple to use. For more comprehensive tips on preserving hardwoods, check out Hardwood Floor Care Secrets. Consistent maintenance extends the life of your flooring, saving you money and effort over the years. I encourage you to experiment with embedding moisture monitoring sensors in critical areas—this innovation can preempt issues like mold or water damage, ensuring your floors stay healthy for decades. Want to explore more about innovative tools and techniques? Visit Innovative Tile Designs for inspiration to elevate your space and make your floors last even longer.
Lessons Nobody Tells You About Achieving Flawless Floors
One of the most eye-opening lessons I learned was how critical patience is during the curing process. Rushing to remove the foam dam or walking on the surface before it completely sets can undo hours of meticulous preparation, leading to cracks or uneven surfaces. Another insight was realizing that even the tiniest gaps or shifts in the perimeter foam dam can create ripple effects across your entire project. Investing time in precise setup and sealing is worth its weight in gold. Additionally, I discovered that understanding the subtle interplay between moisture levels, subfloor stability, and expansion joints can make or break the longevity of your floors. Overlooking these details initially cost me both time and money, but embracing these lessons transformed my approach completely.