
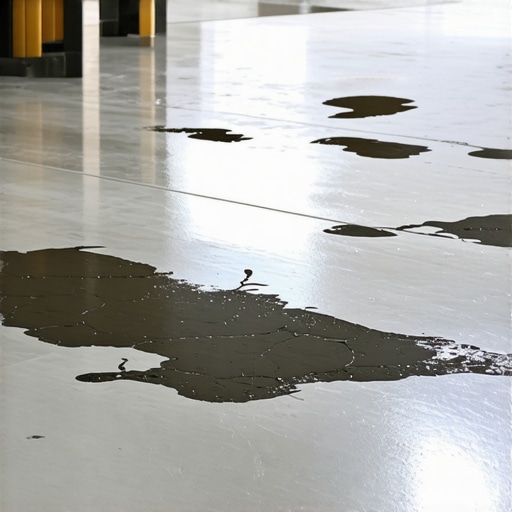
I remember the day I learned a hard lesson about epoxy—the kind that leaves you wondering what went wrong. It was during a busy renovation project, and I was confident in my skills. The client wanted a sleek, durable epoxy coating on their concrete floor, but within weeks, cracks and peeling started to show. It was a domino effect of frustration that could have been avoided. That experience taught me the importance of understanding moisture issues before applying epoxy.
Spotting the Moisture Trap: Why Your Epoxy Might Be Failing
Many homeowners and contractors jump into epoxy flooring without checking the moisture content of the concrete slab. Here’s the truth: If moisture seeps through the concrete, it can sabotage the adhesion of epoxy, leading to bubbling, cracking, and peeling long before its time. I’ve seen this happen countless times—thorough preparation is the key to longevity. When moisture escapes from beneath the slab, the epoxy layer can lose its grip, causing a costly and unsightly failure.
Could Your Floors Be Hiding Hidden Dampness?
This is where many make a critical mistake—assuming a dry-looking floor is dry enough. Early on, I overlooked the importance of performing moisture tests, which led to poor results down the line. A simple moisture meter can reveal hidden dampness, saving you from future headaches. For a comprehensive approach, check out [this detailed guide on moisture testing](https://tiletrendshop.com/floor-leveling-challenges-common-mistakes-and-how-to-avoid-them). Recognizing the signs of moisture early allows you to take proper remedial steps, such as installing a vapor barrier or choosing alternative flooring options.
Are you facing stubborn peeling or bubbling on your epoxy? Chances are, moisture is lurking beneath the surface. The good news is, with a little knowledge and preparation, it’s a problem you can tackle before it ruins your project. Let’s dive into the practical strategies that set successful epoxy applications apart—and how you can make sure your floors stay flawless for years to come.
Prep the Surface Like a Pro
Before applying epoxy, ensure your concrete slab is perfectly dry and smooth. Use a high-quality moisture meter—think of it as a health check-up for your floor. I once skipped this step and shortly after, cracks appeared from trapped moisture. To prevent this, test thoroughly and wait for ideal conditions. If moisture is present, install a vapor barrier or consider alternative flooring options.
Level the Floor with Precision
Uneven floors are like a wobbly table—terrible for any finish. Mix your self-leveling compound according to instructions, then pour it evenly over the surface. Use a gauge rake or a trowel, much like a baker spreading icing smoothly over a cake, to distribute the mix. For large areas, set perimeter dams to contain the leveler—this prevents leaks and ensures a consistent finish. For detailed techniques, see [this guide](https://tiletrendshop.com/how-to-achieve-flawless-floor-leveling-before-tile-laying).
Inspect and Correct Low Spots
After curing, check for dips using a straightedge or a flashlight at low angles. Fill any defects with additional layer or patching compound, then sand smooth. Remember, a flat surface is the foundation of beautiful floors. Once level, clean the surface thoroughly to remove dust and debris; contamination will compromise adhesion.
Apply a Reliable Primer or Sealant
Use a primer suitable for concrete and epoxy—it’s like priming a canvas before painting, ensuring better bonding. Follow the manufacturer’s dry times precisely. I once rushed this step, resulting in peeling later. Don’t cut corners here.
Carefully Mix and Pour Epoxy
Mix your epoxy resin and hardener in a clean bucket, stirring slowly to avoid introducing bubbles—like gently folding in ingredients, not whipping cream. Once mixed, pour the epoxy in a zig-zag pattern across the surface, then spread using a notched trowel or squeegee. Work systematically from one side to the other. For larger surfaces, consider working in sections to prevent the epoxy from setting before you’re finished.
Achieve a Smooth Finish
Use a roller or brush to eliminate bubbles and uneven spots—the same way a painter achieves a seamless wall. For the most flawless surface, apply multiple thin coats instead of one thick layer. Allow sufficient curing time, typically 24-72 hours, depending on conditions. If imperfections appear, light sanding with fine-grit paper can help, but avoid overdoing it.
Transitioning to Tile or Hardwood
When shifting from epoxy to tile, ensure the epoxy is fully cured and free of dust. Use a primer compatible with tile adhesives to promote bonding, much like preparing a sturdy foundation for a new structure. For hardwood installations over concrete, check that the slab is flat and stable. Use [precise flooring techniques](https://tiletrendshop.com/floor-leveling-challenges-common-mistakes-and-how-to-avoid-them) to prevent future movement or cracks. Proper preparation is your ticket to enduring beauty and stability.
Final Checks and Maintenance
Inspect the entire surface for any missed spots or bubbles. Lightly acid-etch or clean the surface if necessary before installing tiles or hardwood. This improves adhesion and longevity. After installation, follow expert tips for maintenance—like regular cleaning with non-abrasive products—to preserve your investment. With these steps, you’ll turn a rough concrete slab into a stunning, durable floor that lasts for decades.While many believe that flooring installation is primarily about laying down tiles or hardwood, the nuanced details often decide the outcome’s longevity and appearance. One widespread misconception is that straightforward leveling and simple adhesion suffice for perfect floors. However, advanced professionals know that overlooking subtle factors—like moisture vapor transmission rates or substrate preparation—can lead to premature failures, cracks, or uneven surfaces. For example, using a generic primer without considering the substrate’s porosity can compromise adhesion, resulting in delamination over time. Additionally, many assume that high-quality materials alone guarantee durability, but improper installation techniques can nullify even the best products.
Another overlooked nuance involves the importance of environmental conditions during installation. Installing tiles or hardwood in fluctuating humidity or temperature can cause expansion, contraction, and eventual cracking if not properly managed. A common trap is rushing the drying or curing process; many try to accelerate drying, but this often traps moisture or creates weak bonds. For instance, applying epoxy or leveling compounds before they fully cure leads to surface bubbles, cracking, or delamination, a mistake many beginners make but seasoned pros avoid by following manufacturer guidelines meticulously.
Why Do Floor Leveling Mistakes Come Back to Haunt You? Best Practices for Long-Term Success
Many believe that pouring a self-leveling compound is a quick fix for uneven floors. Still, the reality is that improper substrate preparation—such as not removing contaminants, moisture, or dust—can cause the leveling layer to fail prematurely. To ensure durability, conduct a comprehensive assessment of your subfloor using reliable tools like moisture meters. For advanced projects, consider the influence of subfloor stability; even minor flexing can crack tiles over time. A detailed approach involves verifying flatness to within millimeters and installing an uncoupling membrane when needed, which allows for slight movements and prevents cracks.
Moreover, understanding the interplay between different flooring materials is crucial. For example, installing tiles over hardwood requires compatibility considerations; if the hardwood is prone to movement, it can transfer stress to the tile, causing cracks. External studies, like one published by the Tile Council of North America, emphasize the importance of substrate stability and proper expansion joints for long-lasting installations.
Avoiding these hidden pitfalls can significantly extend the lifespan of your flooring. The key lies in meticulous preparation, respecting material specifications, and environmental controls. This level of detail separates a professional installation from a DIY slip-up, ultimately saving time and money. Want to master these techniques? Check detailed guides such as [floor leveling success](https://tiletrendshop.com/how-to-achieve-flawless-floor-leveling-before-tile-laying) and [tile installation strategies](https://tiletrendshop.com/installing-tiles-like-a-pro-step-by-step-strategies-for-2025).
Have you ever fallen into this trap? Let me know in the comments.
Keeping It Working: Tools and Maintenance for Flawless Floors
Maintaining your flooring — whether tile, hardwood, or epoxy coatings — isn’t just about occasional cleaning; it requires the right tools and consistent attention. As someone deeply involved in flooring projects, I rely on a few specific instruments that drastically improve longevity and aesthetic appeal. For instance, a high-quality digital moisture meter from Wagner Instruments has become indispensable. I prefer models with rapid response times and dual-sensor technology because they give accurate readings across different substrates, helping me avoid costly moisture-related failures. Regular moisture assessments are vital, especially when preparing for tile installation or hardwood refinishing, aligning with the best practices outlined in the ultimate guide to floor leveling. Additionally, a vibrating concrete sander is essential for deep cleaning and leveling uneven surfaces, especially in older homes where residual debris or high spots can compromise adhesion or surface smoothness.
Maintaining Floors Over Time
Routine upkeep extends the life of your floors. I recommend investing in a microfiber mop with removable, washable pads, paired with pH-neutral cleaners designed specifically for your floor type. Hardwood floors, for example, benefit from occasional refinishing with a floor sander, which I do every 7–10 years, depending on wear. Hardwood refinishing not only restores shine but also removes small scratches and accumulative damage. For tile floors, sealing grout lines every 1–2 years prevents staining and water infiltration, essential for maintaining appearance and preventing deterioration. An often-overlooked aspect is the environment; maintaining stable humidity levels—ideally between 35% and 55%—prevents expansion and contraction that can lead to cracks or delamination here.
Scaling Your Flooring Projects Effectively
When you plan to scale from a single room to an entire home, investing in professional-grade leveling compounds and quick-curing epoxy adhesives ensures uniform results across larger areas. For example, using fast-setting self-leveling underlayment allows for rapid completion without sacrificing precision. Additionally, automation tools like laser-guided levelers help achieve consistent floor flatness, reducing the margin for human error. As trends move toward eco-friendly and sustainable materials, future tools will likely incorporate smarter sensors and AI-driven diagnostics, giving us more control and insight during installation and maintenance phases. Looking ahead, embracing these innovations will be crucial for durability and efficiency.
How do I maintain my floors over time?
Consistent cleaning with suitable tools, scheduled refinishing, and monitoring environmental conditions form the pillars of effective maintenance. For example, employing a microfiber mop combined with a neutral cleaner preserves finishes without damage. Protecting high-traffic areas with mats reduces wear and tear, saving overall costs. Moreover, periodic assessments using moisture meters can preemptively identify issues before they escalate, aligning with the insights from faultless flooring practices. Try upgrading your maintenance kit with a digital moisture meter or a professional-grade sander—these tools can profoundly influence your floors’ lifespan and look. Remember, a well-maintained floor isn’t just about appearance; it’s an investment that benefits from the right tools and disciplined upkeep.
What the Grind Taught Me About Being Truly Prepared
During my early days in flooring, I thought I could skip some steps and still get flawless results. Turns out, overlooking moisture tests was a costly mistake; it was a hard lesson that, if learned earlier, would have saved me time and headaches. Now, I know that a simple moisture meter can be your best friend—it’s the difference between a floor that lasts decades and one that bubbles within months.
Why I Never Underestimate the Power of Precise Leveling
I’ve seen countless projects falter because of uneven slabs—even small dips can cause tiles to crack or epoxy to peel. My lightbulb moment came when I realized that measuring flatness with a straightedge is just the start; actual success depends on correcting those imperfections thoroughly and using reliable tools like laser-guided levelers. Precision here isn’t just a bonus—it’s the foundation of lasting beauty.
Lessons from the Field About Material Compatibility
Initially, I believed that choosing high-quality materials guaranteed success. However, experience taught me that installation techniques and substrate prep are equally vital—especially when transitioning between materials like epoxy and tile or hardwood. Compatibility issues often trace back to poor surface preparation or environmental conditions during installation. Spending extra time on prep has always paid dividends in durability and aesthetics.
Maintaining Momentum and Staying Ahead
One of the best investments I made was in tools that help monitor environmental factors—like humidity meters and surface analyzers. Regular inspections and maintenance routines, such as grout sealing or refinishing hardwoods, have kept my projects looking fresh and lasting longer. Embracing ongoing learning and staying updated with innovations, like smarter leveling compounds or sustainable materials, continues to elevate my craft and results.
Curated Gems for the Flooring Enthusiast
- Moisture meters from Wagner Instruments: I trust these for rapid, accurate readings whenever I test subfloors. Their dual-sensor tech provides peace of mind during critical phases.
- Laser-guided levelers: For me, they’re game-changers—precision and speed in one package, and essential for large-scale, flawless applications.
- Books on modern flooring techniques: Titles like *Flooring Installation Fundamentals* deepen my understanding and inspire innovative approaches. Continuous learning keeps my work sharp.
- Reliable suppliers and manufacturers: Partnering with brands I trust ensures that quality materials complement my techniques and help prevent issues like peeling or cracking down the line.
Your Next Step: Craft Floors That Truly Endure
Every project is an opportunity to hone your skills and make lasting improvements. I’ve learned that meticulous preparation, continuous education, and the right tools are what separate average results from exceptional ones. Don’t shy away from exploring new methods or investing in your craft—your floors will thank you for it. Ready to elevate your flooring game and create stunning, durable spaces? Embrace the journey, and don’t forget to share your experiences below. How have these insights reshaped your approach to floor installation?