
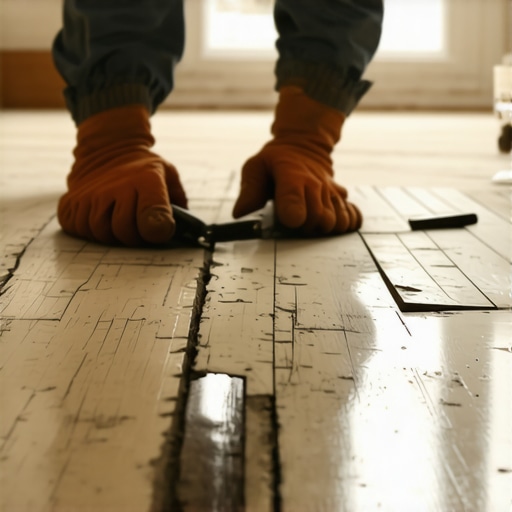
I remember the day I decided to replace my old kitchen floor. It was a Saturday, and I was feeling pretty confident. But as soon as I pulled up that tired, cracked linoleum, a sinking feeling struck me—what if my home contained something more dangerous than a worn-out look? I had no idea then, but that simple tear-up could have exposed me to asbestos fibers that linger in many older buildings. It was a real wake-up call.
Why Identifying Asbestos in Old Floors Is Crucial for Your Health and Home
Many homeowners like me have faced this exact dilemma—how can you tell if your vintage flooring contains asbestos? This mineral was widely used in flooring adhesives, tiles, and backing materials well into the late 20th century because of its durability and fire-resistant properties. But the risk is significant; asbestos fibers, when disturbed and inhaled, can lead to serious illnesses, including mesothelioma and asbestosis. According to the Environmental Protection Agency, asbestos exposure is the leading cause of occupational-related mesothelioma, but many homes built before the 1980s are still hiding this hazard within their walls and floors. Knowing whether your old flooring contains asbestos isn’t just about property value—it’s about safety.
Is Testing for Asbestos Really Worth the Hassle?
When I first considered testing my floors, I hesitated—alarmed by the thought of costly lab analyses and the potential demolition mess. But I learned early on—making assumptions based on appearance or age alone can be a dangerous mistake. An untrained eye won’t be able to identify asbestos-containing materials reliably. I recall one mistake I made: I assumed all vinyl tiles were safe because they looked modern. Turns out, older tiles, especially those with a certain texture or coloration, might still harbor asbestos. This is why I strongly recommend proper testing before any renovation or disposal. For detailed guidance on safe testing methods, check out this comprehensive guide.
Have you ever found yourself questioning the safety of your flooring but unsure where to turn? Trust me—taking the proper precautions now can save you from health issues or costly repairs later. Up next, I’ll walk you through how to determine if your floors are a ticking time bomb and what steps you should take if asbestos is detected. Let’s get into it, safely and confidently.
Preparing Your Subfloor for a Flawless Finish
Start by removing any debris, old adhesives, or uneven patches using a floor scraper and vacuum. Use a level to identify high or low spots—these must be addressed to prevent future problems. For minor dips, applying a self-leveling compound is effective; lay it out with a trowel, ensuring smooth, even coverage. A practical tip from my experience: always check moisture levels before pouring leveler to avoid cracks later.
Achieve Perfect Leveling for a Seamless Look
Proper leveling is crucial for both tile and hardwood installations. For large areas, pour the self-leveling compound in sections, using a gauge rake to spread it evenly. Work quickly before it sets—about 15-20 minutes. I once tried to rush the process, which resulted in uneven patches that showed after curing. After drying, sand high spots if necessary, and vacuum thoroughly to remove dust. For detailed techniques, visit this guide.
Choosing the Right Materials for Durability and Style
Select flooring materials suited to your space and lifestyle. Hardwood floors are timeless but require proper subfloor prep; examine this resource for tips on selecting durable options. For tile, pick designs that complement your decor; explore stunning tile ideas. Remember, a quality underlayment and adhesive are essential for longevity—avoid cheap thinsets that crack easily, as highlighted in this article.
Mastering the Installation Process
For tile, carefully measure the layout before starting to prevent awkward cuts; use spacers for uniform grout lines. During tile placement, press firmly and use a level to keep tiles even—tapping with a rubber mallet ensures proper bonding without damaging surface. If installing hardwood, acclimate the planks inside your home for 48 hours to prevent expansion or contraction. When nailing or gluing, follow manufacturer instructions precisely. My experience: rushing the process led to misaligned tiles, which I had to redo. For step-by-step strategies, see this guide.
Finishing Touches for A Professional Look
Once the flooring is laid, grout or seal as needed. For tiles, wipe off excess grout with damp sponges before it hardens—avoid letting it cure on the surface. Seal grout lines with a water-based sealant to prevent stains; for wood, apply a protective finish to enhance shine and durability. After installation, give your floors several days to cure before moving furniture onto them. I learned this from my own messy experience—rushing led to scratches that could have been avoided with proper curing time. For maintenance tips, check this resource.Even experienced contractors can be misled by widespread misconceptions about flooring installation. One prevalent myth is that a perfectly flat subfloor isn’t essential, but in reality, ignoring subtle imperfections can lead to tile cracking or hardwood buckling over time. For those aiming for durability and aesthetic appeal, understanding the critical nuances—like proper surface preparation and precise leveling—is vital. A common mistake is relying solely on visual inspection; advanced methods, such as the juntos calibration technique, reveal hidden high or low spots that can sabotage your project. Moreover, many believe that hardwood floors are universally suitable for all environments, yet specific species and finishes perform better in certain conditions—details that only a seasoned pro considers. It’s also a misconception that tile grout doesn’t need regular maintenance; in fact, sealing grout lines every couple of years prevents stains and moisture intrusion, extending the life of your installation. For an in-depth look at achieving flawless finishes, check out this guide. Another tricky aspect is understanding the impact of expansion gaps; overestimating them can create unsightly joints, while underestimating results in cracking. The secret lies in precise measurement and adapting gaps to the room’s climate conditions. Don’t fall into the trap of using subpar materials, which might seem cost-effective initially but often lead to early failures. High-quality adhesives, underlayments, and sealants make all the difference, and investing in the right products yields long-term savings. Remember, the devil is in the details—seemingly minor decisions can significantly influence your project’s success. Advanced enthusiasts should consider tools like moisture meters and laser levels to detect issues early. According to a study by the National Association of Home Builders, meticulous preparation is the most impactful factor in durable flooring, yet it’s often overlooked by DIYers. So, next time you plan a flooring upgrade, ask yourself—have I really covered all the nuances to ensure longevity and beauty? Keep learning, and don’t hesitate to seek professional advice when in doubt. Have you ever fallen into this trap? Let me know in the comments.
Keeping it working: Essential tools for durable flooring
To ensure your flooring project stands the test of time, the right tools are indispensable. I personally swear by a high-quality laser level, like the Bosch GSL 2 Professional, which provides precision within 1/8 inch over 30 feet, making leveling large areas much more manageable. Wielding a calibrated moisture meter, such as the Tramex MM3, has been crucial in assessing substrate dryness, directly influencing adhesion quality and long-term stability. Investing in a diamond-tipped tile cutting wheel ensures cleaner, straighter cuts, especially when working with porcelain and large-format tiles, reducing waste and rework.
When working with hardwood floors, I rely on a pneumatic flooring nailer like the Max USA T-15, which allows for fast, consistent nailing without damaging the surface. This tool, combined with a good electric sander equipped with dust extraction, helps achieve a smooth, professional finish while keeping cleanup minimal. Software tools like Floor covering estimator spreadsheets or apps such as MeasureSquare help me plan material quantities precisely, reducing costs and avoiding unnecessary delays.
Tools I recommend for ongoing maintenance and future upgrades
Once your floors are installed, maintenance becomes critical. For hardwood floors, a microfiber dust mop daily keeps debris at bay, preventing scratches. To deal with scratches or dull finishes, I recommend a orbital buffer and a wood floor refinishing kit—these allow for touch-ups without fully re-sanding, saving time and money. For tiles, a grout haze remover like a gentle acid solution or commercially available sealant enhances longevity and appearance. Regularly sealing grout lines, often overlooked, can double their lifespan and maintain the elegance of your tile job.
Where flooring trends are headed and how to stay ahead
The future points toward smart flooring, integrating sensors into tiles and hardwoods that monitor moisture, temperature, and wear patterns. Staying ahead involves not only embracing innovative tools but also understanding material-specific maintenance protocols. For example, elegant tile designs can now be paired with moisture sensors embedded during installation, providing real-time data to prevent issues like warping or cracking. In this evolving arena, investing in specialized diagnostic tools will be key to maintaining flawless flooring for years to come.
How do I maintain my floors over time without constant guesswork?
The secret lies in routine checks with appropriate tools and a proactive maintenance schedule. Regularly using a moisture meter to monitor substrate conditions and a gentle cleaning regimen prevents damage before it occurs. For hardwoods, applying a protective finish every few years, as recommended in this guide, keeps the surface resilient. Don’t underestimate the power of a well-calibrated laser level when redoing threshold transitions or checking for uneven spots; these simple tools can save you from costly fixes down the line. I encourage you to try calibrating your moisture meter this weekend—precision in measurement is your best defense against future problems and a step toward expert-level flooring care.
Room for Growth: The Surprising Truths I Struggled With
One of my biggest lessons was realizing that even the best materials can’t compensate for poor preparation. I once skipped the moisture test, thinking I knew better, only to face warping a few months later. Now I understand that thorough substrate assessment is irreplaceable.
Another insight came from underestimating the importance of proper leveling. I believed that eyeballing was sufficient, but uneven surfaces caused cracked tiles and uneven hardwood seams. Precise tools like laser levels are game-changers in achieving a flawless finish.
Tools and Tactics That Transformed My Approach
Investing in quality tools, such as a calibrated moisture meter or a self-leveling compound applicator, radically improved my results. These tools not only save time but also ensure durability, reducing callbacks and repairs down the line. Check out this guide to mastering floor leveling.
Discipline in prep work remains a cornerstone. Using a good vacuum and trowel, I learned, prevents tiny debris from causing major issues, like tiles popping or grout cracking. Enhancing your toolbox with the right gear makes a tangible difference.
Why Cutting Corners Is Never Worth It
Skimping on materials or rushing through installation feels tempting but often leads to long-term headaches. Cheap adhesives and poor-quality underlayments seldom stand up to daily wear. The extra investment upfront pays dividends in durability and aesthetic appeal.
Another mistake I made was neglecting expansion gaps—assuming they were optional. Learning the correct spacing, especially for fluctuating environments, preserves the integrity of your flooring. Remember, every detail counts when aiming for professional results.
The Power of Patience and Precision—My Final Thought
At the end of the day, meticulous attention to detail and patience elevate your flooring project from good to outstanding. They transform materials into a beautiful, lasting foundation for your home. Embrace the learning curve, leverage the right tools, and don’t shy away from expert advice—that’s the secret to success.
For more on perfecting your installation, you might find this resource invaluable. Remember, every mistake is a stepping stone toward mastery.