
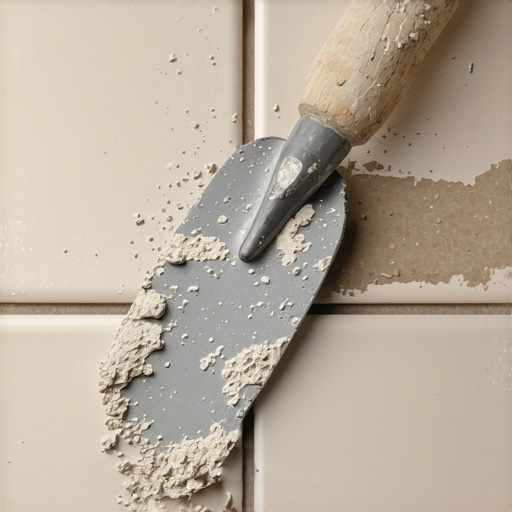
I remember the first time I laid down a new tile floor, eager to see my hard work come to life. But instead of a smooth, professional finish, I ended up with uneven patches and tiny cracks that seemed to mock my efforts. The culprit? I had misunderstood the importance of the thinset’s consistency. That lightbulb moment taught me a valuable lesson: knowing if your thinset is too dry can make or break your flooring project.
Why Knowing Your Thinset’s Moisture Level Can Save Your Floor
The consistency of your thinset mortar isn’t just a detail; it’s the foundation of a successful tile or hardwood installation. When thinset is too dry, it doesn’t bond properly, leading to tiles that will crack or lift over time. Conversely, if it’s too wet, you’ll face messy application and potential surface curing issues. Getting this right ensures your floors are durable, level, and beautiful.
Understanding whether your thinset is at the perfect moisture level is crucial, especially if you aim for a high-quality, long-lasting finish. A dry thinset can look unblemished initially but may cause problems down the line, costing you time and money to fix. I’ve learned that mastering the trowel test is your best bet for avoiding these pitfalls.
Have you ever struggled with loose tiles or uneven surfaces and wondered if it was due to your mortar? If so, stay tuned—I’ll guide you through how to perform the Trowel Test and what signs to look for to ensure your thinset is just right.
Is the Trowel Test Actually Worth the Hype?
I admit, early in my career, I was skeptical. I thought I could judge the mortar’s consistency just by eye. Turns out, I was missing out on a reliable, straightforward method that pros swear by. It was a mistake I made early on—trusting intuition over technique—and it cost me a few salvageable projects.
External sources confirm that proper moisture content in thinset enhances adhesion and longevity. According to industry experts, failing to check mortar consistency is one of the most common mistakes that lead to flooring failures. This simple test has saved me from countless future headaches and can do the same for you.
Now, let’s get into how to perform the Trowel Test properly, what signs to look for, and how to interpret your results. Mastering this skill is the first step towards a flawless finish and a floor that will stand the test of time. Want to dive deeper into flooring techniques? Check out our comprehensive guide on [precise floor leveling techniques](https://tiletrendshop.com/precise-floor-leveling-techniques-to-achieve-flawless-surfaces) for expert tips.
Performing the Trowel Test: Your First Step Toward Perfect Thinset
Start by preparing a clean, flat surface to work on. Scoop a generous amount of fresh thinset with your trowel, and spread it evenly over a small section, about one square foot, using the notch side of your trowel. Press the thinset firmly with the back of your trowel at a 30-45 degree angle to gauge its body.
Consistency Matters: What to Look For
Imagine you’re icing a cake—if the icing is too stiff, it won’t spread smoothly; too runny, and it will drip everywhere. In the same way, your thinset should have a creamy, peanut-butter-like consistency. It holds its shape but is easy to spread. If it looks dry and crumbles, it’s too dry; if it’s sloppy and runny, it’s too wet.
Testing Adhesion and Carrying Capacity
Next, try to lift a trowel-full of the spread thinset. It should stick well to the trowel without dripping or sliding off excessively. If it nearly falls off immediately, it’s likely too dry. Conversely, if it oozes and drips, it’s too wet. Adjust your mix: add a small amount of water if too dry, or a dry mix if too wet, and remix thoroughly.
Applying Consistent Thinset: The Key to a Flawless Floor
Once you’ve dialed in the right consistency, use the notched side of your trowel to apply the thinset to your surface. Hold the trowel at a consistent angle, usually around 45 degrees, to create uniform ridges. When spreading, work in small sections, maintaining the same pressure and angle to ensure even thickness.
For example, I recall a project where I applied thinset too dry, and as I pressed the tiles, I noticed it was lifting off in some spots—clear sign I needed more moisture. Refining my process with the trowel test saved me from future repairs and gave my tiles a solid bond that lasted for years.
Ensuring Proper Coverage and Bonding
To check your coverage, gently lift a tile after setting it to see if the thinset oozes evenly beneath without air pockets. Proper coverage is crucial; inadequate contact leads to weak adhesion, while excessive thinset can inhibit curing. Aim for a uniform layer that fills all gaps without excessive buildup.
Avoiding Common Mistakes with the Thinset
During application, avoid re-troweling over freshly applied thinset, as this can weaken the bond. If adjustments are needed, scrape off excess thinset and reapply fresh mix. Remember, working in manageable sections and keeping your tools moist helps maintain consistency throughout the project.
Refining Your Technique for Long-Lasting Results
As you gain experience, note how different batches of thinset behave and adjust your mix accordingly. Maintaining a steady pace and checking your work with the trowel test frequently ensures each layer is optimal. This approach reduces the risk of bubbles, cracks, or loose tiles, paving the way for a smooth, durable finish.
By mastering the trowel test and applying a consistent thinset layer, you’ll lay the foundation for a pristine floor—one that withstands the test of time and foot traffic. Remember, patience and attention to detail now mean less troubleshooting later, and a result you can be proud of.
Many DIY enthusiasts and even some professionals often overlook the subtle nuances that can make or break a flooring project. A common myth is that as long as the surface appears level and the tiles or hardwood are laid uniformly, the job is done. However, this overlooks the importance of understanding the installation’s intricacies. One significant mistake I see repeatedly is underestimating the impact of moisture levels and subfloor conditions on long-term durability. For instance, improperly prepared subfloors with excess moisture or unevenness can lead to unexpected buckling or cracking months after installation, despite perfect initial aesthetics.
Another misconception is relying solely on the appearance of a flat surface without testing the actual flatness with tools like a straight edge or laser level. Subtle dips or high spots, often invisible to the naked eye, can cause tiles to lippage or gaps in hardwood planks, compromising both aesthetics and structural integrity. These issues become more pronounced with larger format tiles or wider hardwood planks, where even minor imperfections are magnified.
Are Your Floor Leveling Techniques Keeping You Safe from Future Failures?
Many installers assume that following the manufacturer’s instructions is enough, but advanced professionals understand that the environment and materials require a tailored approach. For example, climate-controlled environments reduce the risk of moisture-related issues, but they don’t eliminate the need for proper moisture barriers or subfloor leveling. Emerging studies suggest that incorporating moisture testing as a standard step can dramatically decrease warranty claims and callback rates, saving time and costs in the long run. According to the National Tile Contractors Association, neglected subfloor tests are among the top causes of installation failures, which underscores the importance of comprehensive assessment.
It’s crucial to recognize that proper floor preparation, including accurate leveling, moisture control, and understanding material behavior, is essential for a successful and enduring installation. Skipping these steps or misjudging their importance can lead to problems like hollow spots, squeaks, or visible cracks that diminish the value of your work. For a more detailed look into the proper procedures, review our guide on the ultimate guide to floor leveling. Remember, every surface has its quirks, and respecting those nuances ensures your hard work pays off in the long term. Have you ever fallen into this trap? Let me know in the comments.When it comes to keeping your flooring installation in top shape over the years, the right tools and a proactive maintenance routine are key. Start with a quality floor buffer with adjustable pads. I personally swear by the Bona Hard Floor Premium Buffer because it delivers consistent results without damaging the surface. Regularly using a microfiber pad prevents dirt buildup, which can scratch or dull your finish. For hardwood floors, a detailed cleaning with a pH-neutral wood floor cleaner like Bona Hardwood Floor Cleaner ensures longevity without compromising the finish.
A digital moisture meter is another invaluable tool for ongoing health checks. The Protimeter Surveymaster, for example, allows me to monitor moisture levels in the subfloor, preventing issues like buckling or mold. Consistent readings help me decide when to reseal or perform minor repairs before problems escalate.
Software can assist in scheduling routine inspections and tracking the wear patterns of high-traffic areas. Apps like Flooring Maintenance Tracker enable me to set reminders for cleaning and inspections, ensuring no step is overlooked.
In the future, I predict smart sensors embedded in flooring surfaces will alert homeowners to moisture intrusion or surface degradation in real time, drastically reducing repair costs. Embracing these innovations now can set the stage for easier upkeep.
How do I maintain floors over time? Regularly inspect your surface for signs of damage or wear, and address issues promptly. Reapplying protective finishes, like polyurethane for hardwoods, every few years preserves the surface and enhances beauty. Using tools like a microfiber mop and a gentle cleaner makes routine cleaning efficient without risking harm.
For example, I recently used a humidity meter to assess my basement’s moisture content, which helped me decide to install an improved vapor barrier. This preemptive step prevented future warping.
Always check your tools and cleaning products for compatibility with your flooring type. Remember, the goal is to keep your floors looking beautiful and functioning safely over decades, not just years. Incorporating these tools and routines into your maintenance schedule will pay dividends in durability.
If you’re ready to elevate your floor care, try implementing a moisture monitoring routine with a digital meter. Regular checks can identify problems early, saving you costly repairs. For more detailed guidance, explore our article on proper flooring maintenance techniques.
3 Surprising Lessons I Learned About Floor Leveling and Tile Installation
- Nothing replaces meticulous preparation—skipping subfloor checks might seem quick, but it often leads to long-term headaches.
- Consistency in materials and techniques guarantees long-lasting results; small deviations can cause significant issues over time.
- Patience during curing processes and inspections can save you time and money, ensuring your floor remains flawless for years to come.
My Go-To Tools and Resources for Flooring Success
- Protimeter Surveymaster: This moisture meter has transformed how I assess subfloor readiness—trust me, preventing moisture issues is easier than fixing them later.
- Tile Leveling Systems: Investing in quality leveling clips and wedges makes a visible difference, especially with large-format tiles, delivering a perfectly flat surface every time.
- Precise Floor Leveling Techniques: This guide has become my go-to reference—it’s detailed, reliable, and helped me avoid costly mistakes.
- Professional Consultation: Sometimes, a quick chat with an experienced contractor provides insights you won’t find elsewhere—don’t overlook the value of expert advice.
Don’t Let Fear Stop Your Flooring Journey
Every seasoned installer or DIY enthusiast starts somewhere. Embrace the learning process, celebrate small victories, and remember that mastery is built step by step. Your next project could be your best yet—just take that first confident step. If you’re curious to see how I applied these lessons to a recent upgrade, check out this comprehensive guide for ideas to elevate your space. What’s the biggest challenge you’ve faced with flooring installation? Share your story below—I’d love to hear it! You’ve got this, and every layer you add is a step closer to that perfect, durable floor you’ve envisioned.