
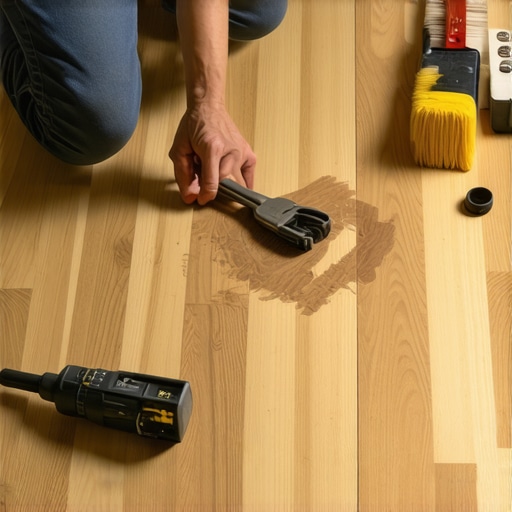
Ever stepped onto your hardwood floor and suddenly felt that unsettling bounce or a hollow sound beneath your feet? I remember the first time I encountered that squeak and was convinced my entire floor was about to come apart. It was a real lightbulb moment—realizing that a seemingly minor issue could point to deeper problems, but the thought of tearing up the flooring seemed daunting and overwhelming.
Smooth Out Those Hidden Bumps Without Starting from Scratch
The good news? You don’t have to rip up your entire hardwood just to fix a hollow spot. Over years of my own flooring adventures, I found there’s a way to carefully address these pesky issues without disturbing your beautiful wood. Today, I’ll walk you through my tried-and-true method, so you can get your floors solid and quiet again. After all, your hardwood should serve as a sturdy foundation, not a source of constant worry.
Is It Really Possible to Fix a Hollow Spot Without Full Replacement?
At first, I was skeptical just like many of you might be. Early attempts at repair often led me to make mistakes, like using the wrong adhesive or not properly assessing the underlying cause. Trust me, I learned the hard way that knowing the root of the problem is key. Now, I want to share that knowledge to save you from the same frustration. Did you know that small repairs can be surprisingly effective, if done with a bit of care and the right approach? According to flooring experts, addressing hollow spots with precise techniques can extend the life of your hardwood and prevent costly replacements down the line. For an in-depth look at what pitfalls to avoid, check out this resource on flooring installation mistakes.
So, if you’ve been staring at that bump or hearing that weird squeak every time you walk across your floor, don’t despair. There’s hope—and it’s within your grasp. Let’s get ready to dive into the step-by-step process of fixing a hollow spot, saving you both time and money, and ensuring your floors remain a source of pride, not stress.
Assess the Damage Precisely
First, locate the hollow spot and gently tap around it with a hammer or tool handle. A distinct, dull thud compared to surrounding areas signals a hollow section. Remember, a tiny bubble under the surface might just be a minor void, while a more extensive hollow indicates a bigger issue. As I experienced, pinpointing the exact extent prevents unnecessary work. Use a flat screwdriver or a thin pry bar to gently lift a section of the flooring near the hollow area, revealing whether the subfloor or the plank itself is problematic.
Prepare Your Materials and Workspace
Gather high-quality wood adhesive, a syringe or small caulking gun, wood filler matching your flooring, and a putty knife. Clear the work area of debris and furniture. Protect nearby surfaces with rags or painter’s tape to avoid accidental damage. Having everything within reach minimizes interruptions. I once started without gloves, and the adhesive got on my hands—imagine trying to fix a squeak with sticky fingers. Keep your workspace organized for a smooth repair process.
Apply Epoxy or Wood Glue Beneath the Plank
Inject the glue or epoxy into the hollow gap using the syringe, ensuring the adhesive reaches the void’s deepest point. The goal is to fill the space beneath the plank and bond it firmly to the subfloor. Think of it like injecting foam into a cavity to stabilize a loose wall — precision matters. I made a mistake once by overfilling, which caused excess glue to seep out and dry on the surface, so apply sparingly. Allow the adhesive to cure as per the manufacturer’s instructions, typically 24 hours, to achieve a solid bond.
Use a Mini Clamp or Weight to Secure the Plank
After adhesive application, place a small clamp or a weighted object on the plank to press it down firmly. This ensures the adhesive bonds tightly and eliminates any remaining hollow space. Secure for several hours; I used a stack of books as a temporary weight, which worked surprisingly well. Be cautious not to damage the finish; placing a cloth between the weight and the wood prevents scratches. This step is crucial to prevent future squeaking or shifting.
Fill and Sand the Surface for a Seamless Look
Once the adhesive has set, use a matching wood filler to fill any minor surface imperfections or gaps around the repaired area. Apply with a putty knife, pressing the filler flush with the floor. After drying, sand lightly with fine-grit sandpaper to blend the patch with the surrounding flooring. Carefully buff it to prevent unevenness or sheen differences. During a past project, I overlooked sanding adequately, which made the repair visible; taking my time made the fix nearly invisible.
Finish and Protect the Repaired Section
Clear-coat or polyurethane finish should match your existing floor’s sheen. Apply with a fine brush or foam applicator for an even coat. Allow to dry thoroughly before walking on it. For extra protection, consider lightly buffing the surface once dried. Proper finishing maintains the aesthetic and prevents moisture infiltration that could compromise the repair. Regular maintenance, like using the tips in hardwood floor care secrets, prolongs your repair’s lifespan.
Many homeowners and even some professionals operate under the myth that flooring installation is a straightforward task, but the reality is far more nuanced. One widespread misconception is that choosing high-end materials guarantees long-term durability; in truth, proper installation techniques often have a greater impact on longevity. For example, insufficient subfloor prep can lead to issues like tile lippage or hardwood gaps, regardless of material quality. I’ve seen many cases where effort was spent on picking premium products, only for those issues to crop up due to overlooked preparation steps, as detailed in flooring installation mistakes.
Another common myth is that hardwood floors can be perfectly level without professional assessment. However, subtle variations in subfloor flatness often go unnoticed by the untrained eye, leading to uneven surfaces and early wear. Even expert installers rely on precise leveling techniques to ensure flawless results. Skipping this step or rushing through it might seem insignificant but can cause problems down the line, including squeaks and cracked tiles.
Beware of the trap where homeowners think that surface finishing—like sanding and sealing—can fix underlying issues. That’s a mistake I’ve seen many fall into, especially when dust and debris from improper sanding cause tiny cracks or clouded finishes. Maintenance like detailed cleaning and proper sealing, as emphasized in hardwood floor care, is essential for lasting aesthetics.
What about the advanced nuances that even seasoned professionals sometimes overlook? Consider how subtle moisture variations within subfloors influence tile bonding or hardwood stability. A seemingly minor moisture imbalance can lead to delamination or swelling, especially in climates with high humidity fluctuations. Recognizing and managing these conditions require more than basic knowledge; it calls for expert-level moisture testing and adaptive strategies, which are discussed in-depth in ultimate guide to floor leveling.
So, before you dive into your next project, ask yourself: are you aware of these hidden nuances? Do not fall into the trap of oversimplification. A detailed understanding and attention to detail can save you time, money, and frustration in the long run. Have you ever fallen into this trap? Let me know in the comments and share your experiences!
Keeping your flooring installation in top shape requires the right tools and a proactive maintenance routine. Over the years, I’ve learned that investing in quality equipment not only simplifies the repair process but also extends the lifespan of your floors. For example, a reliable palm sander with variable speed control allows me to achieve a smooth, professional finish when refinishing hardwood surfaces, ensuring that minor imperfections don’t become major issues over time. Similarly, a high-precision moisture meter helps me detect subtle fluctuations in subfloor moisture levels, which is crucial for preventing warping or delamination in tile and hardwood floors. These tools have become indispensable in my workflow, making tasks like floor leveling and surface preparation more efficient and accurate.
How do I maintain flooring over time?
Consistent maintenance is key to preserving your flooring’s beauty and integrity. Regular cleaning with pH-neutral cleaners prevents buildup that can damage surfaces, while periodic deep cleaning helps identify early signs of wear or damage. I’ve found that implementing a floor-specific maintenance schedule—such as sealing hardwood floors every few years and reapplying grout sealant in tiled areas—can significantly delay the need for costly repairs. Additionally, inspecting your floors after heavy use or extreme weather changes allows you to catch issues early, such as small cracks or gaps, and address them before they worsen. Employing tools like orbital buffers for touch-up polishing or a dedicated grout cleaning kit can make these routine tasks more manageable and effective. Looking ahead, advancements in smart flooring sensors are emerging, capable of monitoring subfloor conditions and alerting homeowners to potential problems before they manifest visibly. Embracing these innovations now can put you ahead in maintaining pristine, durable floors well into the future.
Remember, quality tools and a diligent maintenance routine are your best allies in ensuring long-term success with your flooring projects. Regularly revisiting your toolkit and upkeep practices not only preserves your investment but also keeps your space looking fresh and inviting. For more advanced techniques on maintaining hardwood floors, check out hardwood floor care secrets.
Why not try calibrating your moisture meter before your next project? Accurate readings can make all the difference in avoiding future issues like warping or gaps. Incorporate this step into your routine and enjoy more predictable, lasting results in your flooring maintenance journey.
Lessons That Changed How I Approach Hardwood Repairs
- One of the toughest lessons I learned was that rushing the curing time of adhesives can lead to future squeaks and gaps. Patience truly pays off in flooring fixes.
- I’ve realized that assuming all hollow spots are the same can be a mistake; thorough assessment of the extent and cause avoids unnecessary repairs or replacements.
- Discovering the importance of precise moisture testing early on prevented me from installing over damp subfloors, saving time and money down the line.
- Using the right tools, like a quality syringe for glue injection and fine-grit sandpaper for finishing, makes all the difference in achieving seamless repairs.
- Understanding that small, strategic fixes can significantly extend the life of my hardwood floors reshaped my entire maintenance routine.
Tools and Resources That Elevate My Flooring Projects
- Moisture Meter: Critical for assessing subfloor conditions before repairs; I trust models with quick readings and high accuracy for peace of mind.
- Quality Wood Adhesive: Using high-grade epoxy or Titebond ensures strong, durable bonds that stand the test of time.
- Specialized Pliers and Clamps: Small clamps or even heavy books help secure planks during curing without damaging the surface—every pro’s secret weapon.
- Reference Guides and Tutorials: The detailed insights found in expert refinishing tips have elevated my skills and confidence in tackling complex repairs.
- Moisture Testing Resources: Incorporating professional-grade testing tools and methods from trusted sources minimizes unexpected complications.
Take Charge to Keep Floors Beautiful
Your hardwood floors are more than just a surface—they’re the foundation of your home’s comfort and style. With patience, the right tools, and continuous learning, you can transform small imperfections into showcase moments of craftsmanship. Don’t shy away from tackling these repairs; each confident step you take not only restores your floors but also builds your skillset. Remember, every completed project makes your space more inviting and your home more resilient. So, are you ready to embrace these lessons and elevate your flooring game? Share your experiences or questions below—your journey could inspire others to turn their flooring frustrations into triumphs.