
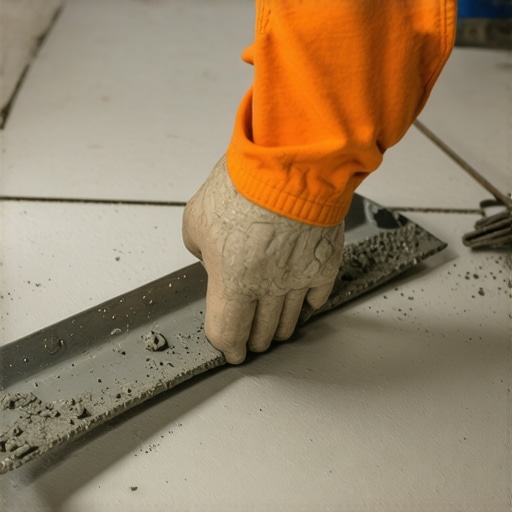
I vividly remember the first time I laid tiles. I thought I had everything under control—until I stepped back and realized my thinset coverage was inconsistent. Some areas were lush and smooth, while others were thin and patchy. It was frustrating, especially since I knew that uneven thinset could lead to cracked tiles and a wobbly floor down the line. That lightbulb moment made me dig deeper into better techniques, and one trick changed everything—the Trowel Angle Trick.
Why Achieving Consistent Thinset Coverage Changes Everything
From my own experience, I can tell you that uneven thinset isn’t just about cosmetic flaws; it directly impacts the durability and longevity of your entire tile installation. Inconsistent coverage can cause tiles to sit unevenly or even crack under pressure. But here’s the good news: mastering the right trowel angle can eliminate this problem entirely. This simple adjustment ensures each tile receives uniform adhesive, creating a stable, level surface that lasts for decades.
Are you tired of dealing with uneven tiles or grout lines that seem to betray your efforts? Well, understanding and applying this trick can save you countless headaches.
Is the Trowel Angle Trick Really Worth the Hype? And Why I Was Skeptical at First
When I first heard about the Trowel Angle Trick, I was skeptical. It sounded too simple to make a real difference. My early attempts included common mistakes like angling the trowel randomly or applying too much pressure, which only worsened the problem. I ignored advice to angle my trowel just right, thinking it wasn’t a big deal. That’s when I realized that one overlooked detail can seriously compromise your installation.
A fellow pro once told me that every small adjustment matters—something I dismissed initially but now swear by. You can read more about the importance of precise techniques in the [flooring installation fundamentals](https://tiletrendshop.com/flooring-installation-fundamentals-leveling-for-a-seamless-look). Trust me; once you get the hang of the correct trowel angle, the results speak for themselves.
So, what’s next? In the upcoming sections, I’ll show you exactly how to find that perfect angle and make your thinset coverage flawless each time. No more uneven spots—just a smooth, reliable foundation for your tiles.
Master the Trowel Angle: Your Key to Consistent Thinset
To truly grasp this technique, recall a time I was installing tiles in my basement. I remember holding the trowel at a specific angle so that the notches spread the thinset evenly across the substrate. Instead of sweeping it randomly, I focused on maintaining a 45-degree angle, akin to tilting a paintbrush for smooth strokes. This small adjustment dramatically improved my coverage, reducing air pockets and ensuring the tiles sat perfectly level.
Set Your Trowel at the Right Angle: Step-by-Step Guide
Start by gripping your trowel firmly with your dominant hand, positioning your other hand to steady the substrate. Hold the trowel at approximately 45 degrees—think of it as a gentle tilt, like a sunset horizon—before beginning to spread the thinset.
How to Find Your Natural Trowel Angle
Place the trowel on the substrate and gently tilt it until the notches are just contacting the surface without excessive pressure. Practice a few strokes to find the sweet spot where the notches leave uniform ridges. This position is your optimal angle, which, when maintained during spreading, guarantees even coverage.
Apply Consistent Pressure for Uniform Coverage
Press the trowel with moderate, steady force—imagine smoothing a matte paint—so that the ridges are smooth and consistent. Avoid pressing too hard or too lightly, as this can cause uneven thinset distribution. My personal trick? I like to imagine I’m spreading frosting on a cake—gentle, even strokes yield the best results.
Use the Notch Size to Your Advantage
Select a trowel notch size appropriate for your tile’s size—larger tiles need deeper notches, while smaller tiles require finer notches. The notches dictate the amount of thinset, affecting coverage and bond strength. For example, when I installed large-format porcelain, I switched to a 1/4-inch notch to ensure ample adhesive. Remember, the right notch size helps avoid voids or thin spots that could lead to future cracks.
Check Your Coverage Before Laying Tiles
After spreading, lift a corner of a tile to inspect the thinset underneath. It should be full, uniform, and without air pockets. This step is crucial—think of it as a quality control check—before pressing the tile into place. If coverage is lacking, re-spread the affected areas with your trowel angle adjusted slightly, maintaining consistent pressure and notching.
Practice and Adjust for Flawless Results
I recall a piece of advice from a flooring pro who recommended practicing on scrap material. I did this, tilting the trowel at different angles to see which gave the best coverage. Over time, I found that maintaining a 45-degree tilt with controlled pressure was my best approach. This practice turned a messy first attempt into a confident, steady technique that I rely on for every tile job.
Link to Deepen Your Skills
If you want to master your tile installation game, check out our comprehensive guide to achieving flawless floor leveling, which ties into how proper thinset coverage ensures a level, durable surface. Remember, mastering the trowel angle isn’t just about Technique; it’s about guaranteeing longevity and aesthetic appeal in your flooring project.
While many DIY enthusiasts focus on getting the surface level or choosing the right adhesive, a common misconception persists: that misconceptions about tile installation are purely superficial. In reality, misunderstandings about floor leveling and the nuances of hardwood installation can silently sabotage your project’s durability and aesthetic appeal. One pervasive myth is that as long as your subfloor is clean and dry, the rest will fall into place. However, this oversimplification neglects critical details like moisture content and uneven substrate corrections, which are essential for long-lasting results. Even minor deviations in floor flatness can lead to cracked tiles or cupping hardwood over time. Experts like Brian Patrick of flooring masterclasses emphasize that attention to these subtle points drastically reduces failure rates and warranty claims. Beware of the trap where installers think they can compensate with thicker thinsets or additional grout lines; these are temporary fixes that mask underlying issues. Instead, investing in proper floor leveling techniques—such as self-leveling underlayments and precise substrate preparation—is crucial. For a deep dive into achieving perfect flatness, see our guide on how to achieve flawless floor leveling. Do you ever wonder why some installations last decades while others fail after a few years? The root often lies in subtle, overlooked nuances. By understanding and addressing these, you elevate your craft from amateur to professional. Let me know your experiences or questions in the comments—understanding these nuances can save you time and money in your next project!
Keep It Running: Essential Tools for Pros
Maintaining pristine tile and hardwood floors over the years requires the right equipment. I swear by my cordless angle grinder equipped with a diamond blade, which is perfect for precision cuts and handling stubborn grout caulking without creating a mess. For cleaning grout lines and tile seams, a handheld steam cleaner proves invaluable by removing deep-set dirt without harsh chemicals, ensuring longevity and appearance. When dealing with hardwood refinishing, I rely on a high-quality orbital sander fitted with fine-grit pads; it’s the key to achieving smooth surfaces without gouges.
Investing in Reliable Leveling Systems
Long-term results hinge on perfect flatness from the start. I recommend using a laser-guided self-leveling system, like the Bosch GLM 150 C, which provides accurate readings up to 165 feet away. This tool helps ensure your subfloor stays true, preventing future cracks or uneven wear. I’ve found that investing in precise equipment like this pays off by reducing costly fix-ups down the road. To learn more about achieving flawless floor leveling, check out our comprehensive leveling guide.
Methods That Stand the Test of Time
Routine maintenance should be part of your workflow. For tile floors, sealing grout annually with a high-quality penetrating sealer keeps stains at bay and prevents moisture intrusion, which can weaken adhesion over time. Hardwood flooring benefits from regular refinishings—sanding and sealing every 7-10 years—preserving the luster and protecting against day-to-day wear. A tip I follow: before applying new finish, I always perform a damp sponge test to confirm the wood’s porosity, ensuring proper adhesion and durability. You can find detailed steps in our guide on refinishing hardwood floors.
Planning for Growth and Scale
If you’re expanding a flooring installation or planning to incorporate new materials, consider how different substrates will affect maintenance. For example, transitioning from tile to hardwood requires careful planning of expansion gaps and transition strips. I recommend selecting versatile tools like adjustable spacers that can accommodate various tile sizes or floor widths, simplifying the process and ensuring consistency. As your projects grow, adopting modular systems like the modular tile layouts can make scaling much more manageable. Keep in mind, ongoing education on new installation methods, like the use of advanced primers or moisture barriers, can significantly extend your floors’ lifespan.
How do I keep my floors in top shape over the decades?
The key lies in consistent maintenance using the right tools. For hardwoods, dust mops and microfiber pads minimize abrasive dirt buildup, while for tiles, a quality grout haze remover prevents stains from setting in. Incorporating regular inspections—looking for loose tiles or lifting edges—can catch issues early before they turn into costly repairs. Plus, always refer to manufacturer recommendations for specific products and techniques. I suggest trying out my favorite upgrade: a microfibre dust mop combined with a damp microfiber cloth for detailed cleaning. It keeps floors looking stunning for years to come and prevents tiny problems from escalating. Want a deeper dive into maintenance strategies? Visit our design inspiration hub.
The Hardest Lesson I Learned About Tile and Flooring Installation
One of my most eye-opening lessons was realizing that subtle mistakes—like neglecting proper floor leveling or misjudging the trowel angle—can lead to costly repairs down the line. Early in my career, I thought I could rush through the process, but I soon discovered that patience and attention to detail, especially in techniques like maintaining the correct trowel angle, make all the difference. Mistakes taught me to prioritize quality over speed, ensuring my installations last.
Tools and Resources That Take Your Flooring Skills Further
Having the right tools is essential. I trust the Bosch GLM 150 C laser-guided leveling system for precise subfloor assessments, which helps prevent future cracks and uneven surfaces. My favorite resource for mastering floor leveling is the comprehensive guide on flawless floor leveling techniques. It’s packed with expert insights that save time and improve results. For refining tile alignment, I recommend using the step-by-step installation guide, which covers everything from substrate prep to final grout.
Embrace the Journey and Create Lasting Beauty
Remember, every perfect floor started with a commitment to learning and refining your technique. Whether you’re installing tile or hardwood, patience and meticulousness pave the way for stunning, durable results. Don’t hesitate to experiment and hone your skills—each project is a chance to improve. I encourage you to take on your next flooring project with confidence, knowing that proper preparation and technique will reward you with a space that stands the test of time.
What new flooring challenge will you conquer next? Share your goals or questions below—I’m here to help you succeed in creating beautiful, lasting floors!
,