
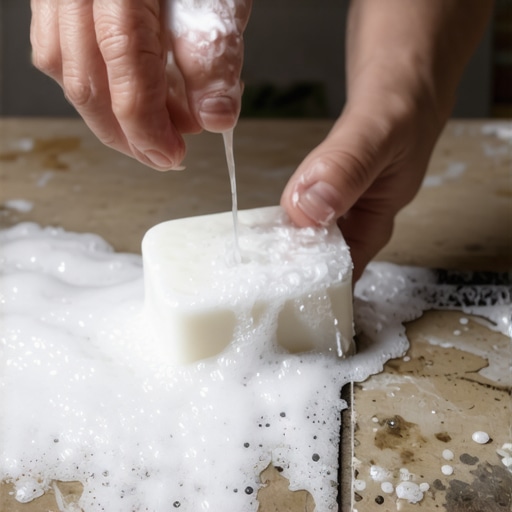
It was a frustrating Saturday afternoon when I finally realized that my new hardwood floors had started to squeak and feel uneven despite what I thought was a meticulous installation. I had laid the planks, sealed the gaps, and even used a professional-level adhesive, yet somehow, the floors still felt loose in some spots. That lightbulb moment hit me: I needed to find out if there were underlying issues beneath the surface—specifically, air leaks in the subfloor that were causing unevenness and long-term damage.
Why Air Leaks in the Subfloor Can Wreak Havoc on Your Floors
As I dug deeper into the problem, I learned that even tiny gaps in the subfloor can lead to significant issues, including temperature fluctuations, moisture problems, and, surprisingly, structural instability. These leaks can cause your hardwood or tile to shift over time, resulting in squeaks, cracks, and uneven surfaces. According to flooring experts, identifying and sealing these leaks early can save you hundreds in repairs and preserve the integrity of your flooring for years to come. I wish I had known this sooner. A common mistake I made in my early days was overlooking the importance of a solid, airtight foundation—something I now realize is crucial for lasting results.
Is the Soap Test Worth the Hype for Finding Hidden Air Leaks?
I admit, I was skeptical at first. The idea of using soap and water to detect tiny gaps seemed almost too simple. But after a failed attempt with more invasive techniques, I tried it following a tip I found in a professional flooring guide. To my surprise, bubbles formed precisely where the leaks were hiding—revealing gaps I couldn’t see or feel. This experience convinced me that sometimes, the simplest methods are the most effective. It’s a technique many seasoned installers swear by, especially for initial diagnostics. Want to learn how this works? Keep reading—I’ll walk you through the steps of the soap test and how it can save your flooring project from unseen problems.
Apply the Soap Test to Uncover Hidden Leaks
Begin by clearing the area and mixing a few drops of dish soap with warm water in a spray bottle. Use a cloth or brush to moisten the suspected areas of the subfloor. Then, spray the soapy solution along seams, around holes, or near any irregularities. As I did during my weekend project, it’s effective to watch closely for bubbles forming—indicating escaping air—especially in the less accessible spots. This simple yet powerful method helps reveal gaps that can cause your floors to warp or squeak over time.
Seal the Gaps with Appropriate Materials
Once you’ve identified the leaks, choose the right sealant—such as expanding foam, acoustic sealant, or high-quality caulk designed for subfloor applications. For small cracks, a flexible acrylic sealant works well; for larger gaps, expanding foam offers better coverage. During my repair, I carefully filled each opening, ensuring the sealant penetrated deep enough to prevent air infiltration. Remember, the goal is to create an airtight barrier without affecting the overall flexibility of the subfloor.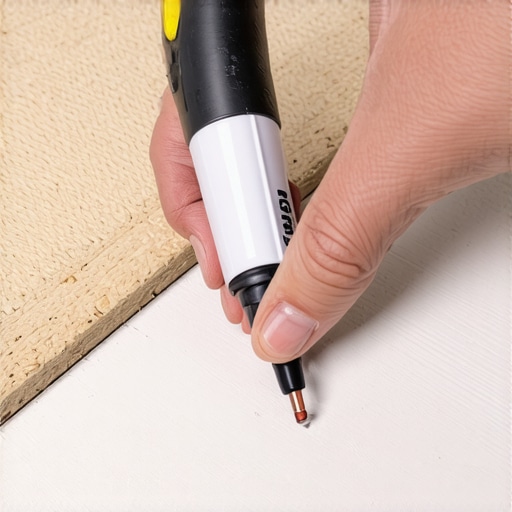
Reinforce and Verify the Seal
After sealing the identified leaks, it’s crucial to press down or weight the area slightly to ensure the sealant adheres properly. Allow sufficient curing time as per the manufacturer’s instructions. Then, repeat the soap test to confirm no new bubbles form, indicating all leaks are sealed. I learned this crucial step firsthand: rushing the cure led to minor leaks reappearing after a few days, causing me to redo sections. Proper verification ensures a stable foundation that will keep your flooring level and squeak-free for years.
Ensure Proper Subfloor Preparation Before Installation
Prevent future issues by thoroughly cleaning the subfloor, removing debris or dust, and checking for moisture or unevenness. If needed, sand down high spots or fill dips to achieve a flat surface. As detailed in the floor leveling guide, a well-prepared substrate is essential for a flawless installation—saving you headaches down the line. Proper preparation not only improves adhesion but also wards off subtle shifts caused by unseen air pockets.
Monitor Your Floors After Sealing
Periodically check for signs of settling or new gaps, especially after seasonal changes. If squeaks or unevenness reappear, repeat the soap test and reseal as necessary. Remember, consistent maintenance extends the lifespan of your flooring and preserves its beauty—akin to regular tuning of a fine instrument. Incorporating these steps into your routine can save significant repair costs and keep your floors looking and feeling as perfect as the day they were installed.
Many homeowners and even some professionals think that a perfectly level subfloor and flawless installation simply come down to following basic steps. However, when it comes to **floor leveling, flooring installation, tile, and hardwood floors**, there are subtle nuances that can make or break your project’s success. **Contrary to popular belief**, many assume that employing the right tools alone guarantees a perfect finish. In reality, understanding the material behaviors, environmental factors, and installation techniques is equally vital. For example, some believe that using rapid-set self-levelers guarantees instant flatness, but without proper substrate preparation and humidity control, you risk bubbles, cracking, or uneven curing. To deepen your knowledge, check out the comprehensive guide on floor leveling challenges.
Invest in Quality Tools for Long-Term Floor Care
Keeping your floors pristine requires the right equipment. I personally swear by a high-quality cordless orbital sander for routine refinishing, as it allows me to quickly address scratches and wear without the hassle of cords. For targeted stain removal on hardwoods, I reach for a microfiber mop combined with a pH-balanced cleaner, ensuring gentle but effective cleaning that preserves the finish. When tackling grout lines or tricky tile corners, a handheld steam cleaner offers precision without chemicals, making maintenance safer and faster. Proper care tools not only extend the lifespan of your floors but also keep them looking brand new for years.
Smart Software Boosts Your Flooring Projects
Beyond physical tools, digital solutions have revolutionized floor maintenance. I use a floor mapping app to track high-traffic zones prone to wear, allowing me to schedule targeted refinishings proactively. For estimating materials or costs, I rely on flooring calculators that consider subfloor conditions and material dimensions, ensuring accuracy while budgeting. As technology advances, software with augmented reality features will soon enable virtual walkthroughs to spot potential issues before they arise—saving time and money in the long run.Explore innovative tools now to elevate your maintenance approach.
Routine Inspections and Minor Repairs
Consistent monitoring is key. I recommend conducting seasonal inspections using a moisture meter to prevent warping and checking for loose tiles or squeaks that might signal underlying problems. Address minor issues promptly with specialized fillers or sealants—being proactive saves big bucks later. For example, resealing grout lines with a high-quality epoxy sealant can prevent water infiltration and staining. Implementing simple routines, such as wiping floors daily with a microfiber cloth, diminishes the need for deeper cleaning or repairs, preserving the aesthetic and structural integrity over decades.
How do I maintain hardwood or tile floors over time?
An effective way is to create a maintenance schedule that includes cleaning, repairs, and protective measures, like applying a refresher coat of finish on hardwoods every few years. Using tools like a spike roller post-refinishing ensures even saturation and reduces bubbles or imperfections. As I learned from professional refinishing guides, regular upkeep combined with proper tools guarantees floors that stay stunning despite daily wear and seasonal changes. I strongly suggest trying a dual-action orbital sander for your next refinishing—it’s a game-changer in achieving an ultra-smooth finish effortlessly.
Future Trends in Floor Maintenance
Looking ahead, I predict an increased integration of smart sensors embedded within floors that alert homeowners to issues like moisture buildup or structural shifts instantly. Combined with AI-powered maintenance apps, these innovations will make long-term care more intuitive and less labor-intensive. Staying ahead means investing in early detection tools now, even if they seem advanced or costly today.
Remember, combining the right equipment with a proactive approach is your best strategy for maintaining beautiful, durable floors. Don’t hesitate—start by testing a dual-action orbital sander on a less visible area and see the difference professional-grade equipment can make in your routine. Clearer floors, less hassle, and longer-lasting beauty await!
The Hardest Lesson I Learned About Floor Leveling and Installation
One pivotal realization was that even the most advanced tools can’t fix poor prep work. I once rushed through subfloor cleaning and ignored moisture tests, only to face uneven tiles and squeaking floors months later. Now, I understand that meticulous inspection and patience during preparation are the backbone of durable installation. This mistake taught me to never underestimate the power of a clean, dry, and level surface when working with hardwood or tile.
Beyond the Manuals: What No One Tells You About Floor Materials and Climate
I used to assume that choosing premium materials would simplify installation and maintenance. However, I quickly discovered that environmental factors—like humidity and temperature fluctuations—play a critical role in how floors behave over time. For example, engineered hardwood needs room to breathe, much like a living organism. Trusting reputable sources like professional guides helped me adapt my approach and select the right materials for my climate.
The Power of Small Fixes: Repair Tricks That Save You Big
Over the years, I learned that addressing minor issues early can prolong your flooring’s lifespan. A squeak here, a tiny gap there—these are signals, not problems. Using simple tools like a spike roller or high-quality sealants, I restored stability and prevented costly replacements. It’s amazing how a little effort in maintaining and resealing grout or polishing a worn patch can keep your floors looking new and feeling solid for decades. Remember, consistent care beats reactive repairs every time.
My Essential Toolkit for Floor Care and Maintenance
Investing in the right tools has transformed my flooring upkeep routine. I rely on a high-grade cordless orbital sander for refinishing, a microfiber mop with pH-neutral cleaner for daily cleaning, and a moisture meter for seasonal checks. These tools, combined with trusted products like floor care secrets, have saved me countless hours and expenses. The right equipment not only simplifies tasks but also ensures thorough, professional results at home.
Advancing with Smart Tech for Future-Proof Floors
Technology is revolutionizing how we care for floors. I’ve started using digital mapping apps to track wear zones and moisture sensors to anticipate issues before they become visible. This proactive approach minimizes disruption and maximizes longevity. As innovations like AI-driven maintenance unfold, staying informed through reputable sources like cutting-edge guides will keep your floors in top shape with less effort and guesswork. Embrace these tools to create smarter, more resilient spaces.
Trust the Process: Why Consistency Means Everything in Floor Success
For years, I thought that one solid repair or a quick fix was enough. It’s not. Regular inspections, prompt minor repairs, and finishing touches—like sealing gaps or sanding uneven patches—build a buffer against future problems. Creating a maintenance schedule ensures you catch issues early, preserving both the beauty and structural integrity of your floors. Think of it as a form of self-care for your home—a small investment that offers immense peace of mind over time.
My Experience with Treading the Extra Mile Without Cutting Corners
From meticulous subfloor prep to selecting suitable materials for my climate, going the extra mile paid off. Trust me, shortcuts may save time now but cost dearly later. The insights I gained from expert resources eventually became second nature, turning what seemed complex into a manageable, rewarding process. The key? Patience, attention to detail, and willingness to learn from mistakes. I encourage you to approach your flooring projects with that same mindset—your floors will thank you for it.