
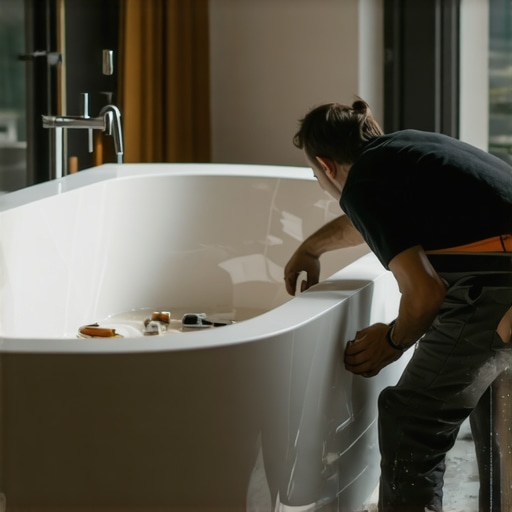
Have you ever spent hours installing beautiful tile, only to realize it doesn’t quite fit around your curved bathtub? I remember a time when I tried to force perfect straight cuts onto a gracefully rounded edge, and it was a frustrating mess. The grout lines looked uneven, and I felt like I’d wasted my entire weekend chasing a flawless finish that just wouldn’t come together. That lightbulb moment hit me hard—that the secret isn’t just in the tile itself, but in how you adapt your techniques to the unique contours of your space.
The Hidden Challenge of Curved Bathtubs and Flat Tile Surfaces
Most DIYers and even seasoned pros overlook the fact that curves in architectural features require a different approach. A curved bathtub presents a smooth, flowing edge that can make straight, square cuts look out of place. I learned early on that trying to scribe and cut tiles to match these curves isn’t about just measuring and scoring—it’s about understanding the subtle art of shaping tiles to fit seamlessly. When I first faced this, I assumed my standard methods would work, but the result was a jagged, misshapen border that detracted from the entire aesthetic. That mistake reinforced how crucial it is to tailor your scribing process specifically for curved surfaces.
Today, I want to walk you through the proven strategies I’ve developed for this exact challenge, turning what seems like a daunting problem into a rewarding finishing touch. Whether you’re refreshing a bathroom or building from scratch, mastering this skill will elevate your project’s quality and save you headaches down the line. Ever had that moment where a curved edge threw you off, or worse, caused you to redo your work? You’re not alone, and trust me—there’s a better way.
Is Scribing to a Curve Really Worth the Extra Effort?
Many beginners dismiss the need for precise scribing, thinking a little filler or caulk can hide imperfections. But those of us who’ve been on the receiving end of uneven grout lines know better. Early on, I made the mistake of rushing through the scribing process, thinking I could smooth over inaccuracies later. Spoiler: it doesn’t work well. From my experience (and plenty of trial and error), taking the time to scribe tiles properly to fit curves results in a much cleaner, professional look. If you want to achieve that perfect, seamless transition around your bathtub, then embracing these techniques is essential. Plus, with proper guidance, you’ll find the process more straightforward than you might think. For more in-depth tips, check out this resource on precise floor leveling.
Now that I’ve shared my struggles and lessons learned, let’s dive into the step-by-step methods that will make scribing around your curved bathtub a manageable—and even enjoyable—task. Ready to transform your bathroom into a work of art? Great—let’s start with understanding what tools and preparations you’ll need to succeed.
Prep Your Tools and Materials
Before diving into scribing, gather essential tools: a high-quality tile nipper, a wet saw with a diamond blade, a flexible contour gauge, a pencil, measuring tape, and safety gear. I remember a time I underestimated the importance of a good contour gauge—when I used a cheap one, the measurements were jagged, leading to wasted tiles and frustration. Investing in precise tools pays off in cleaner cuts and less rework.
Trace the Curve Accurately
Position the contour gauge along the bathtub edge, gently pressing it to match the curve. Transfer the shape onto a piece of scrap cardboard first—this acts as your template. During my project, I found marking directly on tiles led to inaccuracies; creating a template gave me a clear guide for cutting.
Cutting the Tile for a Custom Fit
Using the template, mark the cut lines on your tile with a pencil. For straight edges, a wet saw with a diamond blade is ideal. When shaping curved sections, a tile nipper allows for incremental adjustments—think of it as sculpting drywall; small bites refine the shape. Once, I hacked away with a chisel and ended up with a jagged edge, forcing me to redo the tile. Patience and small cuts are key here.
Shape Tiles with Precision
To match complex curves, gently nip the tile along the marked lines, then test fit it against the contour. Use a file or sandpaper to smooth rough edges. I once skipped this smoothing step, which caused grout gaps; taking the time to refine edges ensures a snug fit and neat appearance.
Align and Install with Care
Lay the tiles temporarily without adhesive to verify fit and alignment. When ready, apply thinset evenly, and press the tile into place. Use spacers to maintain consistent grout lines. During installation, I used a level frequently—especially on curved sections—to prevent lippage, avoiding a wavy finish that would ruin the look.
Finishing Touches
Once the adhesive sets, grout the gaps with a flexible grout suitable for curved surfaces. Clean excess grout immediately to prevent haze. For a seamless finish, use a damp sponge to smooth grout lines and a grout float to press curing grout into curves thoroughly. I learned that rushing this step leads to uneven textures, so patience here creates the professional result you aim for.
If you need additional guidance, the resource on tile installation tips offers great insights to refine your technique. Remember, shaping tiles around curves is an art—practice with scrap pieces, stay patient, and you’ll achieve that flawless, custom fit around your bathtub.
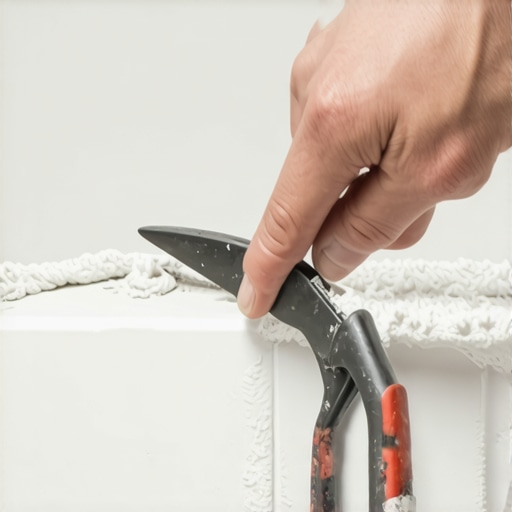 When it comes to floor leveling and installation, there’s a surprising gap between popular beliefs and the truth uncovered by expert experience. Many assume that a perfectly flat subfloor guarantees flawless floors, but in my years of work, I’ve seen this myth crumble. The real secret lies in understanding how slight imperfections interact with different flooring materials, especially hardwood and tile. For instance, many installers think that applying extra thinset or leveling compound can hide hidden subfloor issues, but this often leads to uneven floors and cracks over time. The truth:** the importance of proper subfloor preparation and understanding material behavior can’t be overstated.** Did you know that hardwood floors are particularly sensitive to subtle subfloor movements, which can cause squeaks or buckling if not addressed correctly? For advanced flooring projects, paying attention to moisture barriers and expansion gaps is vital. Ignoring these details is a common mistake that results in costly repairs down the line. For a deep dive into these nuances, check out [this guide on mastering floor leveling](https://tiletrendshop.com/mastering-floor-leveling-pro-secrets-for-perfect-installations). But what about misconceptions around tile installation? Many believe that using standard thinset is suitable for all tile types, but certain materials like large format porcelain require specialized adhesives and flexible grouts to prevent cracking. A notable trap is neglecting to verify subfloor flatness with the *penny test*—a simple yet effective method to catch hidden dips or bumps that can compromise the entire tile job. One advanced tip I recommend is incorporating uncoupling membranes, especially for large tiles, to absorb movement and prevent cracking. According to a study by the Tile Council of North America, incorporating uncoupling membranes can reduce crack propagation by up to 80%, highlighting how subtle technical choices vastly improve durability. Remember, multiple small details in installation—like correct expansion gaps, appropriate subfloor prep, and tailored adhesive choices—are essential for achieving professional results. So next time you hear a tip like “skip the moisture test” or “just level with a quick pour,” think twice. These shortcuts might save time initially but often lead to bigger headaches later. Have you ever fallen into this trap? Let me know in the comments. For more advanced strategies, explore [precision flooring techniques](https://tiletrendshop.com/precise-floor-leveling-techniques-to-achieve-flawless-surfaces) to elevate your project from amateur to pro.
Achieving a flawless floor or tile installation is just the beginning; maintaining that perfect finish over the years requires the right tools and habits. From leveling compounds to specialized tools, investing wisely can save you time, money, and headaches in the long run.
Prioritize Precision with Quality Leveling Systems
One of my most valued investments has been a high-quality laser level. Unlike traditional bubble levels, laser levels project a 360-degree line that’s invaluable for long runs or ensuring evenness across expansive surfaces. For instance, during hardwood refinishing, I rely on a laser level to verify floor flatness before and after sanding. This tool ensures my floor remains perfectly level, preventing issues like squeaking or uneven gaps down the line.
Use the Right Adhesives and Sealants for Long-Term Durability
Not all adhesives are created equal, especially when it comes to hardwood or tile installations. I recommend using fast-curing, flexible caulks and sealants like urethane or silicone-based products for sealing around edges or transitions. They accommodate natural expansion and contraction of materials over time, reducing cracks and gaps. For example, applying a flexible sealant around the tub perimeter prevents water infiltration, which could damage subfloors and lead to costly repairs. Regular inspection and reapplication as needed are part of my maintenance routine, ensuring lasting protection.
Work Smarter with Advanced Moisture Meters
Monitoring humidity levels in your subfloor and room environment is crucial. Use an advanced moisture meter with digital readings to detect potential issues early—before installing tile or hardwood. This practice is especially vital in basements or newly poured concrete slabs. I often check moisture content with tools like the digital moisture meter to confirm it’s within safe limits. Waiting for perfect conditions ensures your installation adheres well and lasts longer.
Plan for Seasonal Changes to Prevent Future Damage
Seasonal fluctuations can cause your floors to warp or develop gaps. To prevent this, I recommend maintaining consistent indoor humidity and temperature, and using vapor barriers when necessary. Furthermore, incorporating expansion joints in your flooring design allows materials to expand freely without cracking. Over time, applying these strategies minimizes repair needs and preserves aesthetic appeal, keeping your work looking pristine for years.
Future Trends: Smart Tools for Floor Maintenance
The future of flooring maintenance points toward smart technology. IoT sensors embedded in flooring can monitor moisture, humidity, and structural integrity remotely. As these products become more affordable, homeowners and contractors will be able to detect issues early and act swiftly—saving costs and extending the lifespan of floors. Embracing these innovations now will keep your projects ahead of the curve.
How do I keep my floors in top shape over time?
Regular cleaning, prompt repairs, and routine inspections are fundamental. Using tools like a specialized vacuum with soft brushes helps prevent debris buildup that can scratch surfaces. Additionally, reapplying protective coatings or sealants every few years maintains durability and shine. Remember, a proactive approach with the right tools ensures your investment continues to impress well into the future.
Ready to elevate your maintenance game? Try incorporating a professional-grade moisture meter into your routine and observe how early detection of subtle issues can save you from costly repairs later. For additional strategies tailored to your specific flooring type, visit this guide on hardwood floor care.
Looking back, some of my most valuable lessons in flooring and tiling came from the mistakes I never expected to make—like underestimating the importance of meticulous preparation around curved surfaces or ignoring subtle subfloor imperfections. These lightbulb moments, though challenging at the time, transformed my approach and ultimately saved me countless hours and materials. If there’s one takeaway, it’s that even the smallest details—like creating a perfect template or choosing the right adhesive—can make the difference between a professional finish and a DIY disaster. Embracing this mindset cultivates patience and craftsmanship, turning complex curves and uneven substrates into opportunities for creative problem-solving rather than sources of frustration.
What Hidden Lessons Shape Your Flooring Success
- The Value of Proper Planning: Rushing into cutting tiles or pouring leveling compounds without testing and templating introduces inaccuracies that are hard to fix later. The moment I started dedicating time to detailed templates, my fit and finish improved exponentially.
- Tools Make All the Difference: Investing in a quality contour gauge or a reliable moisture meter was a game-changer. Precise measurements prevent errors and streamline the installation process—trust me, cheap tools are rarely worth the savings.
- Patience Is a Virtue: Scribing around curves or smoothing edges takes time. Rushing leads to jagged cuts or grout gaps that undermine your project’s durability. Taking deliberate, small steps results in cleaner, long-lasting results.
- Material Behavior Matters: Understanding how your substrate or flooring material responds to moisture, temperature, and movement informs better decisions—like applying uncoupling membranes or choosing flexible grouts—ensuring your work remains resilient over the years.
Tools and Resources That Elevated My Skills
- Laser Levels: A dependable laser level simplifies alignment across large or curved surfaces, ensuring consistency. I use the advanced laser level for precise measurements, saving time and reducing rework.
- Moisture Meters: Digital moisture meters have been vital for assessing subfloor health, especially over concrete slabs. Checking moisture levels with tools like this device prevents future tiling failures caused by unseen water damage.
- Templates and Calipers: Creating custom templates with flexible contour gauges makes fitting tiles around curves much more predictable. Pairing this with calipers ensures your cuts are accurate every time.
- Knowledge-Backed Guides: Deep dives like this expert guide on floor leveling have refined my technique and given me confidence in handling unexpected substrate challenges.
Your Next Step in Floor Craftsmanship
Now, it’s your turn to apply these insights and elevate your flooring projects. Remember, mastering the art of fitting tiles around curves and ensuring a level subfloor is more than just technical—it’s a form of craftsmanship that adds beauty and longevity to any space. Equip yourself with the right tools, embrace patience, and view each challenge as an opportunity to learn and create something truly exceptional. The journey from DIY novice to seasoned professional begins with small, consistent steps—so go ahead, turn those tricky curves into your signature style!
What has been the most surprising lesson you’ve learned when working on curved surfaces or leveling floors? Share your stories or ask questions below—let’s grow together!