
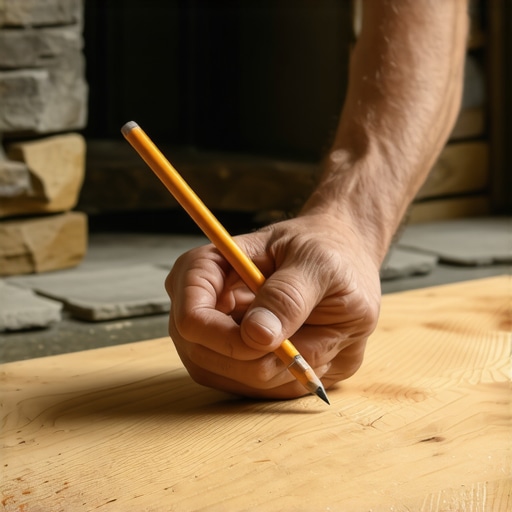
Ever stared at a corner where your hardwood seems to stubbornly refuse to snug up tight against that rugged stone fireplace? I remember my frustration well—thinking I’d need to buy a new saw or fight with my straightedge endlessly. That was until I stumbled upon a simple yet game-changing technique: the Pencil Trick for scribing wood planks. It was my lightbulb moment, saving me hours and headaches.
In today’s post, I’ll walk you through how this trick transformed my approach to flooring and how it can do the same for you. Whether you’re a seasoned pro or tackling your first DIY project, mastering this method is like having an extra pair of hands—precise, efficient, reliable.
Why Perfecting Your Scribing Technique Matters More Than You Think
When you’re installing a new hardwood floor or even laying tiles near an uneven edge, the devil is in the details. Small gaps, uneven cuts, or misaligned planks can turn a professional-looking floor into a patchwork mess. And let’s face it—fighting with rough stone or uneven edges without a proper guide can be incredibly frustrating.
A major reason this matters? Achieving a flawless fit against irregular surfaces like a stone fireplace enhances not only the aesthetic but also the longevity of your installation. Gaps allow dust and debris to gather, and uneven surfaces can cause premature wear or cracking.
Early in my DIY days, I made a rookie mistake. I neglected to use a proper scribing method, resulting in a gap so wide I could shimmy a coin through. That mistake cost me extra time, material, and a frustrating redo. It’s a reminder that the right technique—like the pencil trick—can be your best friend.
Have you faced a tricky edge where your planks refuse to follow the contour? If so, you’re not alone. Many homeowners and pros alike struggle with making that perfect cut. But don’t worry—this simple trick, supported by experts in flooring installation, can make all the difference. According to a detailed guide on [floor leveling](https://tiletrendshop.com/precise-floor-leveling-techniques-to-achieve-flawless-surfaces), precise scribing is the key to achieving a seamless finish.
In the next section, I’ll show you step-by-step how to implement this technique, and I promise—once you master it, you’ll wonder how you ever did without it. Ready to ditch uneven gaps and make your floors truly fit for a craftsman? Let’s get started.
Get Your Tools Ready and Mark Carefully
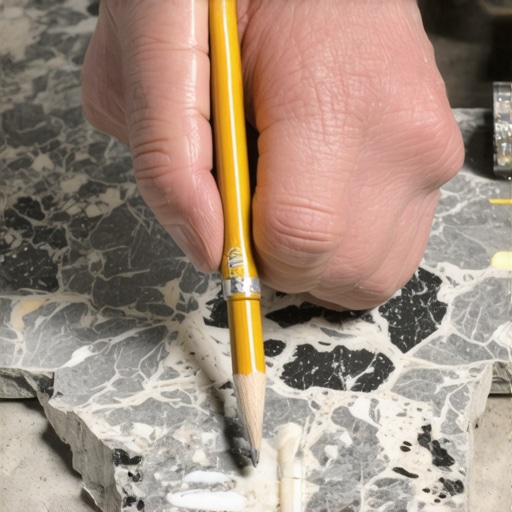
First, gather a flexible, high-quality pencil, preferably a soft lead type like a soapstone pencil, which glides smoothly over dark tiles or hardwood. Position the plank against the irregular surface—such as a stone fireplace—and gently press the pencil’s tip onto the surface, dragging it along the edge to create a faint, accurate line. I remember a time when I juggled multiple planks and made quick marks, only to realize I missed a contour. Taking my time with this initial step saved my entire project. This method mimics a chameleon blending into its environment, ensuring your cut contours perfectly with the underlying surface.
Shape the Scribe Line with the Right Tools
Next, use a flexible drywall or spline curve on the marked line, tracing along the pencil mark. This creates a custom template that matches the exact contour. I once worked on a tight corner with uneven stonework; tracing directly with a curved ruler gave me a template that fit like a glove. Cutting from this template reduces waste and errors, especially when dealing with complex edges.
Transfer the Pattern Accurately
Carefully place the template onto your plank, aligning edges and making sure it sits flat. Use a light adhesive or another method to temporarily hold the template in place. With a sharp jigsaw or fine-tooth saw, follow the outline precisely. In my experience, cutting slowly and steadily prevents chips and splinters. The key here is patience and maintaining the integrity of your cut line. Think of it as carving a sculpture—you want finesse, not haste.
Test Fit and Fine-Tune
Place the cut plank against the surface—check for fit, and mark any minor adjustments. Lightly sand or trim small areas to perfect the contour. I once had a small gap after my initial cut, but taking an extra minute to sand the edge eliminated it entirely. Remember, fitting is an iterative process—it’s normal to make minor refinements for a seamless fit. This step is akin to tailoring a suit; precision ensures the final appearance is flawless.
Proceed with Confidence
Once satisfied with the fit, proceed to install the plank securely. This simple yet effective process transforms your flooring project from guesswork to craftsmanship. The pencil trick’s strength lies in its adaptability—whether working with hardwood, tile, or laminate—making irregular surfaces a non-issue. For more insights on surface preparation and avoiding common pitfalls, explore floor leveling challenges and precise leveling techniques.
 Many homeowners and even some professionals often fall prey to misconceptions about hardwood floors, tile installation, and floor leveling that can lead to costly mistakes. One prevalent myth is that perfectly flat subfloors aren’t essential; however, even minor dips or humps can cause cracked tiles or squeaky hardwood over time. Experts emphasize that meticulous subfloor preparation, including proper leveling, is crucial for long-lasting, flawless floors. For advanced readers wondering about subtle subfloor deviations, the 3-foot level test is a trusted method to identify hidden unevenness. Many assume that using standard adhesives or primers suffices, but in reality, incompatible products or improper application may lead to adhesive failure, causing tiles to lift or hardwood to warp. I’ve seen cases where homeowners ignored moisture testing before installation, resulting in mold or warping later—don’t make that mistake. For thorough guidance on moisture barriers, visit the ultimate guide to floor leveling. People also overlook the importance of expansion joints, believing ‘one size fits all.’ Yet, neglecting these can cause buckling or gaps as materials expand and contract. Remember, proper installation isn’t just about making things look good temporarily; it’s about ensuring durability and structural integrity over decades. To ensure you’re aligned with best practices, review proper expansion joint placement for seamless results. Do you think shortcuts compromise long-term quality? Share your experiences or questions in the comments and let’s dig even deeper into expert techniques for perfect floors.Maintaining your flooring setup over time requires the right tools and a proactive approach to care. I personally recommend investing in a high-quality oscillating multi-tool, such as the Fein MultiMaster, for precise detail work during touch-ups or repairs. This versatile device allows you to sand, cut, or scrape with exceptional control, making it invaluable for small adjustments that keep your floors looking flawless. Another essential tool is a moisture meter—specifically, the Tramex Concrete Moisture Encounter—helping you monitor subfloor conditions to prevent future issues like warping or mold growth. Regularly checking moisture levels ensures your installations remain stable and durable, aligning with what experts suggest in their [floor leveling](https://tiletrendshop.com/the-ultimate-guide-to-floor-leveling-for-a-perfect-finish) guides. For routine cleaning, a microfiber mop paired with pH-neutral cleaners preserves the finish without damage, and I swear by the Bona Hardwood Floor Cleaner for its effectiveness and safety.
Long-term results depend heavily on consistent maintenance. Implementing scheduled inspections—looking for signs of wear, loose tiles, or surface scratches—can prevent minor issues from escalating. When you notice minor damage, addressing it promptly with touch-up kits designed for hardwood or tile helps prolong the life of your flooring. If you plan to scale up your project or undertake a larger renovation, consider modular tools like the Festool cordless sander, which offers both power and maneuverability, reducing fatigue and increasing precision across extensive areas.
Prediction for future trends suggests integrating smart technology with flooring maintenance. Devices equipped with sensors could soon provide real-time data on subfloor conditions or wear patterns, enabling preemptive repairs. For now, sticking to proven tools like moisture meters and durable cleaning equipment ensures your floors stay in top shape.
How do I maintain hardwood and tile floors over time
Regularly clean with microfiber mops and appropriate cleaners, monitor moisture levels using reliable meters, and perform periodic inspections for damage. Tackling minor repairs swiftly and using versatile tools will keep your floors looking impressive for years. As you build your toolkit, try incorporating an oscillating multi-tool for detail work; it’s a game changer for refinishing and precise adjustments. To deepen your understanding of floor prep and long-term care, check out this comprehensive floor leveling guide and stay ahead of potential issues before they become costly repairs. Calling all DIY enthusiasts—equip yourself with these specialized tools and stay vigilant with maintenance. Your floors will thank you by looking stunning and lasting for decades.
What Few Realized About Flooring Success
One of the biggest lessons I learned was that patience beats haste every time, especially when scribing complex edges. Rushing through the pencil trick or saw cut often leads to mistakes that are costly to fix later. Taking my time, double-checking with templates, and refining my cuts made all the difference in achieving a flawless finish.
Another insight was the importance of embracing minor imperfections. No surface, no matter how prepared, is perfectly uniform. Learning to read the subtle contours and adapt accordingly transformed frustration into confidence. This shift in mindset unlocked a newfound appreciation for craftsmanship and taught me that perfection is a process, not a static goal.
The third revelation was that the right tools amplify your skill. Investing in quality implements like a flexible curve or a precise moisture meter empowered me to detect issues early and adapt on the fly. Recognizing that good tools are an extension of good technique made all the difference during intricate scribing or leveling tasks.
Tools and Resources That Elevated My Work
- Tramex Moisture Meter: I trust this for accurate moisture readings, which are crucial before laying any flooring—moisture issues are insidious and can ruin a project if ignored. This tool is reliable and easy to use, providing peace of mind.
- Flexible Drywall or Spline Curve: For tracing irregular contours, nothing beats a high-quality flexible ruler. It adapts to complex shapes effortlessly, ensuring your templates are precise. It’s my go-to for custom scribing projects.
- Sharp Jigsaw with Fine-tooth Blade: Precision cutting is vital. I prefer a jigsaw with a fine blade for clean, controlled cuts around intricate shapes. Proper technique and sharp blades keep splinters at bay and improve finish quality.
- My Trusted Guide: The comprehensive Ultimate Guide to Floor Leveling has been invaluable. It consolidates expert techniques that ensure a perfect foundation, which makes all subsequent installation steps smoother.
Seize Your Flooring Journey Today
Remember, every perfectly laid tile or hardwood plank begins with a mindful approach and a commitment to precision. The pencil trick and these tools are more than tips—they’re your allies in crafting spaces that stand the test of time. With these insights, you’re equipped to turn challenging edges into a showcase of craftsmanship. Don’t wait for perfection—start today, and watch your skills grow with each project.
What challenging edge or corner are you eager to conquer next? Share your plans or questions below—I love helping fellow DIYers elevate their flooring game!