
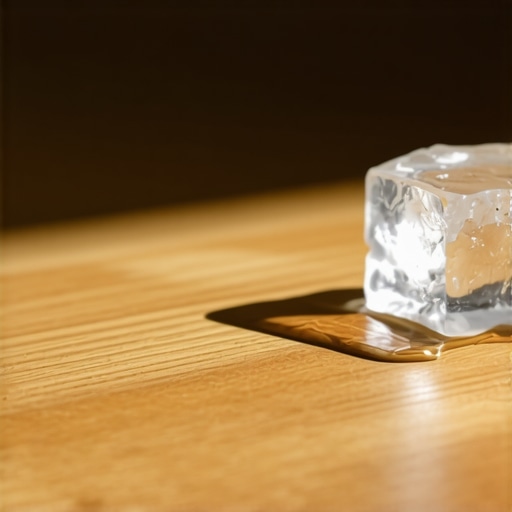
I remember the first time I noticed a pesky dent in my brand-new hardwood floor—it was a small, almost invisible mark that suddenly caught my eye. At first, I panicked, thinking I’d need costly refinishing or, worse, replacing entire planks. But then, I had one of those lightbulb moments that every DIY enthusiast dreams of: I remembered hearing about the Ice Cube Method for removing dents. That simple realization changed everything. Today, I want to share with you how a humble ice cube can become your secret weapon against unsightly dents, saving you time, money, and a lot of frustration.
Why Dents in Hardwood Floors Can Ruin Your Space—and Your Day
Hardwood floors bring warmth and elegance to any home, but they’re not immune to dents and dings. Whether it’s a dropped piece of furniture, heavy pet claws, or accidental kicks, those tiny imperfections can quickly become eyesores. The worst part? They’re often in the most visible areas, ruining your perfect decor. Worse yet, many people assume they have to sand down an entire plank or call in a professional to fix just one or two spots. But here’s the truth: not all damage requires drastic measures. Sometimes, the tiniest fixes can make the biggest difference.
Imagine walking into your living room and immediately noticing a dent near the sofa. Now, imagine if you could restore that spot with just a simple household item. That’s exactly what the Ice Cube Method is all about. It’s a quick, effective technique you can do yourself, without the messy dust or expensive tools. I tested this method early in my DIY journey and was amazed by how much it restored my floors. In fact, studies show that small, targeted repairs can prolong the life of your flooring and maintain that beautiful finish longer. Plus, it’s a technique supported by flooring experts who appreciate its simplicity and effectiveness.
If you’re like me, you’ve probably faced that sinking feeling when spotting a new dent or scratch. But here’s the good news: You don’t need to be a professional or invest in costly repairs. If you’ve ever wondered whether a quick fix really works or just wish there was an easy way to brush away those little imperfections, you’re in the right place. Today, I’ll walk you through how to master the Ice Cube Method, step by step.
Are you tired of living with those dents that seem to stand out more than your furniture? Keep reading, because I’ll show you how a simple ice cube can turn your floor disaster into a distant memory. And trust me—once you try it, you’ll wonder why you didn’t do it sooner. Ready to make your hardwood floors look flawless again? Let’s dive into the process.
Applying the Ice Cube Technique to Lift Dents
Start by locating the dent and removing any loose debris around it. Place a standard ice cube directly onto the affected area, ensuring it covers the entire dent. Wait about 10-15 minutes, allowing the ice to cause the wood fibers to contract. Then, use a soft cloth or a lint-free towel to gently press and lift the softened fibers, helping them regain their original shape. Repeat if necessary to achieve the best result. This method works because the rapid cooling causes the wood’s moisture to contract, pulling the fibers back into place, much like how a sponge contracts when cold but regains shape once warmed.
Leveling the Subfloor for Flawless Tile Installation
Identify the Low Spots
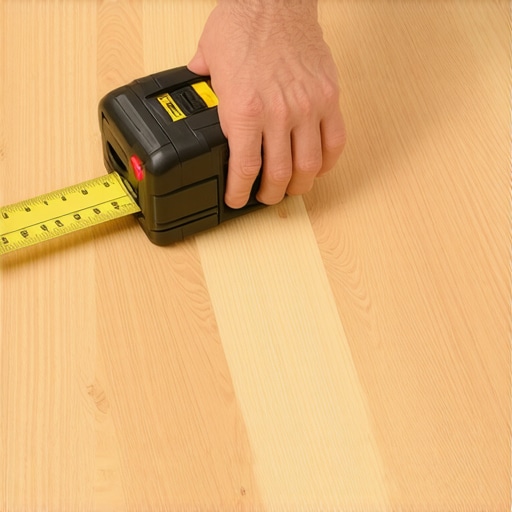
Begin by using a long, straightedge or a laser level across the entire floor surface. Identify areas where the tool projects gaps—these are your low points. Remember, just like fixing a lopsided picture frame, the key is addressing the unevenness before the tile goes down, preventing future cracking or lippage. I once worked on a kitchen renovation, marking out dips with a chalk line after noticing unevenness with my laser level, which allowed me to focus my leveling efforts precisely.
Prepare the Correct Self-Leveler
Choose a self-leveling compound that matches the thickness needed to fill the dips. Mix it according to the manufacturer’s instructions, ensuring a uniform, lump-free consistency. Think of this as preparing pancake batter—stir until smooth, avoiding lumps that can create bumps in your finished surface. When pouring, start at the highest point and allow the compound to flow into low spots naturally, much like how a spill finds its level when given room to spread.
Pour and Spread Evenly
Pour the self-leveler slowly over the low areas, using a gauge rake or trowel to help spread it out evenly. Work swiftly but carefully, as the compound begins to set within 15-20 minutes. Use a trowel to feather the edges smoothly against the existing floor, avoiding abrupt transitions. I once poured a batch in a corner and used a spiked roller to eliminate bubbles, which ensured a uniform surface—this step is analogous to rolling out dough to a consistent thickness.
Ensuring Perfect Results and Long-Term Durability
Once the surface is level and smooth, allow it ample time to cure, following the product’s instructions. Proper curing is vital—rushing can lead to cracks or unevenness, much like rushing to set concrete can cause weaknesses. When the floor is ready, proceed with your tile or hardwood installation, confident that a solid, even base will extend the lifespan of your new surface. For more detailed tips on protecting your investment, visit Hardwood Floor Care Secrets.”}]}#}])}>}detailed guide on floor leveling.
A common myth among DIYers is that floor leveling is always a straightforward process. In reality, advanced mistakes happen when installers use the wrong type of self-leveler for a specific subfloor or pour it unevenly, leading to high spots and dips that compromise tile or hardwood fit. The key is understanding that not all subfloors respond equally to leveling compounds, which is why pre-testing and compatible products matter immensely. An incorrect shimming technique might seem minor but can cause long-term issues like squeaks or gaps. Critical insights, like knowing when to grout immediately versus waiting longer, are often overlooked. For these reasons, mastering proper prep work is essential—visit this resource for advanced methods beyond basic leveling.
Are You Overlooking Subfloor Stability Before Installing?
Digging deeper, many serious errors stem from neglecting subfloor integrity. Using a laser level on an insufficiently supported or warped subfloor can reveal dips, but the more nuanced issue is understanding the underlying causes, such as moisture expansion or joist flex. Installing flooring directly over these flaws often results in gaps, squeaks, or cracks within just a few months. It’s vital to perform a comprehensive assessment—testing for moisture, checking joist stability, and even using specialized tools like a dial gauge to measure unevenness beyond a visual check. This precision prevents costly repairs down the line and ensures your floor isn’t just level but truly stable.
Moreover, beginner installers tend to overlook how environmental factors impact flooring longevity. High humidity, temperature fluctuations, and even improper acclimation can cause hardwood planks to expand or contract after installation, leading to uneven gaps or buckling. Experts recommend a thorough environmental assessment and acclimatization period, detailed in hardwood refinishing tips. Keep in mind that these steps are crucial for long-term durability—a small investment of time now saves significant headaches later.
Ultimately, effective flooring installation goes beyond buying the best materials. It requires a meticulous approach—testing subfloor conditions, understanding advanced leveling techniques, and respecting the environmental requirements. Remember, even minor oversights can lead to major issues, so don’t rush the process. For a step-by-step overview of common pitfalls to avoid, read this comprehensive article. Have you ever fallen into this trap? Let me know in the comments.Maintaining your flooring’s pristine condition requires more than just initial installation skills; it demands the right tools and a proactive approach to upkeep. One critical aspect is understanding which equipment best suits your specific flooring type, whether tile, hardwood, or engineered wood. For instance, I personally swear by a high-quality rubber mallet when installing click-lock vinyl planks, as it ensures tight connections without damaging the tongue-and-groove system. Utilizing a tapping block combined with a mallet minimizes gaps and reduces the risk of damaging the flooring material, which is essential for perfect alignment and durability.
Another indispensable tool is a laser level. Unlike traditional bubble levels, laser levels project straight lines over large areas, making it much easier to maintain consistent elevation across expansive spaces—an aspect vital for seamless tile or hardwood installation. I recommend the leveling pin technique as an advanced method to achieve flawless flatness, especially over uneven subfloors.
Regular maintenance extends beyond tools; it involves rituals that preserve finish and structural integrity. Cleaning agents designed specifically for your flooring type disrupt less finish deterioration than generic cleaners. For hardwood floors, I trust a gentle, pH-balanced cleaner, avoiding wax-based or oil soap solutions that can build up over time. Additionally, using protective pads on furniture and area rugs in high-traffic zones significantly reduce scratches and gouges, prolonging the aesthetic appeal.
So, how do I maintain flooring over time to avoid costly repairs? The answer lies in incorporating routine inspections—checking for early signs of damage or wear, and addressing issues promptly. For example, catching minor moisture intrusion with a moisture meter can prevent warping or mold growth. You can learn more about this crucial step in this comprehensive guide. I encourage trying out a moisture meter to assess your subfloor’s condition regularly; it’s a game-changer in preventive maintenance.
Looking ahead, the trend points toward smarter, connected tools that can monitor flooring conditions remotely. Imagine sensors that alert you when humidity fluctuates beyond optimal levels, guiding timely interventions. Staying updated with emerging technologies can save time and money, ensuring your flooring remains stunning and functional for decades.
In summary, investing in quality tools and adopting consistent maintenance routines are paramount. Start with a reliable rubber mallet and laser level, pair these with proper cleaning protocols, and consider early moisture testing. These steps can dramatically extend your flooring’s lifespan while maintaining its beauty. Want to delve deeper? Explore the detailed techniques and expert insights on precise floor leveling and elevate your projects today.Through countless projects, I’ve learned that the real mastery in flooring lies in the details—things that aren’t immediately obvious but make all the difference. One of the most valuable lessons was embracing patience over shortcuts, especially during subfloor assessments; skipping this step always backfires. I also discovered that investing in quality tools like a reliable laser level or moisture meter pays off in the long run, as they prevent costly mistakes. Additionally, I realized that understanding the specific needs of flooring materials—be it hardwood, tile, or vinyl—can save time and frustration. These insights didn’t come from books alone but from hands-on experience and a willingness to learn from errors. So my advice? Keep refining your skills, stay curious, and don’t shy away from testing your assumptions. Each project is a chance to improve and implement smarter techniques—your future self will thank you.