
Imagine this: after hours of meticulous floor prep, you’re just about to lay that final layer of sealant or finish, confident that everything’s perfect. Then, out of the corner of your eye, you notice tiny specks of dust glued to the surface—completely ruining what should’ve been a flawless finish. My heart sank the first time it happened to me. I thought I had everything under control, only to be blindsided by stubborn dust particles that had sneaked in during the last minute. It was a frustrating lesson in the importance of inspecting thoroughly before sealing the deal.
The Power of the Flashlight Trick
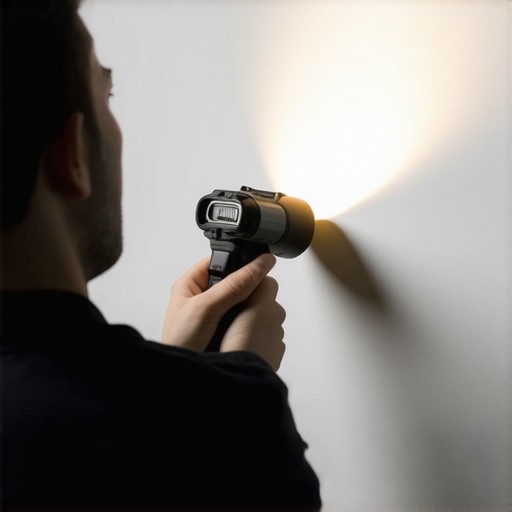
But then I stumbled upon a game-changer: the flashlight trick. It sounds simple, almost too good to be true, but a well-placed, bright flashlight can reveal dust, lint, and even tiny scratches that are invisible in normal lighting. This technique has honestly saved me from costly re-dos and uneven finishes. When you angle a flashlight across your freshly sanded or cleaned surface, its oblique light casts shadows that highlight imperfections—making dust sit up and yell for removal. With practice, this method became my go-to step before applying that final coat.
So, what’s the secret? It’s all about the angle and intensity of the light. I always keep my flashlight at a low angle relative to the surface, scanning slowly across the entire area. Dust particles will cast tiny shadows, making them much easier to spot and remove. This trick has become a cornerstone of my finishing routine, especially when working on hardwood refinishing or tile sealing projects.
What’s at Stake Without It? The Common Mistakes to Avoid
Before we dive into the how-to, I want to share a little personal mistake I made early on—trusting my eyes alone. Turns out, that’s a rookie move. I overlooked dust in the gloss of my hardwood floor during a refinishing job, and it showed up glaringly after the final coat dried. No amount of sanding could fix it—only stripping and redoing everything. To avoid this nightmare, I now always incorporate the flashlight check, which I highly recommend for anyone serious about quality results. For more guidance on avoiding common pitfalls, you can check out this article on flooring installation mistakes.
Do you find yourself battling dust or debris in your finishing stages? If so, mastering this simple yet effective trick can save you a lot of headaches down the line. Next, we’ll explore step-by-step how to implement the flashlight method flawlessly, ensuring your final result is nothing short of professional quality.
Mastering the Final Inspection Before Sealing
Once your floor is sanded or the tiles are laid, it’s tempting to proceed immediately. But the crucial step is a thorough inspection. Grab a bright, handheld flashlight and hold it at a low angle across the surface. This oblique lighting casts shadows of tiny dust particles, hair, or lint that are invisible in regular light. My recent experience involved inspecting a hardwood floor in daylight, but the flashlight revealed a stubborn speck that had settled after sanding. Using the light, I identified and removed it with a tack cloth, preventing a noticeable flaw after sealing. This method is essential, especially when working in low-light environments or during evening hours, ensuring nothing spoils your carefully prepared surface.
Step 1: Prepare Your Inspection Tools
Before starting, ensure you have a high-quality, bright flashlight with adjustable angle and intensity. A dual-beam model allows easier scanning of large surfaces. Keep a clean, lint-free cloth or tack cloth ready to wipe off any dust or debris discovered during inspection. This simple setup makes a huge difference in detecting hidden imperfections, reducing the risk of costly rework later.
Step 2: Divide the Surface into Sections
Divide your floor visually or with masking tape into manageable sections. This helps maintain focus and ensures no area is overlooked. For larger projects, systematically inspect each section, starting from the farthest corner and working your way back towards the exit point. Doing so minimizes the chance of stepping on or recontaminating cleaned areas.
Step 3: Use the Flashlight at the Correct Angle
Hold the flashlight at approximately 30-45 degrees relative to the surface. Move the light slowly across the area, sweeping side to side in straight lines. Watch for tiny shadows or glittering particles that might indicate dust or debris. This technique is akin to shining a raking light on a painting to spot imperfections—only here, it reveals the microscopic flaws that ruin a pristine finish.
Tip: Adjust the Light’s Brightness and Angle
If you notice reflections or glare, slightly lower the brightness or tilt the flashlight differently. This adjustment helps distinguish dust from surface texture, leading to more accurate detection.
Step 4: Remove Detected Imperfections Effectively
Use a tack cloth or a slightly damp microfiber cloth to pick up any dust specks. For stubborn lint, a soft brush can dislodge particles from textured surfaces. Be meticulous; even a tiny speck can cause an unsightly bump or a blotch when sealed. Respect the analogy of cleaning a camera lens—small dirt spots cause big problems if left unattended.
Step 5: Confirm the Surface Is Ready
Repeat the flashlight scan in different sections until no shadows or glittering particles are visible. This redundancy confirms your surface’s cleanliness. Remember, even a minor oversight can lead to surface imperfections that catch the light differently and become visible post-finish. This is particularly critical when working on high-gloss hardwood finishes or sleek tile surfaces, where flaws are immediately noticeable.
Applying the Technique to Real Projects
During my last hardwood refinishing project, I followed these steps. After preliminary sanding, I used my flashlight to inspect the entire surface. Spotting a tiny dust particle near the edge, I carefully wiped it away and re-checked. The result was a mirror-like glossy finish with no visible imperfections—a testament to the effectiveness of a diligent inspection routine. Incorporate this step into your workflow consistently; it pays dividends in achieving professional-quality results.
For more guidance on floor leveling and avoiding common pitfalls, visit this resource. Ensuring the surface is perfectly clean before sealing or finishing is paramount—think of it as laying a clean canvas for your masterpiece.
Even experienced installers can fall prey to misconceptions that sabotage their projects. One widespread but flawed belief is that if the subfloor feels solid and level to the touch, it’s ready for tile or hardwood. In reality, subtle imperfections beneath the surface—like minor dips or high spots—can cause long-term issues such as cracking or uneven wear. This is why precise floor leveling, verified with tools like laser levels or the mysterious coin slide test, remains essential for perfection. Overlooking these nuances complicates future repairs and diminishes aesthetic appeal, as documented in industry research emphasizing the importance of meticulous preparation for durable finishes.
Why do professional-level results demand more than just eye inspection?
The myth that visual inspection suffices is particularly dangerous. Many assume that if a floor looks flat, it’s truly flat. However, studies show that human perception often misses deviations below the 1/8-inch threshold, which can cause visible problems once the surface is finished. Advanced techniques involve using straightedges, laser levels, and thorough testing to detect these hidden flaws—reminding us that precision tools outperform the naked eye in critical tasks. Failing to incorporate these methods can lead to costly rework, especially when working with high-gloss hardwoods that magnify surface imperfections. For deeper insights on achieving flawless leveling, check out this expert guide.
A common trap is believing that substrate flatness is universally consistent, neglecting the impact of environmental factors like humidity and temperature swings. Wood and concrete expand and contract, which can subtly distort even professionally leveled floors over time. This misconception often results in premature tile cracks or squeaks in hardwood, especially if proper expansion joints and acclimation procedures are ignored. To avoid this, sophisticated installers measure moisture and temperature gradients and adjust their preparations accordingly—key steps highlighted in advanced flooring guidelines.
Speaking of precision, what about the misconception that cheap tools yield acceptable results? Many think that basic trowels, slack levels, or uncalibrated laser devices are sufficient. However, the subtle variations these tools introduce can accumulate, leading to uneven surfaces or poor adhesion. Investing in quality equipment and undergoing proper calibration isn’t just a cost but a guarantee of excellence. It’s like building a house on a solid foundation—you need the right tools to ensure everything stacks correctly. For best practices, consult this comprehensive resource.
Finally, an often unnoticed nuance is the importance of dedicated subfloor preparation before installing high-end finishes. Many skip critical steps such as applying primer, using self-leveling compounds in troubled areas, or ensuring proper curing times. These oversights might seem minor but can lead to large-scale problems down the line—like tile delamination or hardwood cupping. Advanced installers prioritize these preparatory steps, understanding that the effort upfront pays dividends in longevity and aesthetics. Would you agree that mastery in flooring is all about attention to detail? Share your experiences in the comments. For tailored advice, don’t hesitate to reach out through our contact page.
Keeping Your Flooring Investment in Top Shape
Achieving beautiful, durable floors is just the start; maintaining them over time is essential to preserve their appearance and functionality. Having the right tools on hand and understanding proper care routines can significantly extend the lifespan of your hardwood or tile surface.
First, invest in a high-quality vibration mop equipped with adjustable speed settings, like the O-Cedar ProMist MAX. Its microfiber pads effectively remove dirt without scratching, making routine cleaning easier and safer for your finish. Regular dusting with a microfiber dust mop prevents grit build-up that can cause scratches during sweeping. For more detailed techniques, check out this expert guide.
Another underrated aspect is controlling environmental factors. Using a dehumidifier in humid months or a humidifier during dry spells helps maintain stable moisture levels, especially for hardwood floors. Near-infrared moisture meters, like the
Periodic inspection is equally important; use a flashlight at a shallow angle to identify scratches, chips, or areas prone to damage. This allows for early intervention, such as re-polishing or touch-up repairs, which prevents larger issues down the line. For refinishing hardwoods, investing in a refinish kit with variable grit sandpaper enables you to restore surface luster without professional help, saving money and time.
How do I maintain my floors over time?
Developing a regular cleaning routine, controlling humidity, and performing periodic inspections are the keys. Incorporating tools like microfiber mops, moisture meters, and proper lighting inspections helps catch problems early. Additionally, consider professional maintenance every few years to reapply sealants or finishes, especially on high-traffic floors. Remember, consistent care today saves on costly repairs tomorrow.
Looking ahead, technological advancements such as smart home monitoring for humidity and automated cleaning systems are poised to revolutionize floor maintenance. Integrating these innovations can keep your floors looking new with even less effort.
Don’t underestimate the power of a simple flashlight check—it’s one of the most effective methods for early detection of issues and maintaining your floors’ allure. Try incorporating this tip into your next cleaning routine and see how much easier it becomes to keep them looking flawless.
If you’re interested in more advanced maintenance techniques, or need personalized advice, feel free to reach out to us. Your floors deserve the best care possible!
Lessons Learned From the Trenches of Flooring Perfection
- One of the most eye-opening lessons was realizing that even a bright, clean surface can hide tiny imperfections. The flashlight trick revealed dust and debris invisible to the naked eye, saving me from costly rework. It taught me that small details make a big difference in professional-looking floors.
- Patience is key—rushing the inspection process often leads to overlooking dust or scratches that spoil the finish. Taking extra time to divide the surface and scan meticulously ensures a surface ready for sealing, directly impacting the final aesthetic.
- The myth that surface appearance is enough was shattered. Human eyes can miss subtle dips or high spots, which tools like laser levels and simple tests can catch. This understanding transformed my approach from casual to meticulous, greatly enhancing durability and appearance.
- Investing in quality tools and dedicated inspection routines reduces rework and improves results. Trusting cheap instruments or skipping inspections might seem like saving, but it often costs more in the long run—especially with high-gloss finishes or delicate tile work.
- Environmental factors matter more than I initially thought. Proper acclimation and climate control prevent issues like cupping or cracking, emphasizing that preparation extends beyond the surface to the environment itself.
Tools, Books, and Resources That Changed My Approach
- Warmly recommend the full guide on floor leveling. It’s a game-changer for understanding how to prepare surfaces properly before tile or hardwood installation.
- The hardwood refinishing expert tips book provided insights into surface prep and finishing that I still use today, improving the quality of my projects.
- An affordable, high-quality flashlight with adjustable angles has been indispensable. Paired with a microfiber tack cloth, it allows me to catch even the tiniest speck before sealing—saving time and frustration.
- For environmental control, I trust the moisture meters and dehumidifiers. They help maintain proper conditions, extending the life of the finished surface and preventing issues like warping or cracking.
Take Action and Elevate Your Flooring Game Today
Now that you know the importance of thorough inspection and the power of simple tools like a flashlight, there’s no better time than now to incorporate these tips into your workflow. Every detailed check brings you closer to achieving a flawless, professional finish that lasts decades. Just remember—careful preparation and attention to detail are your best allies in elevating your flooring projects from good to extraordinary. Ready to master these final steps? Share your experiences or ask questions below—let’s build floors that truly stand the test of time!
,