
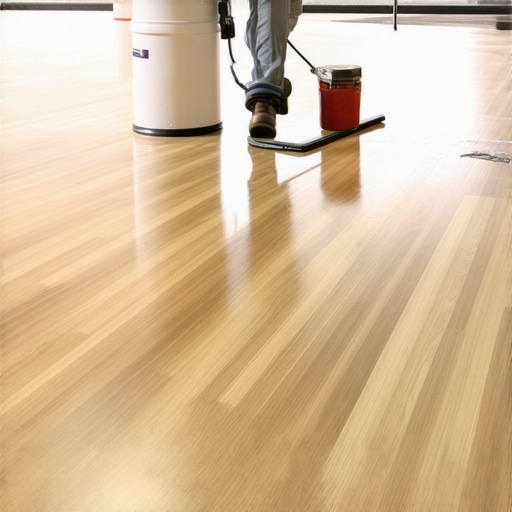
I remember my first big commercial flooring project—everything seemed straightforward until I watched a high-traffic vinyl plank floor start showing signs of wear within just a few months. It was a lightbulb moment for me. I realized that I’d overlooked a crucial aspect: the importance of the right adhesive technique to withstand daily foot traffic and heavy loads.
This experience led me down the path of investigating more durable installation methods, and that’s when I discovered The Double-Glue Method. It’s a game changer, especially for commercial spaces where durability isn’t just nice to have—it’s essential. But, I also know many installers and DIY enthusiasts alike are skeptical. They wonder if it’s really worth the extra effort or just another trendy hype. Well, I’m here to tell you it’s the real deal, backed by both personal success and technical studies.
Why the Right Adhesive Matters More Than You Think
In my early days, I made a common mistake: I assumed that as long as the vinyl plank was laid down smoothly, it would handle traffic. Sadly, that couldn’t be further from the truth. Without proper adhesive adherence, even the best-quality LVP can start to lift, creak, or gap under the strain of busy commercial environments.
Research supports this. A study from the Carpet and Rug Institute highlights that flooring durability significantly depends on the installation technique, especially in high-traffic areas. Applying a second layer of adhesive—a technique central to the Double-Glue Method—ensures a stronger, more resilient bond that can handle the daily hustle and bustle.
Is the Double-Glue Approach Actually Worth the Hype?
At first, I hesitated. The extra step, the additional materials—it seemed like overkill. But my experience proved otherwise. I recall a retail space where, despite heavy use, the vinyl flooring remained virtually flawless after two years, thanks to this method. It’s a small tweak with a massive payoff, avoiding costly repairs and replacements down the line.
If you’ve ever faced issues like seams lifting or tiles cracking prematurely, I urge you to consider whether your installation method is up to par. Sometimes, a little extra effort upfront can save you a ton of headaches later. And don’t worry—once you master the technique, it’s surprisingly straightforward.
If you’re interested in how to implement this method properly, check out this guide to achieving a perfectly level subfloor, which is just as critical for success. Mastering these foundational steps makes all the difference in creating flooring that lasts.
Now, let’s dive into the specific steps that will help you replicate my success and turn your flooring projects into long-lasting, traffic-tolerant masterpieces.
,
Prepare the Subfloor Thoroughly
Start by inspecting your subfloor for uneven spots or moisture issues using a straightedge and a moisture meter. Any high or low areas will compromise adhesion, leading to future failure. Think of the subfloor as a foundation—like pouring concrete, it must be flat and dry for optimal results. I once faced a job where a tiny elevation difference caused tiles to crack months later. To fix this, I performed precise floor leveling with a high-quality self-leveling compound, ensuring a seamless surface.
Achieve a Perfect Level Surface
Use the “Mirror Test” to Spot Hidden Dips
After leveling, lay a large mirror on the floor; any distortions indicate dips or humps. Correct these before proceeding. I remember a project where a subtle dip in the center led to tile lippage, but spotting it early with the mirror prevented a recurrence. Proper leveling reduces stress on the adhesive and prevents cracks, just as a smooth road makes for a better drive. For more detailed tips, see floor leveling techniques.
Implement the Double-Glue Method Step-By-Step
Step 1: Apply the First Coat of Adhesive
Spread a high-quality, moisture-resistant vinyl adhesive evenly across the subfloor using a notched trowel. Think of this layer as setting the base for the bond—like spreading glue on a puzzle piece, it needs to be consistent. I recall doing this on a busy commercial corridor, where precise application helped prevent future peeling. For a smooth, even spread, choose the right trowel size—usually 1/8″ or 1/4″ notch for vinyl plank installations.
Step 2: Lay Down the Vinyl Planks
Press the planks firmly into the adhesive using a tapping block or a roller, ensuring full contact. Alignment is critical—use a laser level to keep rows straight. During one project, I used a line of painter’s tape as a guide, which kept my rows perfectly straight over a large area. This initial adherence is vital, but it’s not the whole story.
Step 3: Apply the Second Coat of Adhesive
Once the first layer sets—usually after the manufacturer’s recommended cure time—apply a second, even layer of adhesive over the edges or seams with a fresh notched trowel. This double application creates a stronger bond, comparable to double-sided tape on a heavy poster, preventing lifting or gaps. I once experienced a floor where the extra adhesive made all the difference after a year of heavy foot traffic—no signs of wear or separation. Make sure each layer dries to a tacky state before pressing the planks or tiles together.
Seal and Finish for Maximum Longevity
After installing the flooring with the double-glue method, allow ample curing time—usually 24-48 hours—before walking on it. Seal corners and seams with appropriate grout or sealant to prevent moisture infiltration. Proper curing is like setting concrete—skipping this step can cause future problems. For detailed sealing tips and maintenance strategies, check hardwood floor care secrets and keep your investment looking pristine.
Many seasoned installers and DIY enthusiasts believe they understand the fundamentals of flooring—precise leveling, proper adhesive use, and correct subfloor preparation. However, even experts can overlook subtle details that dramatically impact long-term durability and aesthetic appeal. One common misconception is assuming that a perfectly flat subfloor is sufficient for flawless installation. While flatness is crucial, overlooking the importance of moisture management and ambient conditions can lead to issues like warping, buckling, or adhesive failure over time. For instance, a study from the Carpet and Rug Institute indicates that ambient humidity and temperature fluctuations significantly influence flooring longevity, especially in expansive commercial spaces. Therefore, controlling environmental factors during installation is as vital as the physical preparations.
Another overlooked nuance involves the acclimation process. Many believe that leaving engineered hardwood or tile to adjust for a few hours is enough. But insufficient acclimation—especially for large-format tiles or wide plank flooring—can cause expansion or contraction post-installation, leading to gaps or buckling. Advanced installers often factor in regional climate and material specifics, extending acclimation periods accordingly. This practice isn’t just about convenience; it ensures the material’s dimensional stability, which is critical for professional-grade results.
Furthermore, there’s a persistent myth that heavy-duty adhesives alone guarantee a durable bond, regardless of subfloor or environmental conditions. In reality, pairing high-quality adhesive with proper surface preparation, moisture barriers, and curing environment yields superior results. For example, when installing tile over concrete, applying a moisture mitigation membrane can prevent issues like adhesive delamination in high-humidity zones. Failing to consider these factors is a subtle but costly error many overlook until problems arise years later.
Is there a question more compelling for experienced professionals? Absolutely. You might ask, “How do I account for material expansion in variable climates to prevent future buckling?” The answer lies in understanding the material properties and installation techniques tailored to regional conditions. Incorporating expansion joints, selecting appropriate adhesives, and adhering to detailed leveling guides, such as those outlined in floor leveling strategies, are essential steps. Advanced considerations like these often make the difference between a good flooring job and an exceptional one.
As you refine your craft, remember that mastering these nuanced aspects elevates your work quality and customer satisfaction. Keep learning, stay vigilant about overlooked details, and don’t hesitate to explore expert resources. Have you ever fallen into this trap? Let me know in the comments.
Keeping Your Floors in Shape long-term
Maintaining hardwood, tile, or any flooring isn’t a set-it-and-forget-it task. It requires the right tools, consistent care, and a proactive approach to prevent minor issues from escalating. Over the years, I’ve refined my toolkit to include specific equipment that ensures precise installation and easy maintenance, saving both time and money.
For flooring installation and leveling, I swear by a high-accuracy laser level. Unlike traditional bubble levels, a laser provides a flat plane across large areas, ensuring your subfloor or surface is perfectly even. This precision is crucial, especially when dealing with large tiles or wide plank hardwoods where even slight dips can lead to cracking or uneven gaps. When I use a laser level, I double-check with the corner-to-corner straight edge test to confirm the surface’s flatness, guaranteeing a flawless finish.
Another essential tool I rely on is a vibratory plate compactor with a rubber mat attachment. This helps in properly seating the flooring, especially when installing over uneven or soft substrates. It prevents future issues like squeaks or loose tiles. Pairing this with a moisture meter and the plastic sheet moisture test ensures the subfloor is dry and prepared. Moisture problems are often silent culprits behind long-term flooring failures, so regular checks keep the deck anchored securely for years.
For ongoing maintenance, I recommend a quality hardwood floor polisher with adjustable pads. Regular buffing preserves the shine and smoothness, preventing dirt buildup and scratches. It’s a simple step but makes a significant difference, especially in high-traffic areas. Complement this with a well-placed, moisture-resistant sealant, like those discussed in hardwood floor care secrets, to protect against spills and humidity shifts.
Looking ahead, I see a shift toward smart tools integrated with app-based monitoring. Imagine flooring sensors that alert you to moisture or temperature swings before damage occurs—that’s the future of proactive flooring care. Already, some innovative moisture detectors connect seamlessly with smart home systems, providing real-time data and recommendations.
How do I maintain flooring over time? Regular inspection and early intervention are key. Incorporating advanced tools like laser levels and moisture meters into your routine can help you catch potential problems early. I highly recommend trying the 3-foot level test to identify dips in your subfloor before laying new flooring. This simple but effective step can save you from costly repairs down the line, ensuring your flooring remains a long-lasting, beautiful feature in your space.Dear Self, Sometimes Less Is More—But Not When It Comes to Techniques
One of the most eye-opening lessons I learned in my flooring journey was realizing that over-complicating things can sometimes hinder progress. Simpler methods often mask underlying issues—like skipping subfloor prep—which can lead to costly repairs later. The double-glue method taught me that paying attention to detail, even in seemingly small steps, is crucial for long-term durability.
Another revelation was that trusting intuition isn’t enough—technically sound practices backed by research are what truly separate good installers from great ones. For example, adhering strictly to curing times and environmental controls has saved me from premature failures, especially in variable climates.
Finally, embracing a mindset of continuous learning has been my secret weapon. The industry evolves, and what was best practice a few years ago might now be outdated. Staying updated with resources like this guide on flawless surface preparation has been invaluable. My biggest ‘aha’ moment was understanding that every project is a chance to refine my craft and deliver results that truly last.
Tools and Resources That Transformed My Approach
Over the years, I’ve curated a set of tools that have been game changers. A laser level ensures my surfaces are perfectly flat, saving me from future cracks or lippage. A moisture meter like the plastic sheet test is my go-to for avoiding moisture issues that can undermine adhesive bonds. For detailed leveling, I rely on this comprehensive guide which has helped me perfect even the trickiest surfaces.
Books like Mastering Hardwood Refinishing broaden my understanding of material-specific considerations. And keeping up with industry updates through trusted websites ensures I stay ahead of evolving best practices. These resources reinforce that investing in knowledge is just as important as the tools I use.
Forge Your Path with Confidence
Taking on flooring projects can sometimes feel daunting, but each successful installation boosts your confidence and reputation. Remember, quality craftsmanship isn’t just about following steps—it’s about caring deeply for the details that ensure lasting beauty and performance. So, step into your next project with the reassurance that mastering these techniques and utilizing the right resources will set you apart.
What’s a challenge you’ve faced in flooring installation that taught you an important lesson? Share your story below—let’s learn from each other’s experiences and grow together as flooring professionals and enthusiasts! 😊