
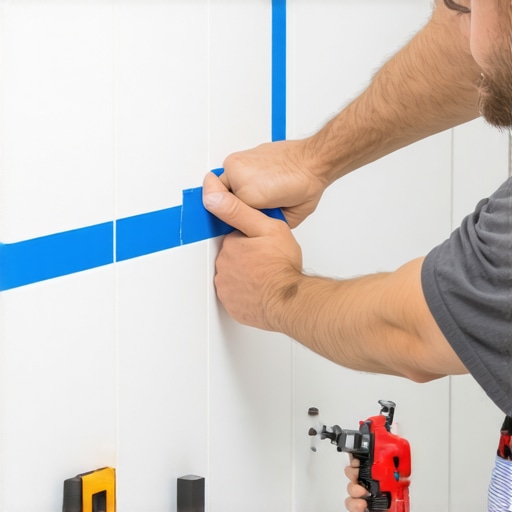
It was a cold Saturday morning when I first tackled my bathroom remodeling project, expecting smooth sailing. Instead, I watched in frustration as my carefully applied caulk looked messier than a toddler’s art project. No matter how steady my hand or how many tools I tried, the excess caulk smeared outside the joints like poorly played paint. That lightbulb moment hit me hard: I needed a better way to keep the caulking neat and clean.
Discovering the Power of The Blue Tape Trick
Since that day, I’ve learned a simple but revolutionary secret—the Blue Tape Method—that dramatically improves the cleanliness and precision of caulking jobs. This isn’t just a little trick; it’s a practical strategy that transforms a messy, time-consuming task into something almost foolproof. Today, I promise to guide you through how this method works and why it’s become my go-to solution for all my sealing projects.
Can This Trick Really Save My Caulking Job?
I admit, at first, I was skeptical. I had my doubts about whether a piece of painter’s tape could make such a big difference. Early on, I made the common mistake of rushing through the application, which only resulted in uneven lines and a lot of cleanup. That mistake—skipping the tape or using it improperly—made me realize I needed to understand the proper technique. Now, after countless projects and improved results, I can confidently say that this method is worth every homeowner’s attention.
Understanding the nuances of applying tape correctly is vital—improper use can lead to uneven edges or damaged surfaces. To learn more about achieving flawless results, I recommend checking out this guide on tile and finishing techniques. It helped me realize that patience and preparation are key.
If you’ve ever struggled with smudged, uneven caulk lines or spent hours trying to clean excess sealant, you’re not alone. The Blue Tape Method simplifies this process, making your finished project look professional without the pricey contractor’s fee. Ready to see how it all comes together? Let’s dive into the step-by-step process and see how this small trick can make a big difference in your next project.
Prep Your Surface for Perfect Results
Before applying tape, thoroughly clean the area to remove dust, mold, or any residue. Use a damp cloth or a mild cleaner and let it dry completely. This ensures the tape adheres properly and prevents dirt from causing imperfections.
Apply Painter’s Tape Along the Edges
Stick the painter’s tape precisely along the edges of the joint or corner you plan to caulk. For a clean line, press the tape firmly to prevent any gaps. During my first attempt, I carefully lined the tape parallel to the joint, which made my final caulk line look professionally done.
Use a Quality Caulk and Proper Tooling
Select a high-quality, paintable silicone or latex caulk suited for your surface. Cut the nozzle at a 45-degree angle and load it into a caulking gun. When I tackled my bathroom, I applied the caulk slowly, maintaining steady pressure, to avoid gaps and bubbles.
Apply the Caulk with Confidence
Squeeze the trigger steadily, guiding the gun along the joint. Fill the gap completely in one smooth motion. My experience taught me that rushing leads to gaps or uneven insets—so take your time for a uniform fill.
Shape and Smooth the Caulk Quickly
Immediately after application, utilize a caulk finishing tool or a damp finger to smooth the bead. This step is crucial to press the caulk into the joint and remove excess. I found that moistening my finger with a bit of water kept the process clean and effective.
Remove Tape Before Caulk Skins Over
Carefully peel off the painter’s tape at a 45-degree angle while the caulk is still soft. Doing this right away prevents the tape from pulling out the caulk or creating jagged edges. During my project, pulling the tape too late caused rough lines, so timing was key.
Touch Up for a Flawless Finish
Inspect the edges and use a damp sponge or brush to clean any smudges or excess caulk. For minor imperfections, apply a small amount of caulk and smooth again. This final touch-up makes a noticeable difference in the professional appearance of the job.
Let It Cure Completely
Avoid disturbing the area for at least 24 hours, or as recommended by the caulk manufacturer. Patience here ensures durability and a neat look that lasts. I’ve learned that rushing to clean or paint over wet caulk ruins the tidy lines I worked hard to achieve.
When it comes to hardwood and tile flooring, many professionals and DIY enthusiasts alike fall prey to widespread myths that can compromise a project’s success. One such misconception is the overemphasis on choosing the perfect material, neglecting the importance of proper subfloor preparation. As I’ve learned through extensive experience, a flawless finish starts beneath the surface, which is why mastering floor leveling techniques is crucial for avoiding uneven or cracked tiles and uneven hardwood planks. Failing to address subfloor irregularities often results in costly repairs down the line. For advanced insights on achieving smooth, seamless surfaces, I recommend reviewing this comprehensive guide on floor leveling. Another common myth is that all adhesives and leveling compounds are interchangeable. In truth, selecting the wrong product—such as using a standard thinset where a modified version is required—can lead to cracking, bubbling, or delamination. This is particularly critical in areas subjected to moisture or temperature fluctuations. Experts like those cited in a recent study emphasize that understanding product specifications tailored to your climate and flooring type can greatly enhance durability.
How do I detect subtle subfloor inconsistencies before laying tile or hardwood?
A useful trick involves the simple flashlight test—shining a light at a low angle across the surface to reveal high or low spots that might be invisible to the naked eye. Using a laser level enhances precision, ensuring your floor is perfectly flat before installation. Remember, even minor deviations can cause long-term issues like squeaking floors or cracked tiles. For detailed techniques on floor leveling, check out this expert-approved guide. Beyond the technical aspects, many overlook the significance of proper joint spacing and expansion gaps, which are vital in accommodating material expansion and contraction. Ignoring these can lead to buckling or gaps over time. It’s a subtle nuance that significantly affects the integrity and appearance of your flooring. Take the time to review common leveling pitfalls and solutions, to prevent costly mistakes. Remember that correct installation isn’t just about aesthetic appeal—it’s about ensuring the longevity and safety of your floors. Have you ever fallen into this trap? Let me know in the comments.Maintaining pristine hardwood floors and properly installed tiles requires more than just initial expertise; it demands the right tools and consistent upkeep. Investing in quality equipment can significantly extend the lifespan of your flooring and ensure it retains its beauty over decades. For hardwood floors, a high-quality dust mop like the O-Cedar Microfiber Flip Mop is essential for daily cleaning, as it effectively traps dirt and prevents scratches. Pair this with a wood floor cleaner such as Bona Hardwood Floor Cleaner to preserve the finish without introducing harmful residues. Regularly inspecting and refinishing the surface using fine-grit sanding and a satin polyurethane topcoat can keep the wood looking new; professional-grade orbital sanders like the Festool ETS EC 150/3 provide smooth, even results and minimize dust. For tiles, a grout haze remover like Aqua Mix Grout Haze Remover helps restore shine after installation, and a handheld scrub brush with stiff bristles ensures thorough cleaning of textured surfaces. Utilizing a wet/dry vacuum with proper filters is invaluable for debris removal and preventing dirt from settling into joints or under tiles, reducing long-term damage. In terms of long-term results, scheduling annual inspections to identify issues early can save costs and avoid extensive repairs. Employing tools such as laser levelers ensures floors stay flat over time, especially in areas prone to settling or structural shifts. As the industry moves towards smart flooring solutions, integrating moisture sensors under hardwoods—like those from Watersafe Technologies—can alert you of leaks or humidity changes before damage occurs. When it comes to scaling your flooring projects, employing modular leveling systems enables consistent results across larger areas without the need for extensive rework. For detailed guidance on achieving flawless surfaces, I recommend reviewing this resource on precise floor leveling techniques. Be proactive by setting up regular maintenance routines that include cleaning, inspections, and minor touch-ups. Small, consistent efforts today will dramatically improve your floors’ appearance and durability tomorrow. Why not try implementing a comprehensive floor inspection checklist this month? It’s a simple step that can prevent costly repairs and preserve your investment. Proper tools and routine care form the backbone of any successful flooring project, ensuring your hard work stands the test of time.
What I Wish I Knew Before Starting My Flooring Journey
One of the biggest lessons I learned was the importance of patience in floor leveling and installation. Rushing the process led to cracked tiles and uneven hardwood planks, which I could have avoided with more careful prep. Additionally, understanding that subfloor preparation trumps choosing the most expensive materials taught me to focus on the groundwork, saving me money and headaches later. I also realized that mastering small details, like expansion gaps and joint spacing, makes a noticeable difference in the longevity and appearance of my floors. Lastly, embracing continuous learning through reputable resources kept me motivated and informed, transforming challenges into opportunities for craftsmanship growth.
My Go-To Resources That Elevate My Flooring Projects
First, I rely heavily on this guide on precise floor leveling. It offers step-by-step techniques that have helped me achieve smooth, professional-looking results every time. I also trust this resource on elegant tile designs, which inspires me to elevate my aesthetic game while ensuring functionality. For maintaining hardwoods, this care guide has been invaluable in preserving my floors’ beauty. Lastly, for understanding adhesives and installation nuances, I turn to this comprehensive flooring guide; it demystifies complex decisions, making my work more confident and durable.
The Push I Needed to Make My Floors Truly Stand Out
Taking action with the right mindset and tools can transform your home and boost your confidence in DIY projects. Remember, flawless floors aren’t just about material choice—they’re about proper prep, patience, and continuous learning. I encourage you to set small, actionable goals like inspecting your subfloor with a laser level or practicing the Blue Tape Method on a small section. Every step forward strengthens your skills, bringing you closer to the professional finish you crave. Don’t wait for perfection; start today, and watch how your space and confidence evolve. Your dream floors are within reach—believe in your ability to create them, one careful step at a time.