
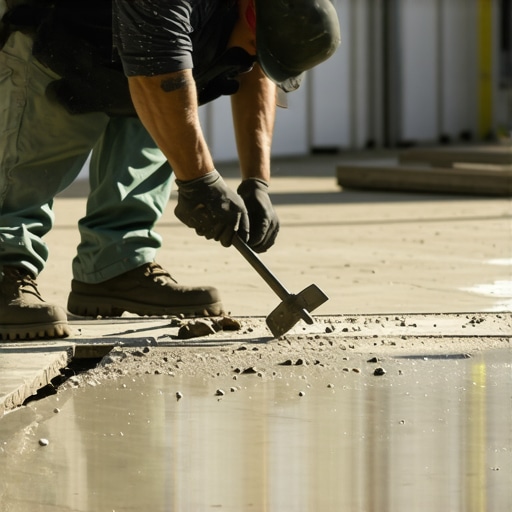
I remember the moment vividly—standing knee-deep in my garage, staring at a patch of stubborn, hardened thinset glued to my concrete slab. It was late, I was exhausted, and yet that relentless layer seemed to mock my every effort. Every scraper I tried just chiseled away a tiny piece, only revealing the stubborn truth beneath: removing old thinset is no walk in the park. I felt like I was fighting an endless battle with a cement beast. If you’ve ever tried to tackle this, you know exactly what I mean.
Why Old Thinset Can Turn Your Floor Project Into a Headache
Getting rid of old thinset might seem straightforward—just chip it away, right? But in reality, it’s often the bottleneck that stalls your entire flooring project. That crusty layer not only hides the original surface flaws but also complicates subsequent work, leading to uneven floors, cracked tiles, or even failure of new installations. I’ve been there, and I can tell you — skipping proper removal can bite you back.
What makes this task so frustrating is the age and composition of the old thinset. Over time, it bonds more aggressively to the slab, especially if an imperfect application was initially performed. Plus, using the wrong tools or techniques can turn a cleanup into a nightmare, potentially damaging your concrete slab. I once made the mistake of using a steel chisel without any safety gear—lesson learned the hard way.
But don’t worry. After many trial and error sessions, I discovered effective methods that significantly eased the process. Whether you’re planning a new tile lay or just craving a cleaner surface, understanding how to remove old thinset properly is crucial. This journey from struggle to success isn’t just my story—many homeowners have overcome this challenge.
If this resonates with you, or you’re currently staring at a stubborn layer of old thinset and wondering how to proceed, stick around. I’ll walk you through tried-and-true techniques that can save your project and sanity. And for more insights on laying a solid foundation for your flooring, check out our detailed guide on [flooring installation fundamentals](https://tiletrendshop.com/flooring-installation-fundamentals-leveling-for-a-seamless-look). Let’s take the mystery out of the process and get your space ready for stunning new floors.
Start With Proper Tools to Loosen the Adhesive
My first attempt involved a basic flat chisel and hammer, which only scratched the surface and risked damaging the concrete. I switched to a floor scraper with a utility blade and a carbide-tipped pneumatic hammer. These tools provide the leverage and force needed to tackle stubborn thinset efficiently. Think of it like trying to peel off stubborn wallpaper—using the right scraper and a bit of patience makes all the difference. For larger areas, renting a floor scraper machine can dramatically cut down your work time and effort.
Apply Heat for Easier Removal
In one messy Saturday, I heated sections of the thinset with a hot air gun before scraping. The heat softened the bond, reducing the force needed to chip it away, preventing potential damage. Imagine melting glue with warm air—this method is especially effective on older, thick layers. Always keep the heat moving to avoid overheating the concrete or creating bubbles. This technique is a game-changer when dealing with tightly bonded layers.
Use Chemical Bonders for Stubborn Spots
Some areas refused to budge despite scraping and heating. I applied a commercial thinset remover, following the manufacturer instructions. These chemicals break down the cementitious compounds, making removal easier. Remember to wear gloves and ensure good ventilation. For most DIY projects, a combination of mechanical and chemical approaches yields faster, cleaner results. Visit this guide for a deep dive into surface preparation techniques.
Employ Mechanical Methods for Final Clean-up
After softening and initial scraping, I used a rotary hammer fitted with a chipping bit to reach tight spots and remove residual bits. This method is similar to chiseling stone—powerful but precise if controlled correctly. Be cautious: too much force can chip the slab. Use slow, controlled motions, and consider wetting the surface to minimize dust and heat. For extensive projects, renting a floor grinder with a diamond abrasive disc smooths the surface and removes lingering thinset—think of it as sanding wood but on concrete.
Address Unevenness Before Moving Forward
As I progressed, I noticed some uneven patches. Small dips were easy with a self-leveling compound, but large dips required screeding with a straightedge before leveling. Remember, an even subfloor is critical for tile or hardwood installation; otherwise, your finish will suffer. For detailed procedures, check out this comprehensive guide. The key is patience—layering thin coats of leveling compound, allowing proper curing, then sanding smooth.
Many DIY enthusiasts and even some professionals fall prey to misconceptions about tile installation and floor leveling that can sabotage their projects. One prevalent myth is that using thicker mortar or adhesive guarantees better bond strength. In reality, over-application can lead to uneven surfaces and increased risk of tile cracking, according to industry experts. Precision in the amount used, rather than sheer quantity, is key for a durable, professional finish. Also, a frequent mistake is assuming that the most expensive materials result in the best outcome. While quality matters, understanding the compatibility of tiles, substrates, and leveling compounds makes a bigger difference for longevity and aesthetics.
Another often-overlooked aspect is the importance of substrate preparation. Many think that a quick cleaning suffices, but irregularities or residual moisture hidden beneath surfaces can cause significant issues down the line. Proper moisture testing, as recommended by flooring professionals, is essential to prevent problems like mold or adhesive failure.
For advanced installers, the real trick lies in understanding how thermal expansion and contraction affect your flooring over time. Materials expand and contract with temperature changes, which can crack tiles or cause gaps if not accounted for during installation. Implementing expansion joints or choosing flexible adhesives can mitigate this risk. The science behind these nuances is backed by research in material science; for instance, a 2020 study in the Journal of Building Science highlights how proper joint design reduces stress buildup in tiled surfaces.
An additional hidden nuance involves the importance of grout selection and application techniques. Many assume that any grout will do, but using an epoxy grout in high-moisture environments provides superior durability and stain resistance, as detailed in our guide to grout types. Improper mixing or application can leave you with unsightly haze or weak joints, undermining your craftsmanship.
Lastly, avoid the trap of rushing the curing process. Waiting the recommended time before walking on or sealing new floors ensures adhesive and grout achieve maximum strength. Skipping or shortening this phase is a common mistake that weakens the entire installation.
By understanding these intricate details and avoiding common pitfalls, you set yourself up for a flawless, long-lasting floor. For a comprehensive approach, check out our step-by-step flooring guide or explore expert secrets in mastering floor leveling. Remember, quality results come from attention to these hidden nuances rather than just surface-level techniques. Have you ever fallen into this trap? Let me know in the comments.Maintaining your flooring setup over time is essential to ensure durability and beauty. The right tools and routine upkeep can make all the difference in preserving your hard work and investment. I personally recommend investing in a high-quality oscillating multi-tool, such as the Fein MultiMaster, because its versatility allows for precise cleaning of grout lines, sanding uneven areas, and even detailed touch-ups without damaging surrounding surfaces. This tool saves me hours compared to traditional methods and provides control that’s unmatched. Regularly inspecting your floors for chips or loose grout and addressing issues early prevents costly repairs down the line. For hardwood floors, using a microfiber mop with a gentle cleaning solution, along with a soft-bristled broom, keeps dust and debris at bay without scratching the surface. I also swear by a good commercial-grade cleaner like Bona Hardwood Floor Cleaner, specially formulated to protect the finish while deep cleaning.
Looking toward the future, advances in automation and smart home integration will likely introduce floor sensors that monitor moisture levels and structural shifts in real-time, alerting homeowners before minor problems become major repairs. Staying informed about emerging technologies helps you adopt proactive preservation methods.
How do I maintain my flooring installation over time?
Consistent cleaning with appropriate tools, routine inspections for early signs of wear, and timely repairs are key. Sealing grout lines periodically prevents staining and water intrusion, while maintaining indoor humidity levels reduces expansion and contraction in wood. To make your flooring last, don’t neglect the importance of proper maintenance supplies; for example, avoiding harsh chemical cleaners that can dull the finish is crucial. Regularly check your subfloor stability, especially if you notice uneven surfaces or creaks, by performing simple tests like the “penny test,” which can reveal underlying issues early. For comprehensive strategies, explore our article on mastering floor leveling secrets as a foundation for long-term preservation.
Overall, consistent upkeep, using the right tools like a multi-tool for detailed work, and staying informed about technological breakthroughs will extend the life of your flooring project. By integrating these practices, you’re actively investing in the longevity of your investment. Consider trying my favorite technique of using an oscillating tool to clean grout lines—it’s a game changer that can dramatically improve maintenance efficiency.
Unearthing the Hidden Pitfalls in Thinset Removal
One of the biggest lessons I learned was that rushing through the thinset removal process often leads to more damage and frustration. Patience and proper preparation are key; taking the time to understand the composition of your old thinset can prevent accidental gouges or uneven surfaces. I once underestimated the importance of testing a small section with heat and chemical removers before tackling the entire floor, and that oversight made me spend hours fixing unintended damage. Learning to identify the stubborn spots versus the easily removable layers transformed my approach and saved me precious time.
Tools Alone Won’t Solve Everything—Mastering Technique Wins
Initially, I relied heavily on power tools, thinking that brute force would make the job easier. But I quickly realized that improper technique—like applying excessive pressure or not controlling the tool’s angle—can cause unnecessary harm to your subfloor. Developing a steady hand and understanding the right angle and pressure for each tool changed my results dramatically. That balance between mechanical power and finesse turned a grueling task into a manageable one.
Embrace the Science of Heat and Chemicals
For years, I believed that scraping was enough until I discovered how heat softens the bond, making removal less invasive. Using a heat gun on stubborn sections allowed me to gently loosen the thinset without damaging the concrete. Combining this with chemical removers in select areas created a synergy that sped up the process. It’s a reminder that understanding the chemistry behind these materials can elevate your DIY game significantly, turning an intimidating task into an achievable project.
Small Wins Add Up to Big Results
One of the most satisfying lessons was recognizing that tackling small sections at a time with patience leads to a clean, level surface. Rushing often results in uneven patches that cause headaches later. I learned to plan my progress, start with the most stubborn spots, and gradually work outward. Celebrating these small victories kept me motivated and assured me that a professional finish was possible with the right mindset and technique.
Transform Your Approach for Long-Lasting Floors
In the end, mastering the art of thinset removal impacted every subsequent step—floor leveling, tile installation, and even long-term durability. Proper surface preparation isn’t just a step; it’s the foundation of flawless results. If you want to avoid common pitfalls and elevate your flooring project, I recommend exploring our detailed guide on floor leveling techniques. With the right knowledge, tools, and patience, your DIY journey can lead to stunning, durable floors that stand the test of time.