
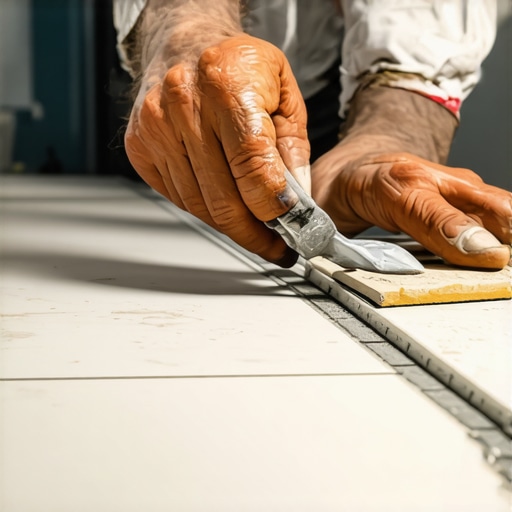
It happened during my last home renovation—standing ankle-deep in dust, frustration mounting, I realized I had overlooked the importance of finishing those pesky tile edges. I had laid beautiful tiles, but the edges were raw, jagged, and unfinished. It was a glaring eye-sore, turning a gorgeous floor into an incomplete project. That lightbulb moment made me understand just how crucial the finish details are, even beyond aesthetics.
Why Proper Tile Edge Finishing Can Make or Break Your Remodel
Have You Faced This Issue With Sharp, Unfinished Tile Edges?
Research shows that proper edge finishing can extend the life of your tile installation by preventing chips and water damage. In fact, a study published in the Tile Association highlights the importance of edge treatments for long-term durability. Now, I’ll walk you through simple, proven methods to finish those tiles beautifully without resorting to heavy bullnose pieces, setting your project up for success from start to finish.
Preparing Your Edges for a Flawless Finish
Start by assessing the raw tile edges. If they’re jagged, use a wet tile saw or a diamond-grit hand file to smooth them out. This step prevents chips and creates a uniform surface for finishing. I vividly recall the first time I tried this—my hands were slippery with mortar, and I nearly slipped, but the resulting smooth edges made subsequent steps much easier.
Choosing the Right Edge Protection Methods
Use Bullnose or Radius Edges
For a polished look, bullnose tiles are ideal, but they may not always fit your design. Instead, consider fabricating custom-radius edges using a router with a diamond-bit. This method offers a sleek, seamless transition that mimics professional installations. I once rented a router and practiced on scrap tiles; the control and precision it provided transformed my DIY project into a designer-quality finish.
Apply Edge Trim or Aluminum Profiles
Metal or plastic trim profiles are quick solutions to cover raw edges. Measure the tile length accurately, cut the profile with snips, and secure with matching adhesive or screws. During my last renovation, I opted for anodized aluminum trims for durability, and the clean lines instantly elevated the entire space.
Sealing and Protecting Your Edges
Once edges are finished, sealing with a matching silicone or grout sealant prevents water ingress and chipping. Apply a bead along the edge, smoothing it with a damp finger or a sealant tool. I learned this the hard way—skipping sealant led to moisture seeping behind tiles, causing loosening over time. Proper sealing guards your work and prolongs its lifespan.
Final Checks and Touch-Ups
Inspect the finished edges carefully. If any rough spots or gaps remain, gently sand or apply additional sealant as needed. Walkthrough your project like a quality inspector, ensuring every detail aligns for a professional finish. My personal tip: always step back and view the installation from different angles; sometimes, the imperfections only reveal themselves from certain perspectives.
Efficient edge finishing combined with proper sealing creates a seamless, durable surface that elevates your entire tile project. For more advanced techniques, consider consulting floor leveling experts or sourcing high-quality trims at trusted suppliers.
When it comes to flooring installation, many assume they have the basics down, but there are subtle nuances that often get overlooked, leading to costly mistakes down the line. One of the most pervasive myths is that leveling the subfloor is a simple, one-step process. In reality, achieving a perfectly flat foundation requires meticulous attention to detail, proper tools, and an understanding of the unique challenges posed by different subfloor materials. Cutting corners here can result in uneven surfaces, tile cracking, or squeaky hardwood floors, which is why I always advocate for comprehensive floor leveling techniques like those detailed in my guide on precise leveling. Another misconception involves the use of thinset or adhesive products. Many installers rely on generic, budget-friendly options without considering the specific needs of large-format tiles or engineered woods, which can lead to adhesion failure. An expert approach involves selecting and applying the right adhesive type based on substrate and tile size, as explained in this detailed resource.
Moreover, the trap of underestimating moisture levels before installation is a critical mistake. Moisture problems can cause tiles to lift or wood floors to warp unexpectedly. Using proper moisture testing techniques, such as the “bucket of water” test or specialized meters, is essential. For advanced insights, see my detailed moisture testing strategies.
And what about floor leveling products? Many folks believe any self-leveling compound is suitable for every project. But the truth is, choosing the wrong product or applying it improperly can create cracks or uneven surfaces that are impossible to fix later. This is why I stress the importance of understanding the specific formulations and application techniques listed in this expert guide.
For those looking to elevate their craftsmanship, being aware of these advanced pitfalls is crucial. Proper planning, material selection, and execution go hand-in-hand with a well-informed approach. Do you want to master these finer points? Explore my comprehensive step-by-step guide here and minimize costly mistakes.
If this resonates with you, share your experiences below—have you ever fallen into this trap? Let me know in the comments.
Keep It Working: Tools and Tips for Longevity
Ensuring your flooring remains beautiful and durable over time requires more than just quality installation; it demands proactive maintenance using the right tools. I personally rely on a few specialized devices that make a significant difference in preserving hardwood floors, tiles, and level surfaces. A high-quality microfiber mop, for instance, is indispensable for daily cleaning, as it traps dust and debris without scratching delicate finishes. For deeper cleaning, I prefer a steam cleaner designed specifically for hardwood or tile, which disinfects surfaces without the use of harsh chemicals.
When it comes to addressing persistent issues like unevenness or minor cracks, I turn to professional-grade floor leveling compounds, such as those discussed in my guide on floor leveling. These products, combined with a quality notched trowel and a rubber float, allow me to perform spot repairs that extend the lifespan of my floors without the need for costly replacements.
Investing in Precise Tools
Accuracy is key, especially when maintaining or scaling your flooring efforts. A digital moisture meter helps me monitor humidity levels in the subfloor and finish surfaces—crucial for preventing warping or buckling over time. I also use a laser level to ensure tiles and hardwood planks stay perfectly aligned, preventing uneven wear and unsightly gaps. Consistently checking with these tools ensures that small problems don’t snowball into major repairs, saving time and money in the long run.
Technology is advancing rapidly, and I predict that smart moisture sensors and automated leveling devices will become standard in professional and DIY projects alike. Staying ahead of the curve means integrating these innovations into your routine, which can facilitate early detection of issues before they escalate. As an example, my recent upgrade involved a Bluetooth-enabled moisture sensor that alerts me when moisture levels exceed safe thresholds, providing peace of mind and protecting my investment.
How do I maintain floors over time?
Consistent upkeep hinges on a combination of regular cleaning, timely repairs, and the right tools. I recommend establishing a routine that includes gentle cleaning with microfiber pads, periodic checks with a moisture meter, and prompt attention to minor damages. For scaling your efforts, consider professional-grade equipment like many flooring experts use, which can be rented or purchased from trusted suppliers. To explore options tailored for your specific needs, you can contact specialists through this contact page.
For further tips on preserving your flooring’s beauty, don’t miss my collection of installation pointers that emphasize long-term results. Taking these proactive steps now will help ensure your floors remain stunning and functional for years to come.
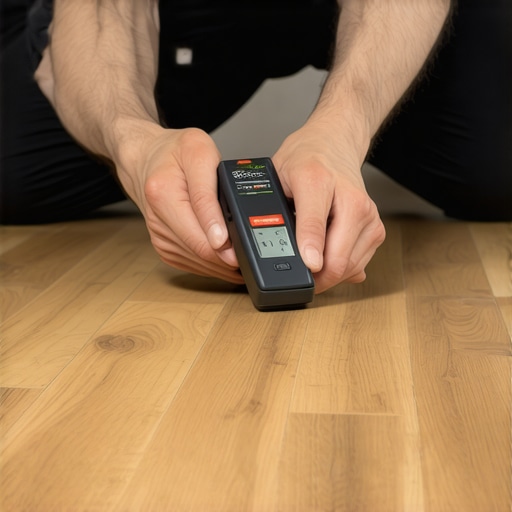
Investing in quality tools and maintenance strategies is the key to long-term flooring success. For an advanced tip, consider trying a Bluetooth-enabled moisture sensor—it’s a game-changer for early detection of moisture issues, protecting your investment from hidden damage.