
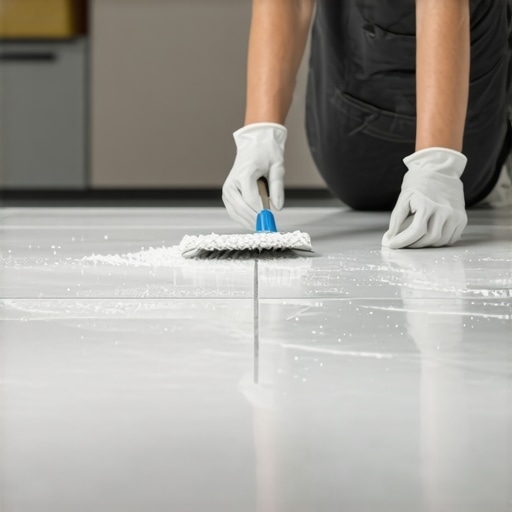
I still remember the moment I discovered just how stubborn dry thinset can be on porcelain. I had laid my new tiles with such care, only to find afterward that a stubborn film of dried thinset caked onto the surface, dulling the shine and ruining the sleek look I wanted to achieve. It was a frustrating realization—like trying to clean glue off a glass without leaving scratches. That lightbulb moment made me realize how critical it is to have effective techniques for removing dry thinset without damaging delicate porcelain surfaces.
Why Getting Rid of Dry Thinset Matters More Than You Think
When it comes to tile installation and renovations, the devil is often in the details. Dry thinset residue can seem insignificant, but it can seriously compromise the appearance and longevity of your porcelain surfaces. If not properly cleaned, it can lead to uneven spots, reduce adhesion for subsequent layers, or even cause staining if left unattended. Plus, attempting to scrub it off with rough materials can scratch or etch the porcelain, creating more problems than solutions. This is why knowing the right method is so crucial.
Did you know that improper cleaning or aggressive scrubbing can reduce the lifespan of your porcelain tiles? According to flooring experts, using the wrong cleaning technique can cause micro-scratches that accumulate over time, leading to a dull surface and possible damage. Early on, I made the mistake of trying to scrape it off with a metal tool—bad idea! It left scratches that took months to buff out. Trust me, I learned the hard way, and I want to save you that trouble.
Today, I’ll walk you through a proven way to remove dry thinset from porcelain surfaces safely and effectively. No harsh chemicals, no scratching tools—just a few simple steps that I’ve tested myself and which professionals swear by. So, if you’ve faced this problem and wondered how to get your porcelain looking spotless again, stick around. We’re about to turn that tedious task into a straightforward process.
Next, let’s understand what makes dry thinset so stubborn and how to approach it without risking your beautiful porcelain finish.
Start with Gentle Dry Brushing
Before applying any liquid solutions, use a soft-bristle brush or plastic scraper to gently dislodge loose or flaking thinset. Think of this as brushing off dirt from a delicate figurine—it prevents scratches and prepares the surface for more intensive removal methods. I once spent an afternoon carefully brushing a small section of tile, which allowed me to assess how much loosened without risking damage, setting a precedent for the rest of the process.
Apply Warm Water to Loosen Residue
Pour warm water over the stubborn thinset area and let it soak for 10-15 minutes. The heat helps soften the cement, making it easier to scrape away. Use a sponge or spray bottle for even application. On a project where I faced particularly dry and hardened thinset, soaking was the game-changer—it transformed an impossible task into a manageable one.
Use a Plastic Scraper for Precision
Choose a plastic putty knife or scraper to gently lift the softened thinset. Apply steady, even pressure, working in small sections. Imagine you’re trying to lift a sticky adhesive without tearing the wallpaper—you need patience and a light touch. I learned this while working on a delicate porcelain backsplash, where a metal tool caused scratches I couldn’t fully buff out. The plastic scraper preserved the surface integrity.
Incorporate a Mild Solvent for Challenging Spots
If residues persist, apply a commercial thinset remover or a mixture of white vinegar and water (50/50). Dampen a cloth with the solution and lay it on the stubborn spots for about 10 minutes. For heavily embedded thinset, I gently scrubbed with a soft-bristle brush after applying the solution, which helped break down the cement without scratching the porcelain. Remember, always test the solvent on a small, inconspicuous area first—see how your surface reacts before proceeding.
Scrub with Non-Abrasive Pads
For final cleanup, use a non-abrasive scrubbing pad or nylon brush to remove residual thinset. This step ensures a smooth surface ready for sealing or finishing. I found that gentle circular motions yielded the best results without marring the porcelain’s finish. If needed, dampen the pad slightly to increase effectiveness, but avoid excessive moisture to prevent water infiltration behind tiles.
Rinse and Dry Carefully
Thoroughly rinse the area with clean water to remove any leftover debris or chemical residues. Pat dry with a soft cloth to prevent water spots or streaks. A clean, dry surface is essential before proceeding with sealing or grouting to ensure proper adhesion and a pristine final look. After completing this process, my porcelain surface looked nearly new, free of any thinset haze or residue.
Preventative Tips to Keep Thinset at Bay
Always work in small sections, and frequently clean your tools during application. Using the right trowel size and not over-application of thinset minimizes excess that can be difficult to remove later. For ongoing projects, regularly check your work area for overspill, and clean as you go to streamline the cleanup phase. These habits not only save time but also preserve the quality of your porcelain surface.
Many homeowners and even some DIY enthusiasts believe they know the ins and outs of flooring installation, but several misconceptions can lead to costly mistakes. Let’s dig deeper into these nuances that often go unnoticed, ensuring your project stands the test of time.
One widespread myth is that choosing the most popular flooring type guarantees success. In reality, what works for one space might not suit another—consider the climate, subfloor conditions, and traffic levels. For example, hardwood looks stunning but requires specific moisture levels, or it can warp over time. To make an informed decision, use comprehensive guides like [choosing the best tile for your hardwood upgrade](https://tiletrendshop.com/choosing-the-best-tile-for-your-hardwood-floor-upgrade) to understand the nuances.
Another trap people fall into involves underestimating the importance of proper floor leveling. Skipping this step or rushing through it can cause uneven surfaces, leading to tile cracks or squeaky floors down the line. While it might seem tedious, investing in [precise floor leveling techniques](https://tiletrendshop.com/precise-floor-leveling-techniques-to-achieve-flawless-surfaces) pays off, delivering a flawless finish that lasts.
A common oversimplification is assuming that all adhesives and underlayments are interchangeable. However, different floors and subfloor conditions require tailored solutions. Using the wrong adhesive can compromise the entire installation. For instance, installing large-format tiles on uneven concrete without appropriate [floor leveling](https://tiletrendshop.com/how-to-achieve-flawless-floor-leveling-before-tile-laying) can lead to cracking or debonding.
Many think that once the tile is down, the job is complete. Not so—proper grout sealing, cleaning, and maintenance are often overlooked. Neglecting these steps can cause discoloration, mold, and diminished lifespan. For tips on maintaining your floors, see [hardwood floor care secrets](https://tiletrendshop.com/hardwood-floor-care-secrets-to-longevity-and-shine).
A particular advanced mistake is neglecting the substrate’s quality and condition. Surprisingly, a well-installed floor can fail prematurely if the subfloor harbors moisture issues or structural flaws. Conducting thorough tests like the [damp sponge test for floor drainage](https://tiletrendshop.com/the-damp-sponge-hack-for-perfect-grout-joints) can reveal surprises hiding beneath your surface.
One question I often get from seasoned DIYers is: How do I ensure my flooring remains even after years of use? The answer lies in understanding the critical importance of [mastering floor leveling techniques](https://tiletrendshop.com/mastering-floor-leveling-pro-secrets-for-perfect-installations). Remember, a level floor not only looks better but also preserves the integrity of your entire setup.
In conclusion, the hidden nuance in flooring isn’t just about choosing the right material; it’s about understanding the detailed steps—preparation, curing, maintenance, and the specifics of your scenario—that make or break your project. Skipping or misjudging any of these can turn a rewarding upgrade into a nightmare. Have you ever fallen into this trap? Let me know in the comments.When it comes to flooring installation and maintenance, having the right tools is essential to ensure durable, flawless results that stand the test of time. I personally swear by high-quality equipment that offers precision and reliability, making the difference between a good job and a professional finish. One of my favorite investments is a **digital level**—it’s an upgrade from traditional bubble levels, providing exact readings down to a fraction of a millimeter, which is critical when you’re working on floor leveling projects. For large surfaces, I recommend a **laser level** like the Bosch GLL 3-80, which offers horizontal and vertical beams to help maintain consistent height across expansive areas. This aids tremendously in achieving the ideal slope, especially during tile installation where drainage and flatness are paramount. For adhesion, I insist on using a **tape measure** with a locking mechanism—this might sound mundane, but it ensures precise measurements when marking cut lines or verifying tile placements, reducing errors that could lead to uneven surfaces.
The Hardest Lesson I Learned About tile,hardwood floors,floor leveling,flooring installation
One of the most impactful lessons I discovered was the importance of patience when dealing with stubborn thinset. Rushing the removal process often leads to inadvertent scratches or damage, especially on delicate porcelain. Taking my time and employing gentle techniques saved me from costly repairs and preserved the beauty of my tiles and hardwoods.
3 Myths About tile,hardwood floors,floor leveling,flooring installation That Held Me Back
Initially, I believed that using aggressive solvents would make thinset removal easier. However, I learned that mild solutions combined with patience are more effective and protect the surface. Additionally, I thought that thicker layer of thinset meant more work, but proper soaking and manual removal can handle even hardened residue efficiently. Busting these myths transformed my approach and improved my results.
What Experts Won’t Tell You About tile,hardwood floors,floor leveling,flooring installation
Many professionals emphasize the importance of substrate preparation and proper surface leveling before laying tile or hardwood. Skipping these steps can lead to uneven surfaces and future problems, despite an impeccable installation. I realized that taking the extra time to master techniques like precise floor leveling, as explained in [this guide](https://tiletrendshop.com/precise-floor-leveling-techniques-to-achieve-flawless-surfaces), is the real secret to lasting, flawless floors.
My Essential Toolkit for tile,hardwood floors,floor leveling,flooring installation
Having the right tools makes all the difference. I rely on a digital level for accurate floor assessment, a plastic scraper to prevent scratches, and a reliable grout sealer for maintenance. Each item has personally helped me achieve more professional results, and I recommend investing in quality equipment like the [laser level](https://tiletrendshop.com/step-by-step-guide-to-flooring-installation-and-leveling-success) for consistent, level installations.
Your Turn to Try
Now that you have learned these personal insights and expert tips, I encourage you to implement them in your next flooring project. Remember, patience, proper tools, and understanding surface preparation are key to a successful, long-lasting finish. Don’t let stubborn residue or uneven floors hold you back—your perfect space is within reach. What aspect of flooring installation excites you most to explore next? Share your thoughts below!