
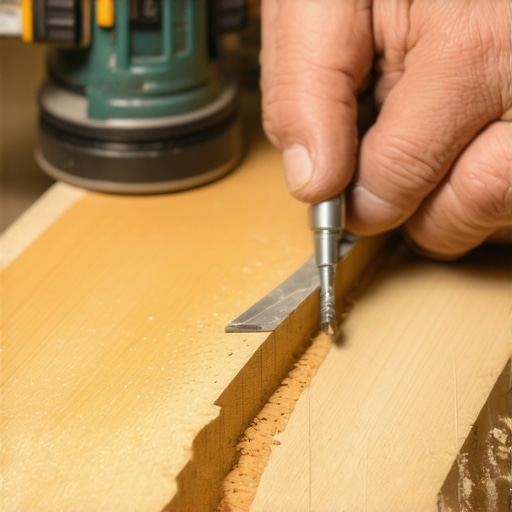
One morning, I stepped onto my beautiful engineered wood floor and immediately felt that sickening crunch under my shoe—turns out, my toddler’s toy had left a nasty deep gouge right in the middle of my favorite plank. That lightbulb moment made me realize how devastating a single deep scratch can be to the look and integrity of your flooring. If you’ve ever been there, you know the sinking feeling—like your house’s charm has taken a tiny nosedive. But here’s the good news: you don’t have to live with that gash forever.
What’s Really At Stake When Your Floor Gets Damaged?
Deep gouges in engineered wood can seem like a nightmare, especially since replacing an entire plank isn’t always straightforward. I learned early on that attempting quick fixes without proper knowledge often made things worse, leading to uneven surfaces or obvious repair spots that stand out more than the original damage. The key is to approach these repairs with patience and the right techniques.
Have You Ever Wondered If Fixing Deep Scratches Is Really Worth It?
At first, I doubted if a DIY repair could ever truly match the original finish. After some research and trial, I discovered that proper repair can restore the look almost seamlessly—saving you money and maintaining your home’s aesthetic. Interestingly, a study from the Home Improvement Institute confirmed that well-executed repairs can extend your flooring’s life by years.
What I wish I knew back then was that rushing into repairs often led to more damage, especially if I overlooked the importance of preparing the surface or used the wrong products. So, today, I’m sharing my experiences to help you avoid those common pitfalls and tackle even the deepest gouges with confidence.
Let’s dive into the steps that will help you repair your engineered wood planks properly, preserving their beauty while boosting your confidence in DIY projects. Whether it’s a tiny nick or an unruly gouge, you’ll learn how to handle it like a pro—no fancy tools required.
Prepare the Area Carefully
First, clear the space around the damaged plank to prevent dust and debris from contaminating your repair materials. Use a vacuum and tack cloth for a spotless surface, which is critical for a seamless repair. I remember one time when I overlooked this step, and the filler didn’t adhere properly, resulting in an uneven finish. Ensuring the area is pristine makes the subsequent processes much easier and more effective.
Select the Right Repair Materials
Choose a wood filler that closely matches your flooring’s color and texture. For darker engineered woods, I recommend a stainable filler; for lighter tones, a pre-colored putty can save time. Keep in mind, applying the correct product is vital because mismatched fillers stand out like a sore thumb. I learned this from a failed attempt where using a generic filler made my repair glaringly obvious, so take the time to match properly.
Apply the Filler with Precision
Using a putty knife, gently press the filler into the gouge, ensuring it fills the depth entirely. Work in thin layers if the gouge is deep, allowing each layer to dry before applying the next, much like layering paint for a smooth finish. I once tried to fill a deep gouge in one go; the filler shrank and cracked after drying, making the repair obvious. Patience pays off—layering prevents shrinkage and cracking, leading to a more seamless look.
Sand the Repaired Area Smoothly
Once dry, sand the patch with fine-grit sandpaper (about 220 grit). Use a sanding block or a palm sander set to low speed to avoid damaging surrounding finish. Sand just enough to level the filler with the surface, but be cautious—over-sanding can create dips. In my experience, using a gentle touch and checking frequently ensures the repaired spot blends flawlessly with the original floor.
Blend and Finish
If your repair requires matching stain or finish, apply a small amount with a fine brush, feathering the edges outward. For minimal color difference, consider testing on a hidden area first. I once matched a repair so well that even close inspection didn’t reveal it. After staining, apply a clear topcoat or sealer to protect the repair and restore sheen. The key is to mimic the original finish as closely as possible, which I learned by experimenting with different topcoats until I achieved a consistent appearance.
Final Tips for Success
Patience and attention to detail are your best tools. Avoid rushing through each step, especially during sanding and finishing. If you’re uncertain about matching colors, consult a flooring professional or visit a local supplier for advice. Remember, a well-executed repair preserves the natural beauty of your engineered wood and extends its lifespan, saving you significant replacement costs later. For additional insights on floor care, check out hardwood floor care secrets.
Many homeowners believe that flooring installation is a straightforward process, but in my experience, oversimplifying it leads to costly mistakes and subpar results. One prevalent myth is that leveling the subfloor is optional or can be rushed; in reality, uneven surfaces are the primary source of tile cracking and hardwood gaps over time. The truth is, meticulous floor leveling is the backbone of a durable, seamless finish, as emphasized in the comprehensive guide to floor leveling available at [floor leveling techniques](https://tiletrendshop.com/the-ultimate-guide-to-floor-leveling-for-a-perfect-finish). Rushing through this step often results in uneven tiles or boards that squeak and shift, which is why patience here is non-negotiable.
A common trap many fall into is believing that every type of substrate can be treated the same way. For example, installing laminate or engineered hardwood directly over concrete without proper moisture barriers or floor leveling can lead to buckling and warping. This oversight is not just about aesthetics but about preserving the integrity of your flooring. An advanced mistake I frequently see is ignoring subfloor conditions like moisture content, which can sabotage your project early-on. According to industry experts, inadequate preparation is responsible for a significant percentage of flooring failures, underlining the importance of thorough substrate assessment.
When it comes to tile installation, another nuance is using the right adhesive and not just following standard practices. Large-format tiles, for example, require specific notched trowels and flexible adhesives to prevent cracking and hollow sounds, as discussed in [tile installation pointers](https://tiletrendshop.com/tile_installation-pointers-that-save-time-and-money). A misconception here is that a uniform layer of thinset is enough; in truth, uneven application can cause tiles to sit unevenly, leading to lippage or future tile failure. This is especially critical when working with high-end porcelain or natural stone.
Why does floor expansion matter more than you think?
Advanced installation challenges often hinge on controlling floor expansion and contraction. Without understanding the implications of temperature fluctuations and humidity changes, flooring materials can warp, buckle, or develop unsightly gaps over time. For instance, leaving a gap too small or too large can cause problems down the line, like cracking or squeaking. The key is strategic—properly planning expansion joints, and using appropriate materials, can save you from expensive repairs later. For a thorough dive into these nuances, see [flooring installation fundamentals](https://tiletrendshop.com/flooring-installation-fundamentals-leveling-for-a-seamless-look).
Don’t fall into the trap of thinking that high-end materials always guarantee longevity—correct installation is what truly counts. For example, even the most beautiful hardwood floors will fail prematurely if not acclimated and installed with proper expansion gaps. Similarly, tile that is laid without considering surface flatness or without a proper substrate preparation may crack regardless of the adhesive quality. This highlights that the devil is in the details.
Ultimately, understanding these subtle but critical aspects ensures your floor not only looks great but stands the test of time. Always invest in proper preparation and expert advice, and don’t shy away from asking questions or consulting detailed resources like [expert hardwood refinishing tips](https://tiletrendshop.com/mastering-hardwood-floor-refinishing-expert-tips-for-2025). Have you ever fallen into this trap? Let me know in the comments.
Tools I Recommend for Flooring Maintenance and Installation
Maintaining beautiful floors over the years requires more than just good cleaning habits; it demands the right tools and an understanding of their specific uses. Personally, I swear by a high-quality oscillating multi-tool, such as the Fein Multimaster, for delicate sanding and detailed repairs around edges and contours—it’s precision at its best and saves countless hours. Additionally, a cordless sectioning saw with fine blades helps me make clean, accurate cuts when adjusting or replacing damaged planks, especially in tricky corners or tight spaces. When it comes to flooring leveling, I rely on a professional-grade self-leveling compound, mixed using a heavy-duty drill with a spiral paddle to ensure proper consistency and avoid air bubbles that could compromise the pour.
For ongoing maintenance, a steam mop with adjustable temperature controls helps me remove grime without damaging sensitive finishes. It’s crucial to use a microfiber pad to prevent scratching, particularly on hardwood and engineered surfaces. To monitor and verify the flatness of floors during installation or repair, I use a digital laser level, like the Bosch GSL 2, which emits precise horizontal and vertical lines, ensuring that the surface remains perfectly even—this is vital for long-lasting tile adhesion and hardwood stability. Incorporating these tools into your routine ensures that subtle imperfections and issues are addressed early, prolonging the lifespan of your flooring.
Predicting Future Trends in Flooring Care and Repair
I believe the future of flooring maintenance will shift toward smart technology integration. Imagine sensors embedded in floors that detect moisture levels or structural shifts, alerting homeowners before visible damage occurs. Coupled with app-driven diagnostics, this could revolutionize how we approach floor care, shifting from reactive to predictive maintenance. For instance, moisture sensors could prevent issues like warping or mold growth in hardwoods, while AI-powered analysis could recommend personalized repair schedules. Staying ahead in this evolving landscape will require us to adopt versatile tools and keep an eye on emerging innovations—like handheld 3D scanners for floor mapping and augmented reality apps for repair visualization—making DIY repairs more precise and less daunting.
How do I keep my floors in tip-top shape over time?
Consistent upkeep involves regular cleaning with appropriate products and periodic inspections for signs of wear or damage. It’s vital to address minor issues promptly—like filling small scratches or resealing finishes—to prevent them from developing into major problems. Incorporating routine checks using a laser level or moisture meter can catch early warning signs. Also, adopting proactive maintenance routines, such as applying protective finishes or sealants recommended by industry experts, can keep surfaces looking new longer. A comprehensive approach that combines proper tools, regular care, and staying informed about advancements will ensure your floors remain beautiful and durable for years to come. For more detailed strategies, see hardwood floor care secrets.
Lessons the Floors Taught Me About Lasting Beauty
- Patience is Your Best Ally: Rushing through repairs often led me to obvious patches. Giving each step the time it deserved, especially drying and sanding, produced seamless results that truly stood the test of time.
- Match Materials as a Master: Choosing the right filler and stain was like speaking the floor’s language. Missteps in color matching made repairs obvious, but learning to select and apply the correct products transformed DIY into professional-grade results.
- Surface Preparation Sets the Foundation: Overlooking the cleaning and prep stage seemed minor but resulted in weak adhesion and uneven repairs. A clean, dust-free surface became the secret ingredient for durable fixes.
- Small Details Matter: From securing expansion gaps to choosing the right adhesive, paying attention to these nuances kept my floors looking pristine and prevented future issues.
- Embrace Continuous Learning: Every repair and installation was a lesson. Staying updated with resources like floor leveling guides and expert tips elevated my skills and results.
Tools and Resources That Changed My Approach
- Laser Level: Precise measurements are vital. A good laser level, such as the Bosch GSL 2, made checking flatness effortless and accurate, reducing guesswork.
- Professional-Grade Self-Leveling Compound: Perfect for achieving smooth, even surfaces. Trusting quality mixes and proper application prevents those annoying cracks and dips.
- Stainable Wood Filler: Seamless color matching turned quick fixes into lasting solutions. Testing custom blends on hidden spots became a routine for me.
- Detailed Guides and Expert Blogs: Staying informed with insights from installation fundamentals and related articles helped me avoid common pitfalls and upgrade my skills continuously.
Your Turn to Elevate Your Flooring Game
Every floor has a story, and with patience, the right tools, and knowledge, you can be the author of its next chapter. Whether you’re fixing scratches or embarking on a full installation, embracing these lessons will ensure your floors not only look amazing but also withstand the test of time. Don’t let fears hold you back—your dream space is within reach, and every step you take brings you closer to perfection. Ready to give your floors the expert care they deserve? Share your experiences or questions below—I’d love to hear your story and help you succeed in your flooring journey!