
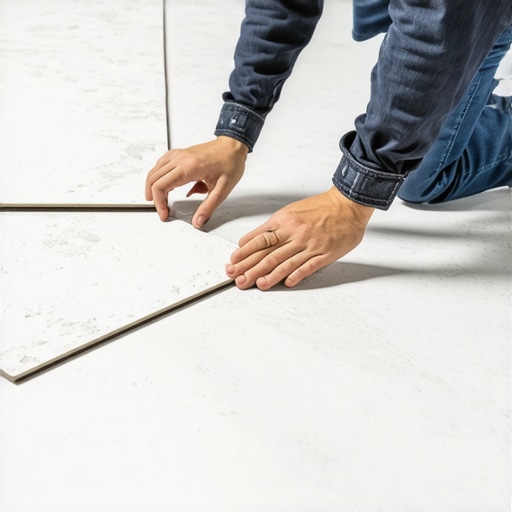
I remember the first time I tried installing large format porcelain tiles in my living room. I was eager to transform my space but quickly ran into a frustrating problem: the tiles wouldn’t lay flat. Despite my best efforts, the surface was uneven, and I felt enormous pressure to find a reliable solution. That lightbulb moment—realizing the importance of choosing the right adhesive—changed everything for me.
The Struggle of Choosing the Right Adhesive
Like many DIY enthusiasts, I initially assumed any thinset would do the trick. But with large format porcelain tiles, adhesion isn’t just about sticking; it’s about stability, durability, and achieving a flawless finish. I learned the hard way that selecting an inappropriate adhesive can lead to cracked tiles, loose spots, or uneven surfaces. This experience taught me that the key lies in understanding the specific requirements of these big tiles.
Are All Adhesives Equal? The Skeptic’s Dilemma
Before diving into my research, I too wondered, “Isn’t any tile adhesive good enough?” Turns out, not quite. I made the mistake early on of using a generic thinset, which resulted in tile lippage and eventual cracking. That experience was a wake-up call about the importance of choosing a specialized adhesive designed for large format and porcelain tiles. Trusted sources like industry experts emphasize that proper bonding materials are critical to prevent issues down the line (source: Tile Cracking Factors).
So, how do you identify the best adhesive for your project? That’s what we’ll explore next. Whether you’re a seasoned pro or just starting out, understanding the nuances of choosing the right bonding agent can save you time, money, and frustration. Ready to get it right the first time? Let’s dive into the options that can truly hold your tiles securely for years to come.
Prepare Your Subfloor for Success
Begin by thoroughly inspecting your subfloor, ensuring it’s sturdy, clean, and dry. Use a buffer or grinder to smooth out high spots, and fill any low areas with a suitable patching compound. A level foundation is crucial; if discrepancies exceed 1/4 inch over 10 feet, apply a leveling compound to create a uniform surface. This step is akin to laying a solid foundation before building a house—without it, everything else risks instability. During my last project, I utilized a self-leveling underlayment, following instructions meticulously, which resulted in an impressively flat surface, saving me time during tile installation.
Master Tiling with Proper Floor Leveling Techniques
Achieving a perfectly leveled floor involves more than just pouring a leveling compound. After application, use a straightedge or a laser level to verify flatness, and sand down high spots carefully. For tricky low spots, trowel additional compound in layers, allowing each to dry completely. Once your surface checks out, prioritize a thorough cleaning to remove dust and debris, ensuring optimal adhesion. Watching my previous project pan out smoothly was rewarding because I dedicated time to meticulous leveling, avoiding the common mistake of skipping this crucial step and facing uneven tiles later.
Select the Right Adhesive for Large Tiles
Choosing the proper adhesive is critical when working with large format porcelain tiles. I learned this the hard way when I initially opted for standard thinset and ended up with lippage issues. For big, heavy tiles, a high-quality, polymer-modified thinset designed specifically for porcelain and large formats is best. Spread the adhesive evenly with a notched trowel, choosing a notch size appropriate for your tile size—larger tiles need bigger notches to ensure full coverage. When I applied a premium, medium-bed mortar, the tiles settled flush with each other, and I avoided future cracks. For further guidance on selecting the optimal adhesive, explore detailed expertise at tile installation tips.
Use Proper Trowel Techniques to Maximize Adhesion
Holding the trowel at a consistent 45-degree angle, drag it across the subfloor to create ridges that hold the adhesive. Then, comb the adhesive with the notched side, ensuring it’s both evenly spread and filled into the ridges. This method guarantees full coverage, especially under large tiles, preventing air pockets that can lead to future cracking. I once rushed this step, resulting in a few tile lippage, but correcting it through lifting and reapplying adhesive saved the project from long-term issues. Proper technique in this phase is like applying a well-scored seal; it ensures everything sticks together seamlessly.
Install Tiles with Care and Precision
Set each tile firmly into the adhesive, applying slight pressure and twisting gently to encourage adhesion. Use tile spacers to maintain consistent grout lines, and periodically check for level with a straightedge. Tap tiles with a rubber mallet for even seating. After placement, allow the adhesive to cure as per manufacturer instructions before walking on the surface. During my last installation, I found that working in small sections reduced errors and made adjustments easier. Remember, patience here translates into a flawless finish.
Finishing and Ensuring Long-Term Durability
Once tiles are set, wait at least 24 hours before grouting. Use a damp sponge to clean excess adhesive from tile surfaces regularly—this prevents grout haze. When applying grout, mix it to a consistent, peanut butter-like texture, and press it into joints with a rubber float at a 45-degree angle. Remove excess grout with a damp sponge before it dries, and after 24 hours, seal the grout to prevent staining and moisture infiltration. I once neglected sealing, and water stains marred the finish, emphasizing how detail-oriented steps protect your investment. Proper curing and sealing are essential for a durable, beautiful surface that maintains its appeal over years.Even seasoned flooring pros occasionally fall prey to misconceptions that undermine their projects. One widespread myth is that leveling a subfloor is simply about achieving a flat surface; in reality, perfect flatness demands addressing subtle dips and high spots that can cause long-term issues. Overlooking these finer details can result in tile lippage or uneven hardwood surfaces, ultimately compromising durability and aesthetic appeal. For advanced applications, it’s crucial to understand the significance of meticulous floor leveling techniques, such as using a laser level to detect minuscule deviations that eye inspection might miss, thereby preventing lippage issues. For detailed strategies on this, visit precise floor leveling techniques.
Why do most installers underestimate the importance of substrate preparation?
Many believe that a basic cleaning suffices before tile or wood installation. However, even microscopic debris or residual adhesive can create voids, weakening bond strength and leading to cracks over time. This ‘hidden’ nuance emphasizes that surface preparation goes beyond cleaning: it involves inspecting for moisture, mixing substrates properly, and sometimes applying primer or bond-enhancers. Skipping these steps is a costly mistake, often resulting in tile failure or squeaky floors, which could have been avoided by thorough prep. For comprehensive substrate preparation tips, check out installation fundamentals.
Make Your Floors Last by Paying Attention to Detail
Many underestimate the importance of transition strips when switching between different flooring types, such as tile and hardwood. Improper transitions can cause uneven surfaces and trip hazards. Additionally, a common mistake is neglecting expansion gaps; failing to account for wood or tile expansion due to temperature fluctuations can lead to buckling or cracking. Advanced practitioners understand that every millimeter counts, and implementing proper expansion joints and transition profiles enhances longevity. For expert advice on these details, visit hardwood and tile hybrid installation.
What about the myths surrounding adhesive choice for large-format tiles?
Contrary to popular belief, not all thinsets are suitable for large-format or porcelain tiles. Using a standard thinset designed for small tiles might seem adequate but may result in insufficient adhesion, leading to lippage or cracks—especially as tiles expand or contract. Polymer-modified thinsets or medium-bed mortars provide the flexibility and stability necessary for these demanding applications. Remember, selecting the right adhesive is not just about following instructions but understanding the nuanced needs of your specific project. For a deeper dive into adhesive selection, explore large tile adhesion tips. Making this choice wisely prevents many headaches down the road. Have you ever fallen into this trap? Let me know in the comments.
Investing in Quality Tools Transforms Your Long-Term Results
One of the most crucial aspects of successful flooring installation and maintenance is selecting the right tools. Personally, I rely on a high-quality laser level, such as the Bosch GSL2, because it provides unparalleled accuracy in ensuring floors are perfectly level. Fine-tuning uneven surfaces before tile installation with a laser level reduces future cracking issues and saves time on rework. Additionally, for mixing compounds, I prefer a Heavy-Duty 5-gallon bucket with a mixing paddle attachment—this setup ensures thorough blending without creating clumps, which can compromise adhesion. When it comes to tile cutting, a wet tile saw equipped with a diamond blade offers clean, precise cuts, essential for tight-fitting corners and intricate patterns. These tools might seem like an upfront investment, but their durability and precision significantly enhance the quality and longevity of your flooring results.
Maintain Your Floors with Proper Care and Routine Checks
Maintaining the beauty and integrity of your floors over time hinges on regular inspections and a consistent care routine. For hardwood floors, I recommend periodic buffing with a microfiber mop and using a dedicated wood floor cleaner. Applying a reputable sealant annually, such as the ones discussed in Hardwood Floor Care Secrets, helps prevent moisture intrusion and reduces wear. Tile surfaces benefit from gentle cleaning with pH-neutral solutions; I avoid harsh chemicals that can erode grout lines or dull surface finishes. A critical maintenance tip is checking grout joints periodically for cracks or discoloration and resealing them as needed to prevent moisture infiltration. Scheduling semi-annual professional inspections can reveal underlying issues like subfloor movement or moisture problems before they escalate.
Plan for Scaling and Evolving Your Flooring System
Thinking ahead about scaling your flooring setup can make future renovations or expansions more manageable. For example, integrating a modular approach with interlocking tiles or adjustable hardwood planks allows easy replacement or extension without tearing out entire sections. Modern adhesive technologies, such as vapor-sensitive membranes, are designed to accommodate changes in humidity levels, preventing buckling or cracking over time. In the next few years, trends point towards smart flooring systems equipped with sensors to monitor moisture, temperature, and structural health—keeping your floors in optimal condition and alerting you to potential issues proactively. An emerging practice I recommend is implementing a comprehensive floor leveling and sealing plan during initial installation, as detailed at precise floor leveling techniques. This will ensure your floor is ready to handle future modifications and maintain its integrity long-term.
How do I keep my floors working perfectly over time?
Consistent inspections are key. Routinely check for loose tiles or cracks, and address potential issues promptly. For hardwood floors, refinishing every 7-10 years restores shine and repairs scratches, as explained in expert refinishing tips. Incorporating preventive measures like using furniture pads minimizes scratching, and controlling humidity levels with a dehumidifier reduces expanding and contracting. Also, don’t overlook the benefits of professional maintenance—periodic expert assessments can identify unseen issues before they become costly repairs. For example, employing a moisture meter during routine checks can prevent subfloor moisture buildup, which is vital for both tile and wood installations. Practice this maintenance discipline, and your floors will serve you well for decades.
What I Wish I Knew Before Laying My First Large Tile
One of the most valuable lessons I learned was the power of meticulous preparation. Skipping the step of precise subfloor leveling or neglecting substrate inspection can lead to long-term issues like cracking or lippage. Trust me, investing extra time upfront—using tools like a laser level or professional-grade leveling compounds—pays off in the end. My initial oversight taught me that attention to detail, especially in the early stages, is the cornerstone of a flawless finish.
Tools and Resources That Changed My Game
Over the years, I’ve curated a set of reliable tools that make a difference. For accurate leveling, I use a Bosch GSL2 laser level because it offers precise measurements that prevent future problems. When it comes to mixing thinset, a heavy-duty paddle ensures thorough blending, resulting in better adhesion. For detailed tile cuts, nothing beats a quality wet tile saw with a diamond blade. Plus, educational resources like precise floor leveling techniques and time-saving installation tips have helped me troubleshoot and refine my craft.
Embracing a Learning Mindset for Long-Term Success
The journey to perfect flooring isn’t a straight path; it’s filled with surprises and lessons. I’ve realized that embracing mistakes—viewing them as opportunities to learn—has been transformative. Whether it’s correcting a lippage or adjusting for moisture issues, maintaining patience and curiosity has helped me grow as a DIYer and professional alike. My advice? Stay open to new techniques, seek out expert guidance when needed, and don’t shy away from experimenting with different methods. That mindset keeps your craft evolving and your floors lasting for decades.
What’s Your Next Step in Flooring Excellence?
Now that you’ve seen the importance of preparation, the right tools, and continuous learning, it’s time to put these insights into action. Whether you’re tackling a small renovation or a major remodel, remember that every detail matters. Your commitment to quality today creates floors that will serve and impress for years to come. Why not start your next project with a fresh perspective and a focus on precision? The possibilities are endless when you approach flooring with confidence and care.
Have you ever faced a surprise obstacle during installation? Share your story below—let’s learn from each other’s experiences and elevate our flooring game together!