
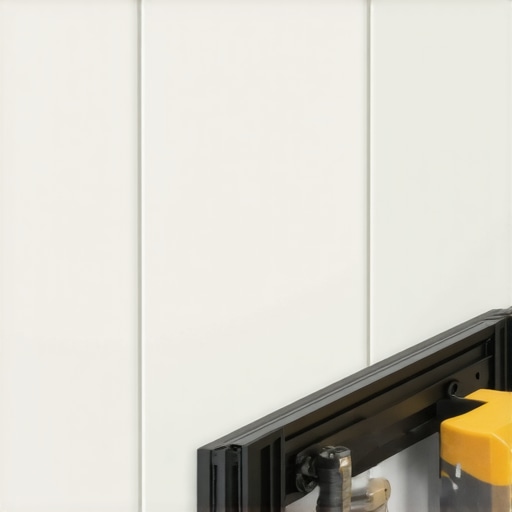
I remember the moment vividly—standing in my living room, staring down at a new tile layout that looked perfect from afar but revealed a disastrous unevenness up close. There it was, the dreaded lippage, making my carefully laid tiles look like a crooked patchwork. Frustration bubbled up as I realized I’d overlooked a simple but crucial detail during installation. It was a lightbulb moment, one that changed the way I approached tile leveling forever.
Getting to the Heart of Tile Perfection
Why does lippage happen, and more importantly, how can a tiny, three-foot-long level make all the difference? When I initially started my flooring projects, I thought that using larger levels was the best way to ensure flat, even surfaces. Turns out, my mistake was relying solely on those big, bulky tools—and ignoring the power of a simple, sturdy three-foot level. This seemingly small device became my secret weapon for catching subtle deviations, ensuring my tiles lay flawlessly across the surface.
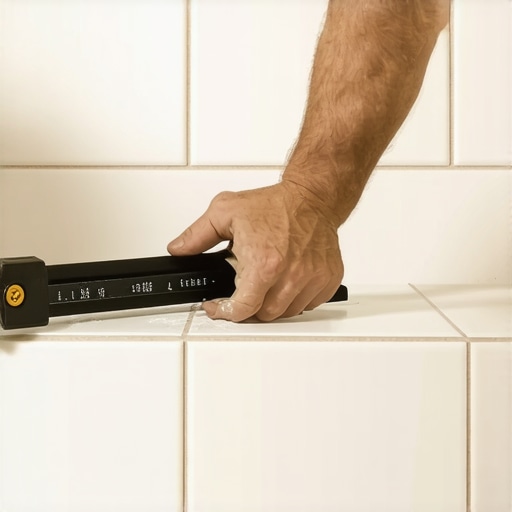
Using this level regularly, I discovered problems early, before thinset dried and grout sealed the issues. The key is to run that three-foot tool over the tiles in multiple directions—longitudinally and transversely—and watch for any slight dips or rises. When you do this, you’ll see imperfections that no big level or eye can catch. Trust me, it’s a game changer.
So, today, I want to share my experience and guide you through how this straightforward trick can save you from ending up with a lippy, uneven floor. No more scrapping tiles because of missed imperfections. Instead, you’ll be confidently installing, knowing that your surface is truly level.
Is a Tiny Level Actually Worth the Buzz?
Many skeptics ask if a three-foot level can really make a difference on large surfaces. I admit, I was doubtful at first—thinking it was too small or imprecise. But early on, I made a critical mistake: I trusted my eyes more than a proper tool. It’s a common mistake, and one that very likely trips up DIYers and pros alike. Studies show that even experienced installers miss subtle dips—proving that relying on visual cues isn’t enough (see [tile installation pitfalls](https://tiletrendshop.com/flooring-installation-mistakes-to-avoid-for-lasting-results)).
Now, I swear by that three-foot level because it provides a tangible, consistent reference point, making the imperfections obvious. Plus, it’s inexpensive and portable—perfect for double-checking tiles at every step.
Are you tired of ending up with uneven tile grout lines or uneven surfaces after the cut? If so, you’re not alone. Many DIYers and professionals face this challenge, but with a simple tool and a bit of technique, you can prevent it altogether.
Ready to make your tile installation smooth and flawless? Let’s dive into the practical steps that will help you master the art of 3-foot level checking—and ultimately, avoid those messy lippage issues once and for all. For more installation tips, don’t forget to check out [installing tiles like a pro](https://tiletrendshop.com/installing-tiles-like-a-pro-step-by-step-strategies-for-2025) and get your project on the fast track to perfection.
Measure Early and Often
Start by placing the 3-foot level across your tiles in one direction, then move it perpendicular and check for dips or high points. I vividly recall a time when I laid a row of tiles and thought everything looked perfect. However, once I ran the level in both directions, I discovered a subtle slope that caused lippage. I immediately adjusted the tiles before the thinset set, preventing a future mess. Always mark and adjust in real-time to keep your surface flat.
Use the Level as a Tuning Fork
Imagine it like tuning a guitar string; gentle taps or presses can reveal hidden unevenness. When installing my kitchen backsplash, I ran the level in multiple directions, pressing gently at problem spots. Areas that rock slightly or show gaps indicate the tile needs shifting. Instead of guessing, this tactile and visual check ensures each tile sits flush, saving time and rework.
Check in Multiple Directions
Tile lippage is often caused by uneven substrate or misalignment. To catch this, run your 3-foot level down the length and width of each row. I used to overlook this step, leading to uneven grout lines. But by consistently checking in all directions, I discovered slight deviations early, allowing me to correct them immediately. Think of it like steering a boat; you need to look both ways to stay on course.
Adjust with Thinset Before Grouting
Once you identify uneven spots, use a notched trowel to add or remove thinset beneath tiles. During one project, I noticed a tile slightly higher after running the level. Carefully scraping some thinset off and resetting the tile brought it down to level with its neighbors. Remember, the sooner you make adjustments, the easier it is to maintain a flat surface.
Double-Check and Confirm
After initial adjustments, re-run the level to confirm perfection. It’s easy to miss imperfections on the first pass. I once spent hours installing tiles only to realize a zone was still slightly uneven—by then, it was dry to the touch. Rechecking helps catch these issues early, preventing costly fixes later. Think of it as proofreading before publishing—crucial for a polished result.
Integrate with Floor-Leveling Strategies
This method works best when combined with proper subfloor preparation. If your subfloor is uneven, consult resources like floor leveling guides to address underlying issues. A stable base enhances your ability to use a small level effectively, leading to a smoother installation. Remember, the best tile job starts with a solid foundation.
 Many homeowners and even seasoned DIYers often fall prey to misconceptions about hardwood floors, floor leveling, and tile installation, leading to costly mistakes and frustration. Let’s dig deeper into the nuances that are frequently misunderstood, and explore why following popular advice without understanding the underlying principles can backfire. One common myth is that simply choosing the right flooring material guarantees a flawless installation. In reality, proper substrate preparation and precise leveling are the true keys to longevity and aesthetic appeal. Rushing this step, or relying solely on visual inspection, can result in uneven floors, gaps, or cracks that emerge months later.
Why do so many advanced installers still struggle with unseen subfloor issues?
Studies show that up to 60% of flooring failures stem from subfloor imperfections that aren’t immediately visible—issues like moisture imbalance, sagging, or slight warping. For experts, this underscores the importance of conducting thorough testing and correction before laying any top layer. Avoid the trap of skipping moisture testing or relying on subjective judgment; instead, integrate scientific methods, like calcium chloride tests, to ensure substrate stability. A nuanced understanding reveals that mastering floor leveling isn’t just about immediate surface flatness—it’s about anticipating long-term movement and environmental factors that can cause expansion or contraction over time. Relying solely on traditional techniques, such as shimming or using self-leveling compounds without proper preparation, often leads to issues like tile cracking or hardwood buckling. For detailed strategies, check out [the ultimate guide to floor leveling for a perfect finish](https://tiletrendshop.com/the-ultimate-guide-to-floor-leveling-for-a-perfect-finish). Recognizing these advanced pitfalls means acknowledging that building a perfect foundation is a science as much as an art. Many assume that common leveling tools are enough, but for a truly professional result, understanding the limitations of each method and how they interact with the environment is crucial. External experts recommend comprehensive testing and the use of precise tools, like laser levels and moisture meters, to achieve superior results. Remember, the devil is in the details—and overlooking the nuanced aspects of subfloor conditions often costs time and money down the line. Have you ever fallen into this trap? Let me know in the comments! Proper flooring installation is a layered process that demands both deep knowledge and meticulous execution. By moving beyond myths and embracing advanced techniques, you’ll elevate your project from ordinary to outstanding.To ensure that your expertly installed flooring remains pristine and functional over time, investing in the right tools and establishing solid maintenance routines is essential. Personally, I swear by a high-quality laser level, such as the Bosch GLL 3-80, for its precision and long-term reliability in checking floor flatness, especially when dealing with complex tile layouts. Its green laser diode provides excellent visibility in various lighting conditions, making ongoing inspections easier. Additionally, a durable, full-length pry bar like the Robbins 4-in-1 is invaluable for fine-tuning tiles or hardwood planks during installation and minor adjustments down the line. For cleaning, a microfibre mop paired with pH-neutral hardwood or tile-specific cleaners helps preserve your floors’ finish without stripping protective coatings. Consistent, gentle upkeep prevents dirt and debris from scratching or dulling the surface, extending the lifespan of your investment. Prediction-wise, as smart home technology advances, integrated floor sensors and maintenance apps are poised to become commonplace, providing real-time alerts for humidity fluctuations or substrate shifts that could compromise your floors.
How do I keep my hardwood and tile floors looking their best over time?
Regular cleaning with appropriate products, preventive measures like felt pads on furniture, and routine inspections with tools like the laser level can catch issues early—saving money and effort. For instance, running your laser level periodically over the surface helps identify any subtle dips or high spots resulting from substrate movement, enabling you to address problems before they escalate. This proactive approach echoes advice found in professional leveling techniques, which emphasize ongoing checks as part of maintenance. If you notice unevenness, consider consulting experts about potential subfloor adjustments; small tweaks now can prevent costly repairs later. Keep in mind that, over the long term, routine inspections combined with proper tools form the backbone of flooring durability. I recommend setting a quarterly schedule to assess your floors’ condition—think of it as a health check for your home’s foundation. Try incorporating regular laser level readings into your maintenance routine; it’s a small investment that yields significant peace of mind and visual precision. For more detailed guidance on flooring upkeep, visit our hardwood floor care secrets page. Staying vigilant with simple yet effective tools like these ensures your floors remain as stunning and durable as the day they were installed, providing peace of mind and aesthetic pleasure for years to come.
The Hardest Lesson I Learned About hardwood floors,floor leveling,tile,flooring installation
One pivotal moment was realizing that even the best tools can fall short if I don’t understand the nuances of substrate prep. Over-reliance on visuals or large levels led to overlooked imperfections that caused headaches later. Investing time in detailed subfloor analysis early on saved time and rework in my projects.
3 Myths About hardwood floors,floor leveling,tile,flooring installation That Held Me Back
First, the idea that larger levels alone ensure flatness—tiny, precise checks matter more. Second, believing that substrate issues are obvious—hidden flaws can sabotage even the most meticulous work. Lastly, trusting your eyes over tactile tools like a three-foot level can lead to unforeseen lippage. Dissecting these myths unlocked higher quality end results.
What Experts Won’t Tell You About hardwood floors,floor leveling,tile,flooring installation
Beyond the common advice lies the secret that proactive testing and understanding environmental impacts are crucial. Moisture levels and substrate stability often dominate long-term success. Integrating scientific assessments, like moisture testing, when paired with simple tools, elevates your craftsmanship from good to professional.
My Essential Toolkit for achieving flawless floors
Personally, a high-quality laser level such as the Bosch GLL 3-80 provides consistent accuracy, especially for complex layouts. Coupled with a versatile pry bar like Robbins 4-in-1, these tools allow precise adjustments. I also lean on pH-neutral cleaners to preserve finishes—sparing time and effort in maintenance. These selections have transformed my installation process, making it more reliable and less stressful.
Where to Go from Here
To elevate your flooring projects, I recommend diving into comprehensive resources like learning from professional installation guides. Engaging with specialized tools and continuing education ensures your skills keep pace with advancements in the industry. Remember, mastery isn’t instant—it’s built through continuous learning and practice.
Your Turn to Take Action
Now it’s your moment: what unexpected challenge has taught you the most about achieving perfect floors? Share your insights below, and let’s learn together to create beautiful, durable spaces that stand the test of time.
.
Comments are closed.