I vividly remember the frustration of laying down a beautiful hardwood floor, only to notice unsightly gaps appear just months later. It was like watching a carefully crafted puzzle slowly come apart. That lightbulb moment made me realize that climate, especially in dry 2026 conditions, can wreak havoc on hardwood installations, leading to gaps that seem nearly impossible to fix without ripping everything out. If you’ve faced similar issues, you’re not alone.
Why Hardwood Gaps Are More Than Just a Cosmetic Problem
Gaps between hardwood planks aren’t merely a visual annoyance—they can compromise the integrity and longevity of your flooring. In dry climates like 2026, moisture levels drop significantly, causing the wood to shrink and creating those unsettling gaps. Not addressing this can accelerate wear, trap dirt, and even lead to dangerous uneven surfaces over time. During my DIY projects, I learned that proactive measures, especially properly addressing underlayment, make all the difference. Interestingly, according to the National Wood Flooring Association, changes in humidity are among the leading causes of floor gaps, underscoring the importance of climate-specific solutions. Have you noticed your hardwood floors separating during the drier months? If so, this post promises practical fixes that can save your investment.
Is Fixing Hardwood Gaps Worth the Effort in 2026?
I used to think that gaps just meant a need for full replacement, and I’d hesitate before attempting repairs. One mistake I made early on was underestimating the significance of proper underlayment. I thought a basic layer would do the trick, but the truth is, quality underlayment plays a crucial role in managing moisture and stability. Making this mistake cost me time and money. That’s why I want to share strategies that are grounded in real experience and proven techniques, so you can avoid the pitfalls I encountered. For more insights on precision floor leveling to prevent early gaps, check out this guide. Now, let’s dive into the four essential underlayment fixes for 2026’s dry climate that can keep your hardwood planks snug and gap-free.
Start with a thorough assessment of your current flooring
Before jumping into repairs, inspect your hardwood floor meticulously. Look for uneven planks, loose boards, and visible gaps. Use a straightedge or level to detect dips or high spots—think of it as checking the terrain before road construction. This initial step ensures you target the right fixes and avoid unnecessary work.
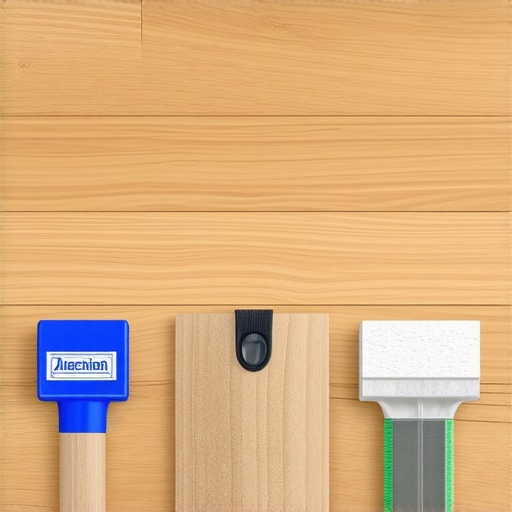
Prepare your workspace and gather the right tools
Clear furniture and cover nearby surfaces. You’ll need pry bars, a rubber mallet, a moisture meter, and specific underlayment products. Having everything at hand minimizes delays and helps maintain workflow. Remember, proper preparation is the foundation of a successful repair job.
Address subfloor issues first
Loose or uneven subfloors cause most gaps. Use a quality subfloor leveler or patch compound to fill in dips. If the subfloor is warped, reinforce it with plywood or apply additional bracing. Consider using a laser level to visualize the floor’s crown—this is like smoothing out wrinkles on a fabric before sewing. A stable subfloor prevents future gaps and creates a flat surface for the hardwood.
Install a moisture barrier to control climate effects
Dry climates exacerbate wood shrinkage. Apply a vapor barrier, such as a polyethylene sheet, over the subfloor. This step acts like a climate shield, maintaining consistent moisture levels. For optimal results, check your local conditions and consider specialized underlayments designed for dry environments. This proactive measure can significantly reduce gap formation over time.
Use high-quality underlayment suited for 2026 conditions
Select an underlayment that manages moisture and provides cushioning. Options like foam or cork underlayments with vapor barriers help accommodate natural wood movement. During my last project, switching to a premium underlayment reduced gaps dramatically. Think of this layer as the memory foam of flooring pads—adapting to the environment and preserving the floor’s integrity.
Secure the hardwood planks with proper adhesive and nailing techniques
For floating floors, install with a premium adhesive and ensure interlocking mechanisms click securely. If nailed down, use pneumatic nailers to guarantee consistent depth and hold. Precise insertion prevents movement that could lead to gaps. I learned the hard way that rushing through this step causes looseness—so take your time and ensure each plank is firmly anchored.
Consider climate control during installation and ongoing
Maintain a consistent humidity level around 35-55%. Use humidifiers or dehumidifiers if necessary. Think of it as keeping the plant in a stable environment—it stays healthy and avoids warping or gap formation. This is especially crucial in 2026’s drier conditions, where fluctuations are common.
Perform a final inspection and fine-tune as needed
After installation, check for visible gaps or movement. Use a gap fixer or insert wood filler where appropriate. For persistent gaps, professionals recommend a refill with matching wood putty, followed by a light sanding. Remember, small adjustments now prevent larger issues later, saving both time and money.
Implementing these targeted steps can significantly improve your hardwood flooring’s resistance to gaps, especially in the challenging climate of 2026. For deeper insights into precision floor leveling that ensures flawless surfaces, visit this detailed guide. Proper execution of these techniques will lengthen the lifespan of your floors and preserve their beauty for years to come.
Many homeowners and DIY enthusiasts believe that proper flooring installation is purely about selecting the right materials and following basic steps. However, as an experienced installer, I can tell you that there’s a complex layer of nuances often overlooked. A common myth is that subfloor flatness isn’t crucial—contrary to popular belief, even minor imperfections can lead to significant issues like telegraphing, uneven surfaces, or tile cracking over time. Skipping meticulous subfloor assessment and preparation sets the stage for costly mistakes, often resulting in needing to redo the entire project. Instead, I recommend investing in advanced floor leveling techniques, such as using laser-guided tools, to ensure a perfectly flat surface, which is especially critical for large-format tiles or high-end hardwoods. Don’t fall into the trap of assuming your floor is sufficiently flat if it feels uneven; use specialized tools and follow detailed procedures outlined in this guide for precision. Another misconception is that climate conditions are secondary once the installation is underway. In reality, neglecting climate control—like maintaining consistent humidity levels—can cause wood expansion or contraction, leading to gaps, buckling, or cupping. This is particularly vital in regions with fluctuating weather or during seasonal transitions. Experts emphasize that preemptive climate management, including dehumidifiers or humidifiers, helps maintain stability over the lifespan of your flooring. Have you ever fallen into this trap? Let me know in the comments. Recognizing and respecting these subtle but critical details amplifies the durability and beauty of your flooring investment, moving beyond basic installation practices to true craftsmanship.
Choosing the Right Equipment and Methods for Long-Term Flooring Success
Maintaining beautifully installed flooring requires more than just a good initial setup; it demands reliable tools and proven techniques to ensure longevity and ease of maintenance. I personally rely on a combination of high-precision laser levels and moisture meters to monitor subfloor flatness and wood stability over time. A laser level, such as the Dewalt DW089K, allows me to detect even minute deviations—crucial for preventing future gaps or uneven surfaces, especially in large or complex projects. A moisture meter like the Protimeter Surveymaster helps me keep tabs on moisture content, which is vital for preventing warping or cupping that might necessitate costly repairs. Incorporating these tools into your routine not only streamlines maintenance but also extends the lifespan of your floors.
Beyond equipment, employing specific methods ensures your flooring stays in top shape. Regular cleanings with pH-neutral cleaners prevent debris build-up, while maintaining consistent climate control—ideally around 35-55% humidity—mitigates wood expansion and contraction. Using protective pads under furniture and avoiding excessive water exposure are simple yet effective strategies. For ongoing maintenance, I recommend scheduling annual inspections that include rechecking moisture levels and subfloor integrity. This proactive approach aligns with expert standards outlined in this comprehensive guide on floor leveling, ensuring your installation remains flawless.
Looking ahead, smart home integration promises to revolutionize flooring maintenance. Sensors embedded within floors can alert you to humidity fluctuations or structural issues before they become visible problems. Embracing these innovations now can save time and money in the future.
How do I maintain my floors over time?
Consistency is key. Regular inspections, gentle cleaning, climate control, and prompt repairs when issues arise are the cornerstones of long-term flooring care. Invest in high-quality tools like laser levels and moisture meters, which provide precise data to guide your maintenance efforts. Additionally, scheduling periodic professional evaluations can catch subtle problems early, preventing extensive damage. Staying informed about the latest techniques and tools—like subfloor readiness tests—empowers you to act proactively. Make a habit of these practices, and your floors will continue to impress for years to come.
If you’re serious about keeping your flooring in prime condition, consider applying advanced techniques such as laser-guided floor leveling and moisture monitoring regularly. These methods not only simplify maintenance but also enhance performance, especially as environmental conditions evolve. For expert advice and the latest tools, don’t hesitate to reach out through our contact page. Investing in precision tools today ensures your floors remain gorgeous and functional well into the future.

What I Wish I Knew When I Started Laying Floors
One of the most insightful lessons I learned was the significance of meticulous subfloor assessment. Skipping this step seemed harmless at first but led to stubborn gaps down the line. Now, I always invest in laser-guided leveling tools to ensure a perfectly flat surface before laying hardwood, preventing future issues.
Another revelation was understanding the critical role of climate control during installation. Maintaining humidity between 35-55% isn’t just a recommendation—it’s a necessity for preventing wood shrinkage and gaps. During dry seasons or in climate-variable regions, using humidifiers or dehumidifiers can save you from costly repairs later.
I’ve also discovered that choosing the right underlayment makes all the difference. High-quality, moisture-managing underlayments act like a buffer against environmental fluctuations, preserving your hardwood’s beauty and staying gap-free. Investing in premium materials has consistently paid off in the longevity of my floors.
Tools and Sources That Elevate My Flooring Projects
My go-to tools include the Dewalt DW089K laser level and the Protimeter Surveymaster moisture meter. They provide precise readings essential for preventing gaps and warping. For in-depth guidance, I rely on this expert-approved guide, which offers step-by-step strategies for meticulous floor leveling and moisture management.
Additionally, books like Hardwood Floors: The Complete Guide have been invaluable in deepening my understanding of species selection and finish techniques. These resources are trustworthy because they combine empirical evidence with real-world applications, empowering DIYers and professionals alike.
Seize the Opportunity to Redefine Your Space
Taking the time to understand and implement advanced flooring techniques ensures your hardwood floors stay flawless in 2026 and beyond. Every step—assessment, environment control, material choice—contributes to a durable, beautiful finish. Now’s the moment to apply these insights, elevate your craftsmanship, and enjoy the lasting beauty of your investment.
Have you ever encountered unexpected gaps despite careful installation? Share your experiences below and let’s learn from each other’s journeys in perfecting hardwood flooring.