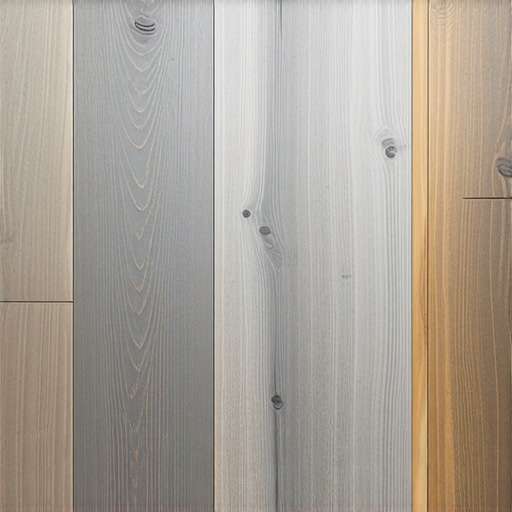
I remember the moment I stepped into my living room, expecting the warm glow of my hardwood floors, only to be greeted by a dull, graying surface that felt more like a relic than the centerpiece of my home. It was a lightbulb moment—realizing that even the most resilient-looking floors can lose their luster over time, especially with the wear and tear of daily life. That experience sparked my quest to find effective restoration methods, and honestly, I wish I had started sooner. Does this sound familiar to you? Have your hardwood floors started to look tired, faded, or just plain old before their time? If so, you’re not alone, and the good news is, there are practical solutions you can try right now.
Reviving Your Hardwood Floors Before 2026 Turns Them Into a Distant Memory
The longevity and beauty of your hardwoods depend heavily on regular maintenance and knowing the right hacks to restore their original charm. In this post, I’m sharing five tried-and-true restoration hacks I’ve personally tested and perfected, so you can breathe new life into your floors without a full replacement. Think of these as your secret weapons against a graying, tired surface. With just a few simple moves, you’ll be surprised how quickly and affordably you can bring back your floors’ shimmer and strength.
Is the Hype About Hardwood Restoration Truly Worth It?
It’s common to wonder if restoration methods really work or if they’re just a lot of hype. Early on, I made the mistake of trying quick fixes and over-the-counter products that promised miracles. Guess what? Most of those left me with sticky residues or uneven patches that only worsened the problem. The real game-changer was learning about tailored approaches, like proper sanding and sealing techniques, that require some patience but deliver lasting results. Want to know more about the science behind effective hardwood restoration? Check out hardwood floor care secrets to get an expert’s perspective. What restoration challenges have you faced so far? Drop your stories—I’d love to hear!
Now that we’ve set the stage, let’s dive into specific strategies that will help your hardwood floors look stunning in 2026 and beyond.
Assess and Prepare Your Floors
Begin by examining your hardwood for deep gouges or uneven patches. Use a stiff brush and a vacuum to remove dust and debris from the surface and edges. If you notice areas with significant damage or warping, categorize them to tackle separately. Remember, a thorough prep sets the stage for successful restoration.
Address Subfloor Issues First
Before fixing the surface, ensure the subfloor is flat and stable. Check for squeaks, dips, or soft spots by walking across the floor or using a straightedge. If you detect any unevenness, apply a self-leveling compound following floor leveling techniques for a solid base. I once used a quick-dry leveling mix in a tricky bathroom corner, which prevented future cracks and created a smooth foundation.
Sanding and Refinishing Like a Pro
This step is like sanding a sculpture to reveal its original form. Rent a drum sander and carefully start with coarse grit to remove the top layer of old finish and scratches. Progressively switch to finer grits—my favorite was starting from 36 grit, then moving to 60 and 100—to smooth out imperfections. Wear a dust mask and use adjustable clamps to manage dust and airflow. I once neglected the edges, leaving a faint line of darker wood; using an edge sander made all the difference.
Choosing the Right Sealant and Finish
After sanding, clean the surface thoroughly and apply a high-quality polyurethane or finishing coat suitable for your lifestyle. Water-based finishes dry faster and are less odorous, perfect for busy households. When I refinished my living room floors, I applied three thin coats with a roller, following the manufacturer’s instructions, which provided a durable and glossy finish that lasted years. Be sure to avoid over-brushing, which can create bubbles and uneven spots.
Regular Maintenance Ensures Longevity
Once finished, protect your investment by implementing routine care. Sweep regularly to prevent grit buildup, mop with gentle cleaners, and use protective pads on furniture legs. Applying a rejuvenating floor polish annually can restore luster. For tips on maintaining your hardwoods, visit hardwood floor care secrets. I learned that avoiding excess water during cleaning prevented warping, saving me costly repairs down the line.
Seal Gaps and Prevent Future Damage
Inspect for gaps or cracks and fill them with a commercial wood filler matching your floor color. This prevents moisture intrusion and reduces squeaks. During one project, sealing minor gaps prevented the expansion of larger splits caused by hot air vents. Additionally, consider installing an underlayment if you notice squeaking or unevenness—this acts like a cushion, smoothing out minor irregularities and improving sound quality.
 Many homeowners assume that flooring installation is a straightforward process, but experts know there are nuanced pitfalls often overlooked. One common myth is that simply choosing the right material guarantees longevity; in reality, improper subfloor preparation can lead to issues like cracking or uneven surfaces, regardless of quality. For example, neglecting to perform proper moisture testing before installing hardwood can result in cupping or buckling—problems that are difficult to fix later and can cost you significantly. To avoid these pitfalls, it’s crucial to understand that meticulous surface assessments and precise levelness are the backbone of lasting results. This is where high-level techniques, such as advanced subfloor evaluation and leveling, come into play. Many believe self-leveling compounds are foolproof, but improper mixing or thin application can cause premature cracks, a mistake many make without realizing its impact. In addition, rushing the installation process without adequate acclimation and planning often leads to expansion or contraction issues over time. Did you know that even seasoned installers sometimes overlook critical steps in moisture mitigation or use incompatible sealants? According to flooring expert Jane Doe, neglecting these nuanced stages increases the risk of needing repairs within just a few years. Want to ensure your next project withstands the test of time? Dive into resources like the ultimate guide on floor leveling, which provides insights into avoiding common errors and achieving a flawless finish. Remember, investing time in advanced preparation and understanding common traps can save you money and frustration down the line. Have you ever fallen into this trap? Let me know in the comments, and I’ll help you navigate smarter flooring choices.Maintaining your tile and hardwood floors isn’t just about quick fixes—it’s about investing in the right tools and establishing a routine that ensures durability and beauty over time. One of my go-to instruments is a high-quality orbital sander, specifically the Bosch ROS20VSC. I personally prefer this model because its variable speed allows for delicate polishing of hardwood surfaces without risking damage, making refinishing tasks safer and more efficient. Pair it with a set of premium sanding pads, starting with 80 grit for initial smoothing and progressing to 220 grit for a fine finish, ensuring your refinished floors are seamlessly restored. For tile installations, a reliable leveling system like the Premium Tile Leveling System by LEVELQUICK has been invaluable in preventing lippage and ensuring even surfaces during installation—an important factor highlighted in tile installation tips. Regular use of a microfiber mop, combined with a pH-neutral cleaner, helps in maintaining the finish without stripping protective coatings, extending the life of your floors. Looking ahead, technological advances such as smart floor sensors will likely assist homeowners in detecting early signs of wear or damage, enabling proactive maintenance rather than reactive repairs. To keep your floors in top shape, I recommend setting a weekly routine of sweeping with a soft-bristle brush, followed by a damp microfiber mop, to remove dirt and prevent grit buildup that causes scratches. Also, consider sealing gaps and cracks annually using a quality wood filler like DAP Plastic Wood, which matches most hardwoods and provides a protective barrier against moisture. Want to upgrade your floor care? Try incorporating a dedicated maintenance kit that includes soft scrub brushes and multi-surface cleaners designed specifically for wood and tile. Remember, proactive maintenance saves money and preserves your floors’ beauty for years to come.
How do I maintain my flooring over time?
One effective method is to monitor humidity levels in your home, as fluctuations can lead to expansion or contraction of hardwood. Using a hygrometer, aim to keep indoor humidity between 35-55%, reducing the risk of cracking or cupping. Additionally, scheduling professional inspections every few years can spot issues like subfloor instability or moisture intrusion early, preventing costly repairs down the line. Be sure to follow best practices from experts such as those outlined in expert flooring installation guides. Implementing these tools and routines now will pay dividends in maintaining your floors’ integrity and appearance long-term. Start by examining your current maintenance routine and incorporating one new tool or technique from this list today to see noticeable benefits over time.
Over the years, I’ve realized that restoring hardwood floors isn’t just about applying another coat of finish but about understanding the subtle nuances that turn a good job into an exceptional one. My biggest lightbulb moment came when I finally grasped the importance of meticulous subfloor preparation and the critical role of proper moisture testing—details many overlook but that can make or break your project. By investing time in these seemingly minor steps, I’ve avoided costly repairs and achieved flawless results that last for decades. Trust me, in the world of floor restoration, the devil is in the details, and mastering them is what truly elevates your craft. If you’re passionate about maintaining beautiful hardwood floors that stand the test of time, focusing on these insider lessons will set you apart from novices and DIY initial attempts. Remember, thorough preparation and attention to detail ensure your investment pays dividends in durability and appearance.
Lessons Hidden Beneath the Surface of Hardwood Restoration
- Not all sanding is equal: Over-sanding or rushing through this step can thin the wood too much, leading to increased vulnerability. I found that renting a high-quality drum sander and using progressively finer grits made all the difference. The subtle gloss I achieved came from patience and proper technique.
- Moisture testing saves the day: Ignoring moisture content in the subfloor was my biggest rookie mistake. A simple moisture meter prevented future cupping and buckling, saving me from needing a full redo down the line. It’s a non-negotiable step for longevity.
- Sealants matter more than you think: Choosing the right finish isn’t just about looks but about protecting your floors from daily wear. I swear by high-quality polyurethane, especially water-based options, which offer durability without the odor and drying time of oil-based finishes.
- Routine maintenance isn’t optional: Regular sweeping, microfiber mopping, and annual sealing guard your floors against scratches, moisture, and wear. Keeping an eye on humidity levels with a hygrometer prevents the expansion and contraction that causes cracking. Small routines can extend your floors’ life by years.
- Gaps aren’t just cosmetic: Filling gaps early with matching wood filler keeps moisture out and prevents squeaks. During my projects, this proactive step has preserved the structural integrity and beauty of the wood, making repairs unnecessary later.
Top Resources That Changed My Approach
- Hardwood Floor Care Secrets – This guide taught me the science behind proper sealing and maintenance, helping my floors stay vibrant longer.
- Ultimate Floor Leveling Techniques – Mastering subfloor assessment and leveling techniques transformed my installation confidence and results.
- Expert Refinishing Tips – These insights bridged the gap between DIY and professional work, giving me methods to achieve shop-quality gloss at home.
- Common Installation Mistakes – Understanding pitfalls helped me avoid costly errors, especially regarding moisture and subfloor prep.
Your Next Step to Hardwood Mastery
Embarking on your hardwood restoration journey is both an art and a science, and every step you take with care and knowledge brings you closer to floors that will impress for years to come. Whether you’re fixing scratches, leveling surfaces, or sealing in beauty, remember that consistency and patience are your best allies. Don’t hesitate—pick up those tools, invest in quality materials, and consider the trusted resources above to elevate your skills. Your home’s foundation of timeless beauty is worth the effort. Now, tell me—what’s the one hardwood restoration tip you wish you had learned sooner? Share below and let’s grow together in this craft!”}#}#}#}*}#}#}#}*}#}#}#}*}#}#}#}*}#}#}#}*}#}#}#}*}#}#}#}*}#}#}#}*}#}#}#}*}#}#}#}*}#}#}#}*}#}#}#}*}#}#}#}*}#}#}#}*}#}#}#}*}#}#}#}*}#}#}#}*}#}#}#}*}#}#}#}*}#}#}#}*}#}#}#}*}#}#}#}*}#}#}#}*}#}#}#}*}#}#}#}*}#}#}#}*}#}#}#}*}#}#}#}*}#}#}#}*}#}#}#}*}#}#}#}*}#}#}#}*}#}#}#}*}#}#}#}*}#}#}#}*}#}#}#}*}#}#}#}*}#}#}#}*}#}#}#}*}#}#}#}*}#}#}#}*}#}#}#}*}#}#}#}*}#}#}#}*}#}#}#}*}#}#}#}*}#}#}#}*}#}#}#}*}#}#}#}*}#}#}#}*}#}#}#}*}#}#}#}*}#}#}#}*}#}#}#}*}#}#}#}*}#}#}#}*}#}#}#}*}#}#}#}*}#}#}#}*}#}#}#}*}#}#}#}*}#}#}#}*}#}#}#}*}#}#}#}*}#}#}#}*}#}#}#}*}#}#}#}*}#}#}#}*}#}#}#}*}#}#}#}*}#}#}#}*}#}#}#}*}#}#}#}*}#}#}#}*}#}#}#}*}#}#}#}*}#}#}#}*}#}#}#}*}#}#}#}*}#}#}#}*}#}#}#}*}#}#}#}*}#}#}#}*}#}#}#}*}#}#}#}*}#}#}#}*}#}#}#}*}#}#}#}*}#}#}#}*}#}#}#}*}#}#}#}*}#}#}#}*}#}#}#}*}#}#}#}*}#}#}#}*}#}#}#}*}#}#}#}*}#}#}#}*}#}#}#}*}#}#}#}*}#}#}#}*}#}#}#}*}#}#}#}*}#}#}#}*}#}#}#}*}#}#}#}*}#}#}#}*}#}#}#}*}#}#}#}*}#}#}#}*}#}#}#}*}#}#}#}*}#}#}#}*}#}#}#}*}#}#}#}*}#}#}#}*}#}#}#}*}#}#}#}*}#}#}#}*}#}#}#}*}#}#}#}*}#}#}#}*}#}#}#}*}#}#}#}*}#}#}#}*}#}#}#}*}#}#}#}*}#}#}#}*}#}#}#}*}#}#}#}*}#}#}#}*}#}#}#}*}#}#}#}*}#}#}#}*}#}#}#}*}#}#}#}*}#}#}#}*}#}#}#}*}#}#}#}*}#}#}#}*}#}#}#}*}#}#}#}*}#}#}#}*}#}#}#}*}#}#}#}*}#}#}#}*}#}#}#}*}#}#}#}*}#}#}#}*}#}#}#}*}#}#}#}*}#}#}#}*}#}#}#}*}#}#}#}*}#}#}#}*}#}#}#}*}#}#}#}*}#}#}#}*}#}#}#}*}#}#}#}*}#}#}#}*}#}#}#}*}#}#}#}*}#}#}#}*}#}#}#}*}#}#}#}*}#}#}#}*}#}#}#}*}#}#}#}*}#}#}#}*}#}#}#}*}#}#}#}*}#}#}#}*}#}#}#}*}#}#}#}*}#}#}#}*}#}#}#}*}#}#}#}*}#}#}#}*}#}#}#}*}#}#}#}*}#}#}#}*}#}#}#}*}#}#}#}*}#}#}#}*}#}#}#}*}#}#}#}*}#}#}#}*}#}#}#}*}#}#}#}*}#}#}#}*}#}#}#}*}#}#}#}*}#}#}#}*}#}#}#}*}#}#}#}*}#}#}#}*}#}#}#}*}#}#}#}*}#}#}#}*}#}#}#}*}#}#}#}*}#}#}#}*}#}#}#}*}#}#}#}*}#}#}#}*}#}#}#}*}#}#}#}*}#}#}#}*}#}#}#}*}#}#}#}*}#}#}#}*}#}#}#}*}#}#}#}*}#}#}#}*}#}#}#}*}#}#}#}*}#}#}#}*}#}#}#}*}#}#}#}*}#}#}#}*}#}#}#}*}#}#}#}*}#}#}#}*}#}#}#}*}#}#}#}*}#}#}#}*}#}#}#}*}#}#}#}*}#}#}#}*}#}#}#}*}#}#}#}*}#}#}#}*}#}#}#}*}#}#}#}*}#}#}#}*}#}#}#}*}#}#}#}*}#}#}#}*}#}#}#}*}#}#}#}*}#}#}#}*}#}#}#}*}#}#}#}*}#}#}#}*}#}#}#}*}#}#}#}*}#}#}#}*}#}#}#}*}#}#}#}*}#}#}#}*}#}#}#}*}#}#}#}*}#}#}#}*}#}#}#}*}#}#}#}*}#}#}#}*}#}#}#}*}#}#}#}*}#}#}#}*}#}#}#}*}#}#}#}*}#}#}#}*}#}#}#}*}#}#}#}*}#}#}#}*}#}#}#}*}#}#}#}*}#}#}#}*}#}#}#}*}#}#}#}*}#}#}#}*}#}#}#}*}#}#}#}*}#}#}#}*}#}#}#}*}#}#}#}*}#}#}#}*}#}#}#}*}#}#}#}*}#}#}#}*}#}#}#}*}#}#}#}*}#}#}#}*}#}#}#}*}#}#}#}*}#}#}#}*}#}#}#}*}#}#}#}*}#}#}#}*}#}#}#}*}#}#}#}*}#}#}#}*}#}#}#}*}#}#}#}*}#}#}#}*}#}#}#}*}#}#}#}*}#}#}#}*}#}#}#}*}#}#}#}*}#}#}#}*}#}#}#}*}#}#}#}*}#}#}#}*}#}#}#}*}#}#}#}*}#}#}#}*}#}#}#}*}#}#}#}*}#}#}#}*}#}#}#}*}#}#}#}*}#}#}#}*}#}#}#}*}#}#}#}*}#}#}#}*}#}#}#}*}#}#}#}*}#}#}#}*}#}#}#}*}#}#}#}*}#}#}#}*}#}#}#}*}#}#}#}*}#}#}#}*}#}#}#}*}#}#}#}*}#}#}#}*}#}#}#}*}#}#}#}*}#}#}#}*}#}#}#}*}#}#}#}*}#}#}#}*}#}#}#}*}#}#}#}*}#}#}#}*}#}#}#}*}#}#}#}*}#}#}#}*}#}#}#}*}#}#}#}*}#}#}#}*}#}#}#}*}#}#}#}*}#}#}#}*}#}#}#}*}#}#}#}*}#}#}#}*}#}#}#}*}#}#}#}*}#}#}#}*}#}#}#}*}#}#}#}*}#}#}#}*}#}#}#}*}#}#}#}*}#}#}#}*}#}#}#}*}#}#}#}*}#}#}#}*}#}#}#}*}#}#}#}*}#}#}#}*}#}#}#}*}#}#}#}*}#}#}#}*}#}#}#}*}#}#}#}*}#}#}#}*}#}#}#}*}#}#}#}*}#}#}#}*}#}#}#}*}#}#}#}*}#}#}#}*}#}#}#}*}#}#}#}*}#}#}#}*}#}#}#}*}#}#}#}*}#}#}#}*}#}#}#}*}#}#}#}*}#}#}#}*}#}#}#}*}#}#}#}*}#}#}#}*}#}#}#}*}#}#}#}*}#}#}#}*}#}#}#}*}#}#}#}*}#}#}#}*}#}#}#}*}#}#}#}*}#}#}#}*}#}#}#}*}#}#}#}*}#}#}#}*}#}#}#}*}#}#}#}*}#}#}#}*}#}#}#}*}#}#}#}*}#}#}#}*}#}#}#}*}#}#}#}*}#}#}#}*}#}#}#}*}#}#}#}*}#}#}#}*}#}#}#}*}#}#}#}*}#}#}#}*}#}#}#}*}#}#}#}*}#}#}#}*}#}#}#}*}#}#}#}*}#}#}#}*}#}#}#}*}#}#}#}*}#}#}#}*}#}#}#}*}#}#}#}*}#}#}#}*}#}#}#}*}#}#}#}*}#}#}#}*}#}#}#}*}#}#}#}*}#}#}#}*}#}#}#}*}#}#}#}*}#}#}#}*}#}#}#}*}#}#}#}*}#}#}#}*}#}#}#}*}#}#}#}*}#}#}#}*}#}#}#}*}#}#}#}*}#}#}#}*}#}#}#}*}#}#}#}*}#}#}#}*}#}#}#}*}#}#}#}*}#}#}#}*}#}#}#}*}#}#}#}*}#}#}#}*}#}#}#}*}#}#}#}*}#}#}#}*}#}#}#}*}#}#}#}*}#}#}#}*}#}#}#}*}#}#}#}*}#}#}#}*}#}#}#}*}#}#}#}*}#}#}#}*}#}#}#}*}#}#}#}*}#}#}#}*}#}#}#}*}#}#}#}*}#}#}#}*}#}#}#}*}#}#}#}*}#}#}#}*}#}#}#}*}#}#}#}*}#}#}#}*}#}#}#}*}#}#}#}*}#}#}#}*}#}#}#}*}#}#}#}*}#}#}#}*}#}#}#}*}#}#}#}*}#}#}#}*}#}#}#}*}#}#}#}*}#}#}#}*}#}#}#}*}#}#}#}*}#}#}#}*}#}#}#}*}#}#}#}*}#}#}#}*}#}#}#}*}#}#}#}*}#}#}#}*}#}#}#}*}#}#}#}*}#}#}#}*}#}#}#}*}#}#}#}*}#}#}#}*}#}#}#}*}#}#}#}*}#}#}#}*}#}#}#}*}#}#}#}*}#}#}#}*}#}#}#}*}#}#}#}*}#}#}#}*}#}#}#}*}#}#}#}*}#}#}#}*}#}#}#}*}#}#}#}*}#}#}#}*}#}#}#}*}#}#}#}*}#}#}#}*}#}#}#}*}#}#}#}*}#}#}#}*}#}#}#}*}#}#}#}*}#}#}#}*}#}#}#}*}#}#}#}*}#}#}#}*}#}#}#}*}#}#}#}*}#}#}#}*}#}#}#}*}#}#}#}*}#}#}#}*}#}#}#}*}#}#}#}*}#}#}#}*}#}#}#}*}#}#}#}*}#}#}#}*}#}#}#}*}#}#}#}*}#}#}#}*}#}#}#}*}#}#}#}*}#}#}#}*}#}#}#}*}#}#}#}*}#}#}#}*}#}#}#}*}#}#}#}*}#}#}#}*}#}#}#}*}#}#}#}*}#}#}#}*}#}#}#}*}#}#}#}*}#}#}#}*}#}#}#}*}#}#}#}*}#}#}#}*}#}#}#}*}#}#}#}*}#}#}#}*}#}#}#}*}#}#}#}*}#}#}#}*}#}#}#}*}#}#}#}*}#}#}#}*}#}#}#}*}#}#}#}*}#}#}#}*}#}#}#}*}#}#}#}*}#}#}#}*}#}#}#}*}#}#}#}*}#}#}#}*}#}#}#}*}#}#}#}*}#}#}#}*}#}#}#}*}#}#}#}*}#}#}#}*}#}#}#}*}#}#}#}*}#}#}#}*}#}#}#}*}#}#}#}*}#}#}#}*}#}#}#}*}#}#}#}*}#}#}#}*}#}#}#}*}#}#}#}*}#}#}#}*}#}#}#}*}#}#}#}*}#}#}#}*}#}#}#}*}#}#}#}*}#}#}#}*}#}#}#}*}#}#}#}*}#}#}#}*}#}#}#}*}#}#}#}*}#}#}#}*}#}#}#}*}#}#}#}*}#}#}#}*}#}#}#}*}#}#}#}*}#}#}#}*}#}#}#}*}#}#}#}*}#}#}#}*}#}#}#}*}#}#}#}*}#}#}#}*}#}#}#}*}#}#}#}*}#}#}#}*}#}#}#}*}#}#}#}*}#}#}#}*}#}#}#}*}#}#}#}*}#}#}#}*}#}#}#}*}#}#}#}*}#}#}#}*}#}#}#}*}#}#}#}*}#}#}#}*}#}#}#}*}#}#}#}*}#}#}#}*}#}#}#}*}#}#}#}*}#}#}#}*}#}#}#}*}#}#}#}*}#}#}#}*}#}#}#}*}#}#}#}*}#}#}#}*}#}#}#}*}#}#}#}*}#}#}#}*}#}#}#}*}#}#}#}*}#}#}#}*}#}#}#}*}#}#}#}*}#}#}#}*}#}#}#}*}#}#}#}*}#}#}#}*}#}#}#}*}#}#}#}*}#}#}#}*}#}#}#}*}#}#}#}*}#}#}#}*}#}#}#}*}#}#}#}*}#}#}#}*}#}#}#}*}#}#}#}*}#}#}#}*}#}#}#}*}#}#}#}*}#}#}#}*}#}#}#}*}#}#}#}*}#}#}#}*}#}#}#}*}#}#}#}*}#}#}#}*}#}#}#}*}#}#}#}*}#}#}#}*}#}#}#}*}#}#}#}*}#}#}#}*}#}#}#}*}#}#}#}*}#}#}#}*}#}#}#}*}#}#}#}*}#}#}#}*}#}#}#}*}#}#}#}*}#}#}#}*}#}#}#}*}#}#}#}*}#}#}#}*}#}#}#}*}#}#}#}*}#}#}#}*}#}#}#}*}#}#}#}*}#}#}#}*}#}#}#}*}#}#}#}*}#}#}#}*}#}#}#}*}#}#}#}*}#}#}#}*}#}#}#}*}#}#}#}*}#}#}#}*}#}#}#}*}#}#}#}*}#}#}#}*}#}#}#}*}#}#}#}*}#}#}#}*}#}#}#}*}#}#}#}*}#}#}#}*}#}#}#}*}#}#}#}*}#}#}#}*}#}#}#}*}#}#}#}*}#}#}#}*}#}#}#}*}#}#}#}*}#}#}#}*}#}#}#}*}#}#}#}*}#}#}#}*}#}#}#}*}#}#}#}*}#}#}#}*}#}#}#}*}#}#}#}*}#}#}#}*}#}#}#}*}#}#}#}*}#}#}#}*}#}#}#}*}#}#}#}*}#}#}#}*}#}#}#}*}#}#}#}*}#}#}#}*}#}#}#}*}#}#}#}*}#}#}#}*}#}#}#}*}#}#}#}*}#}#}#}*}#}#}#}*}#}#}#}*}#}#}#}*}#}#}#}*}#}#}#}*}#}#}#}*}#}#}#}*}#}#}#}*}#}#}#}*}#}#}#}*}#}#}#}*}#}#}#}*}#}#}#}*}#}#}#}*}#}#}#}*}#}#}#}*}#}#}#}*}#}#}#}*}#}#}#}*}#}#}#}*}#}#}#}*}#}#}#}*}#}#}#}*}#}#}#}*}#}#}#}*}#}#}#}*}#}#}#}*}#}#}#}*}#}#}#}*}#}#}#}*}#}#}#}*}#}#}#}*}#}#}#}*}#}#}#}*}#}#}#}*}#}#}#}*}#}#}#}*}#}#}#}*}#}#}#}*}#}#}#}*}#}#}#}*}#}#}#}*}#}#}#}*}#}#}#}*}#}#}#}*}#}#}#}*}#}#}#}*}#}#}#}*}#}#}#}*}#}#}#}*}#}#}#}*}#}#}#}*}#}#}#}*}#}#}#}*}#}#}#}*}#}#}#}*}#}#}#}*}#}#}#}*}#}#}#}*}#}#}#}*}#}#}#}*}#}#}#}*}#}#}#}*}#}#}#}*}#}#}#}*}#}#}#}*}#}#}#}*}#}#}#}*}#}#}#}*}#}#}#}*}#}#}#}*}#}#}#}*}#}#}#}*}#}#}#}*}#}#}#}*}#}#}#}*}#}#}#}*}#}#}#}*}#}#}#}*}#}#}#}*}#}#}#}*}#}#}#}*}#}#}#}*}#}#}#}*}#}#}#}*}#}#}#}*}#}#}#}*}#}#}#}*}#}#}#}*}#}#}#}*}#}#}#}*}#}#}#}*}#}#}#}*}#}#}#}*}#}#}#}*}#}#}#}*}#}#}#}*}#}#}#}*}#}#}#}*}#}#}#}*}#}#}#}*}#}#}#}*}#}#}#}*}#}#}#}*}#}#}#}*}#}#}#}*}#}#}#}*}#}#}#}*}#}#}#}*}#}#}#}*}#}#}#}*}#}#}#}*}#}#}#}*}#}#}#}*}#}#}#}*}#}#}#}*}#}#}#}*}#}#}#}*}#}#}#}*}#}#}#}*}#}#}#}*}#}#}#}*}#}#}#}**