
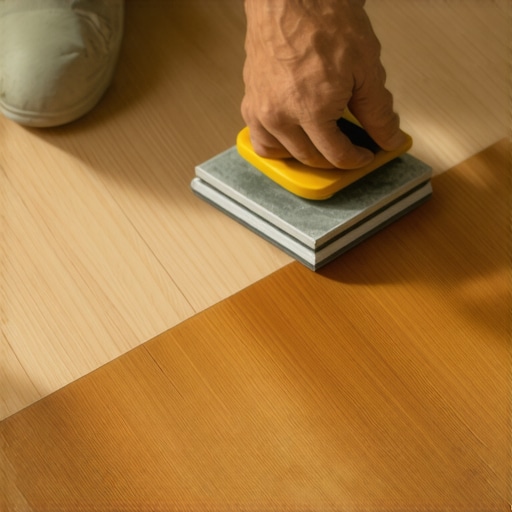
Have you ever spent hours installing beautiful hardwood floors, only to be disappointed when the corners reveal unsightly swirl marks after sanding? I remember the first time I tried to get those tricky edges smooth—my sander left deep, uneven swirl marks that seemed impossible to fix. It was a lightbulb moment for me: I needed a better technique, not just brute force.
The Frustration of Uneven Sanding in Corners
Hardwood flooring offers timeless beauty, but finishing the edges often feels like wrestling with a stubborn artifact. Swirl marks and gouges can ruin an otherwise flawless installation, forcing you to redo the project or accept a compromised look. The challenge is that standard orbital sanders or random orbit sanders excel in open areas but struggle when reaching into tight corners and edges. The temptation is to press harder or make extra passes, but that only deepens the marks and damages the finish.
Over the years, I’ve experimented with different tools and techniques to tame those corners without leaving a trail of swirl marks. The key lies in understanding how to control pressure, tool choice, and sanding motion — topics I’ll share in this post to help you achieve a pristine finish.
Ever Wondered If It’s Possible to Sand Corners Flawlessly?
Early in my flooring journey, I made the mistake of thinking a standard orbital sander was enough for every nook and cranny. That mistake led to more work fixing swirl marks later. According to expert tips, using the correct grit progression and specialized tools can make all the difference. I’ll guide you through step-by-step methods that I wish I knew from the start, including the right sandpaper grits and hand-sanding techniques to minimize swirl marks effectively.
By the end of this post, you’ll have practical, proven strategies to leave your hardwood corners smooth and your finish flawless. Ready to transform your sanding routine? Let’s dive into the techniques that can save you both time and frustration—and elevate your flooring project to professional standards.
Select the Right Tools for Tight Spaces
My first attempt at sanding stubborn corners with an orbital sander ended with deep swirl marks—a mess I had to sand down again. Instead, I switched to a detail sander equipped with a triangular pad, which is like a chisel sharpening a knife—precise and effective. Choose a detail sander or a sanding block with a small, pointed surface to reach into tight corners and edges. Pro tip: A high-grit abrasive pad, like 220 grit, is perfect for the final smoothing stage without creating swirl marks.
Use the Correct Sandpaper Grit Progression
Start with a coarse grit, such as 120, to remove any roughness, then move to a medium grit like 180, and finish with a fine grit 220 for a smooth surface. Think of it as peeling an onion: gradually work your way inward to avoid damaging the wood. I once skipped the finer grits on corners, resulting in a rough feel that I could see and feel—a costly mistake. Proper grit progression ensures a seamless transition from edges to the main floor area.
Master Hand-Sanding Techniques
Hold the sanding block or detail sander at a low angle, applying light pressure and moving in the direction of the grain. Imagine it like guiding a skateboard smoothly along a ramp—control is key. When reaching into corners, use gentle, overlapping strokes to avoid gouging. During my project last month, I used a small brush to hand-sand the final layer, achieving a mirror-like finish, which saved me hours of touch-up work later. Remember, consistency is vital; uneven pressure creates uneven swirl marks and scratches.
Control Pressure to Prevent Swirl Marks
Too much pressure is the enemy; it’s like trying to push a bolder across a surface—ineffective and damaging. Instead, let the sander’s weight do the work, and practice with light, steady pressure. I once applied too much force in a corner, and the swirl marks became prominent, forcing me to redo that section. Applying gentle, consistent pressure while moving in slow, deliberate strokes results in a much cleaner finish, especially in tricky areas.
Maintain a Proper Sanding Motion
Move the sander or sanding block in a circular or back-and-forth motion, avoiding staying stationary in one spot. This is akin to coloring with a crayon—circles prevent uneven deposits of material. In my experience, slow and methodical passes produce the best results. When finishing the edges, I recommend combining light sanding with strategic hand finishing—this hybrid approach leaves corners looking as good as the field.
Finish Edges with Hand Sanding
Accumulate stubborn swirl marks? Transition to hand-sanding using a sanding sponge or a piece of abrasive cloth. It’s like polishing a gem—close attention yields a perfect shine. I often use a fine-grit abrasive pad to blend the edge into the main floor, making the transition seamless. This extra step is crucial for professional-looking results, especially in visible corners and tight spaces which are impossible for larger tools to reach without leaving marks. For more tips on refinishing hardwood floors, visit this guide.
Check Your Work Regularly
Step back frequently and inspect your progress under good lighting. This is like a chef tasting a dish—small checks prevent big mistakes later. I learned this the hard way when I missed a swirl mark that became obvious after finishing. Consistent scrutiny lets you catch imperfections early, allowing for quick touch-ups and saving time. When I finished my last project, I used a flashlight held at a low angle to highlight surface irregularities—a trick worth trying. Proper inspection ensures your corners will be as smooth as the rest of your floor, elevating the overall quality.
Many homeowners and even some DIY enthusiasts operate under misconceptions about tile and hardwood flooring that can sabotage their projects. A common myth is that leveling the subfloor is a simple, one-step process, but in reality, mastering floor leveling requires an advanced understanding of techniques like proper slope detection and moisture considerations. Overlooking these nuances often results in uneven surfaces, cracked tiles, or warped hardwood planks—issues that become evident months after installation, and can be costly to fix.
Ever wondered why your carefully installed floor isn’t perfectly flat despite following tutorials?
The answer often lies in the overlooked details like substrate preparation, moisture barriers, or the difference between thinset consistency and application techniques. For example, using a cheap underlayment instead of a high-quality, moisture-resistant one can cause subtle shifts, leading to visible lippage or gapping. Experts warn that automation and shortcuts can lead to serious issues; a study by the National Association of Home Builders emphasizes that improper floor preparation accounts for over 70% of post-installation problems. Instead of focusing solely on aesthetics, prioritizing critical steps such as accurate leveling and substrate preparation can save time and money in the long run. Remember, achieving a flawless finish goes beyond selecting premium materials. It demands precision in execution—attention to every detail ensures your investment stands the test of time. Don’t let common misconceptions derail your project—understanding these hidden factors can elevate your craftsmanship. Have you ever fallen into this trap? Let me know in the comments.
Prioritizing Maintenance for Durable Floors
Maintaining your flooring investment requires more than just occasional cleaning. Regular inspections, timely repairs, and consistent cleaning routines keep hardwood and tile floors looking their best over many years. Developing a maintenance plan tailored to your floor type can prevent minor issues from becoming costly repairs. For example, using a humidifier during dry seasons prevents hardwood from gapping or warping, while sealing grout lines annually keeps tiles protected from moisture infiltration. Proper maintenance extends the lifespan of your floors and preserves their aesthetic appeal.
Tools I Recommend for Flooring Upkeep and Installation
Having the right tools on hand makes all the difference in achieving professional results and ensuring your floors stand the test of time. I swear by a high-quality moisture meter, such as the Tramex Moisture Meter, to monitor the subfloor’s moisture levels before installation or repair. This tool is indispensable, especially when working in basements or areas prone to humidity, as moisture imbalances are a leading cause of flooring failure. Proper subfloor moisture testing aligns with recommendations from industry standards, preventing issues like buckling or mold growth.
For leveling uneven subfloors, I rely on a premium self-leveling compound like Ardex K 55. It spreads smoothly, offers excellent flow, and cures with minimal cracking—crucial factors for long-term performance. When applying, I use a notched trowel and a squeegee to ensure an even layer, which is vital for floors that need to support heavy furniture or high traffic.
Staying organized with a laser level, such as the Bosch GLL 3-80, streamlines alignment tasks during tile or hardwood installation. Its accuracy helps maintain consistent grout lines and plumb walls, reducing the risk of uneven surfaces that may cause additional wear or damage over time. Laser levels are game-changers when perfecting your layout.
How do I maintain my flooring tools over time?
Routine cleaning and proper storage extend the life of your tools. For example, wiping down power sanders after each use prevents dust buildup that can impair motor function. Inspecting blades and replacing worn abrasives ensures consistent performance, especially for detail sanders used on edges or tight corners. Calibration of laser levels before each project guarantees ongoing accuracy. Using protective cases and keeping tools in a dry, organized space minimizes damage and wear, making your equipment reliable for years to come.
Looking ahead, advancements in smart tools and automated surface analyzers suggest a future where flooring installation and maintenance become more precise and less manual. Devices capable of detecting micro-movements or ongoing moisture changes will allow homeowners and professionals to address issues proactively. Adopting these technologies early will help you stay ahead in the evolving flooring landscape.
Don’t wait—try integrating a high-quality moisture meter into your next project supervision routine. It’s a small investment that pays off by preventing costly mishaps. Ready to elevate your flooring maintenance game? Visit our contact page for expert advice and the best tools to keep your floors in pristine condition for decades to come.
Why I Finally Said Goodbye to Guesswork in Flooring
One of the most valuable lessons I learned was that patience and controlling pressure outweigh brute force. Early on, I believed that faster, aggressive sanding would save time, but it only led to more swirl marks and rework. Now, I understand that the real secret lies in slow, deliberate movements and proper tool selection. This realization transformed my approach and saved me countless hours of frustration.
Elevate Your Technique with Curated Tools and Resources
For those serious about perfecting flooring projects, I recommend investing in a high-quality detail sander with a triangular pad—it’s a game changer for corners. Additionally, a moisture meter like the Tramex keeps subfloor issues at bay, preventing costly mishaps down the line. For comprehensive guidance, Rick’s manual on floor leveling (check this resource) offers expert insights that complement practical experience. Having trusted tools and trusted info makes every step smoother and more predictable.
Embrace the Confidence to Tackle Flooring Challenges
Your next flooring project is an opportunity to refine your skills and embrace craftsmanship. Remember, mastery comes from understanding the nuances—like managing pressure, choosing the right tools, and inspecting your work regularly. Taking this knowledge forward will empower you to complete installations that look polished and last for decades. Don’t hesitate to start—your flawless floors await, and every step you take builds your expertise. What step in flooring finishing do you find most intimidating? Share below, and let’s learn together!
,